Git 客户端基本配置项Git .gitignoreVIM 基础配置VS Code 基础配置VS Code 快捷键VS Code 插件EditorConfig for Visual Studio CodeClang-FormatC/C++ 开发环境简易配置Typora Han 主题配置Makefile 模板Lets Encrypt 证书制作、使用证书制作使用 snap 制作证书Amazon Linux 2023 安装 certbot综合使用安装 CURL 支持 http2基础环境安装依赖库安装 Python 2.7.3安装 nghttp2 v1.14.x安装 CURL 7.46.0确认 CURL 版本以及是否支持 http2Mail 发送邮件Visual Studio Code 配置 GoLang 开发环境Shell 终端提示符设置阿里云挂载磁盘阿里云添加 swap 交换分区阿里云系统盘扩容阿里云数据盘扩容AWS CloudFrontPrometheus+Grafana 监控告警安装 prometheus安装 grafana配置监控面板配置告警配置钉钉告警通道配置邮件告警通道查看告警通道列表配置告警规则DockerHub 上传镜像CentOS 安装 vsftpdCentOS 安装 Apache Tomcat 9,支持 http2CentOS 安装 VNCCentOS 安装 Python 3.5CentOS 安装 ICECentOS 安装 GCC 4.9.2CentOS 安装 MySQL 5.7CentOS 安装 Redis 4.0.9CentOS 安装 RabbitMQCentOS 安装 SiegeCentOS/Ubuntu 安装 wrkCentOS 安装 pipCentOS 安装 MySQLdbCentOS 安装 protobuf 3.5.1CentOS 配置静态 IPCentOS 安装 locust 0.8.1CentOS 安装配置 zookeeper/kafkaGerrit 使用者初始配置CentOS 安装 gSOAP 2.8.18CentOS 安装 flaskCentOS 安装 telnetCentOS 安装 fioCentOS 配置 NGINX 用户认证CentOS 安装 TronCentOS 升级内核CentOS 安装 envoyCentOS 安装 nodejs/npmCentOS 安装 monoCentOS 设置时区Amazon Linux 2023 安装 iftopAmazon Linux 2023 安装 abUbuntu 替换源Ubuntu 安装 golangUbuntu 安装 bitcoinUbuntu 安装 WaykiChainUbuntu 安装 ethereumUbuntu 安装 luaUbuntu 安装搜狗拼音输入法Ubuntu svn 提交编辑器Ubuntu 安装 vim 8.1Ubuntu 禁用 ipv6Ubuntu 设置语言环境为中文Ubuntu 设置静态 IPUbuntu 安装 eosUbuntu 安装 fioUbuntu 安装 NebulasUbuntu 安装 shadowsocks-libevUbuntu 安装 ncWindows 安装 remix-ideWindows 安装 julia 1.0.0Windows 配置 GPG 签名 commitWindows 安装 bitcoin准备编译环境安装依赖库安装 bitcoinWindows 安装 ethereumWindows 安装配置 nodejs/npmWindows 安装 Git Bash 支持 wget/make/protocwgetmakeprotocMac 安装 libraiOS APP 使用企业证书签名后分发gitlab 极狐私有部署gitlab 极狐安装、配置gitlab 邮件配置<可选>配置外部访问域名、启用 https配置 ci/cdaws ec2 ami 制作
Git 客户端基本配置项
xxxxxxxxxx# 执行方式:命令行执行即可# 支持 utf-8 编码,显示中文文件名git config --global core.quotepath false# 提交/检出 不转换git config --global core.autocrlf false# 拒绝提交包含混合换行符的文件git config --global core.safecrlf truegit config --global alias.st statusgit config --global alias.co checkoutgit config --global alias.ct commitgit config --global alias.df diffgit config --global alias.br branchgit config --global color.ui truegit config --global alias.lg "log --color --graph --pretty=format:'%Cred%h%Creset %C(bold blue)<%an>%Creset ---%C(yellow)%d%Creset %s %Cgreen(%cr)' --abbrev-commit"# 指定 vim 作为默认的编辑器git config core.editor vim --globalgit config --global user.name xxgit config --global user.email xx@xxx.cnGit .gitignore
xxxxxxxxxx# From https://github.com/github/gitignore
# Prerequisites*.d
# Compiled Object files*.slo*.lo*.o*.obj
# Precompiled Headers*.gch*.pch
# Compiled Dynamic libraries*.so*.dylib*.dll
# Fortran module files*.mod*.smod
# Compiled Static libraries*.lai*.la*.a*.lib
# Executables*.exe*.out*.app
# CMakeCMakeCache.txtCMakeFilesCMakeScriptsTestingMakefilecmake_install.cmakeinstall_manifest.txtcompile_commands.jsonCTestTestfile.cmake
# Config*.conf
# Loglog/*.log
# Generated binary file/directorydebug/release/bin/debug
VIM 基础配置
VIM 配置文件位置:~/.vimrc
点此下载:vimrc(下载后重命名为 .vimrc)
xxxxxxxxxxset nocompatibleset backspace=indent,eol,startset incsearchset numberset hlsearchset ignorecaseset tabstop=4set shiftwidth=4set softtabstop=4set expandtabset fileencodings=utf-8,gbkset relativenumber " show relative line numberset ruler          " show the current line number and column numberset showcmd        " show the current typing commandset scrolloff=7    " Set 7 lines to the cursor - when moving vertically using j/kset encoding=utf-8set fileencodings=utf-8,ucs-bom,cp936,gb18030,big5,euc-jp,euc-kr,latin1set helplang=enset termencoding=utf-8set laststatus=2set cursorline
set guifont=Courier_New:h14:cANSIset history=9999set selection=exclusiveset selectmode=mouse,keyset fillchars=vert:\ ,stl:\ ,stlnc:\set showmatchset matchtime=1set linebreakset colorcolumn=100set wrapset tw=100
let mapleader = "\<Space>"nmap <Leader><Leader> Vnnoremap <Leader>w :wq!<CR> "save file"nmap <leader><Space><Space> :%s/\s\+$//<CR> "trimTrailingWhitespace"
" 自动补全 "" inoremap ( ()<ESC>i<CR><CR><ESC>k" inoremap [ []<ESC>i<CR><CR><ESC>k" inoremap { {}<ESC>i<CR><CR><ESC>k" inoremap " ""<ESC>i" inoremap ' ''<ESC>i" inoremap /* /* */<ESC>i
imap jj <ESC>
VS Code 基础配置
入口:文件 -> 首选项 -> 配置
备注:前两个配置项根据实际情况设置
xxxxxxxxxx{ "go.gopath": "d:\\go", "terminal.integrated.shell.windows": "C:\\Program Files\\Git\\bin\\bash.exe", "editor.wordWrapColumn": 100, "files.eol": "\n", "editor.insertSpaces": true, "editor.tabSize": 4, "files.trimTrailingWhitespace": true, "files.autoSave": "afterDelay", "editor.formatOnSave": true, "editor.formatOnPaste": true, "explorer.confirmDelete": true, "editor.detectIndentation": true, "team.showWelcomeMessage": false, "python.linting.flake8Enabled": true, "files.autoGuessEncoding": true}VS Code 快捷键
打开命令面板:
Ctrl Alt P查找文件:
Ctrl P结构导航:
Alt N跳转到指定行:
Alt G查找:
Ctrl F替换:
Ctrl H放大/缩小:
Ctrl +/Ctrl -
VS Code 插件
EditorConfig for Visual Studio Code
设置文件编码、换行、去除行末空白、Tab 等
安装插件
项目文件夹根目录创建这个文件
.editorconfig,内容如下
xxxxxxxxxxroot = true
[*]charset = utf-8indent_style = spaceindent_size = 4end_of_line = lfinsert_final_newline = truetrim_trailing_whitespace = true
Clang-Format
安装插件
设置编码风格(以谷歌编码风格为例,可以个性化调整)
在 setting.json 中添加如下配置项即可
xxxxxxxxxx"C_Cpp.clang_format_fallbackStyle": "{BasedOnStyle: Google, IndentWidth: 4, ColumnLimit: 150, AlignConsecutiveAssignments: true, AccessModifierOffset: -4}",C/C++ 开发环境简易配置
xxxxxxxxxx{ "explorer.confirmDelete": false, "editor.formatOnPaste": false, "files.trimTrailingWhitespace": true, "editor.formatOnSave": false, "files.autoSave": "afterDelay", "files.autoSaveDelay": 100, "files.eol": "\n", "editor.fontSize": 16, "C_Cpp.clang_format_style": "{BasedOnStyle: Google, IndentWidth: 4, ColumnLimit: 150 , AlignConsecutiveAssignments: true, AccessModifierOffset: -4}", "editor.insertSpaces": true, "editor.tabSize": 4, "C_Cpp.updateChannel": "Insiders", "[cpp]": { "editor.defaultFormatter": "ms-vscode.cpptools" }, "files.trimFinalNewlines": true}Typora Han 主题配置
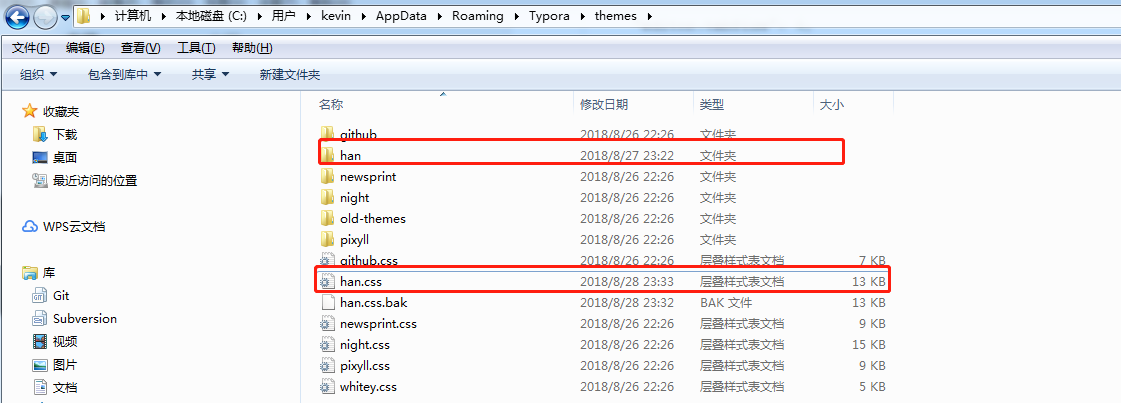
在 Typora 主题配置目录新建 han,将如下内容保存为 han.css,点此下载,目录如下所示
xxxxxxxxxx@charset "utf-8";
:root { --active-file-bg-color: #dadada; --active-file-bg-color: rgba(32, 43, 51, 0.63); --active-file-text-color: white; --bg-color: #fff; --text-color: #333; --side-bar-bg-color: #f5f5f5; --control-text-color: #666;}
/* 防止用户自定义背景颜色对网页的影响,添加让用户可以自定义字体 */html { color: #333; background: #fff; text-size-adjust: 100%; text-size-adjust: 100%; text-rendering: optimizelegibility; font-size: 14px; font-smoothing: initial;}
#write { max-width: 960px; padding-top: 2em; padding-left: 60px; padding-right: 60px; min-height: calc(100vh - 6em); font-smoothing: antialiased; font-size: 16px;}
.typora-node #write { min-height: calc(100% - 6em);}
pre.md-meta-block { background: #f5f5f5; padding: 1em; border-radius: 3px; font-size: 14px;}
@media screen and (max-width: 800px) { html { font-size: 14px; }
#write { padding-left: 30px; padding-right: 30px; font-size: 14px; }}
@media screen and (min-width: 1100px) { body, #footer-word-count-info { background: #f5f5f5; }
body.pin-outline, .pin-outline #footer-word-count-info, .pin-outline footer { background: #fff; }
#write { max-width: 1000px; padding: 40px 60px; background: #fff; margin: 3em auto 3em; border: 1px solid #ddd; border-width: 0 1px; }
.pin-outline #write { max-width: 1000px; background: #fff; margin: 0 0 0; border: 0; padding-left: 60px; padding-right: 60px; }
footer { background-color: transparent; }}
@media screen and (min-width: 1300px) { body.pin-outline, .pin-outline #footer-word-count-info, .pin-outline footer { background: #f5f5f5; }
.pin-outline #write { max-width: 1000px; padding: 40px 60px; background: #fff; margin: 3em auto 3em; border: 1px solid #ddd; border-width: 0 1px; }
.pin-outline footer { background-color: transparent; }
#footer-word-count-info { background: #f5f5f5; }}
/* 如果你的项目仅支持 IE9+ | Chrome | Firefox 等,推荐在 <html> 中添加 .borderbox 这个 class */html.borderbox *, html.borderbox *:before, html.borderbox *:after { box-sizing: border-box; box-sizing: border-box; box-sizing: border-box;}
/* 内外边距通常让各个浏览器样式的表现位置不同 */body, dl, dt, dd, ul, ol, li, h1, h2, h3, h4, h5, h6, code, form, fieldset, legend, input, textarea, p, blockquote, th, td, hr, button, article, aside, details, figcaption, figure, footer, header, menu, nav, section { margin: 0; padding: 0;}
/* 重设 HTML5 标签, IE 需要在 js 中 createElement(TAG) */article, aside, details, figcaption, figure, footer, header, menu, nav, section { display: block;}
/* HTML5 媒体文件跟 img 保持一致 */audio, canvas, video { display: inline-block;}
/* 要注意表单元素并不继承父级 font 的问题 */body, button, input, select, textarea { font: 300 1em/1.8 "PingFang SC", "Lantinghei SC", "Microsoft Yahei", "Hiragino Sans GB", "Microsoft Sans Serif", "WenQuanYi Micro Hei", sans;}
body { font-family: "PingFang SC", "Lantinghei SC", "Microsoft Yahei", "Hiragino Sans GB", "Microsoft Sans Serif", "WenQuanYi Micro Hei", sans;}
h1, h2, h3, h4, h5, h6 { font-family: "TimesNewRomanPS-ItalicMT", "PingFang SC", "Lantinghei SC", "Microsoft Yahei", "Hiragino Sans GB", "Microsoft Sans Serif", "WenQuanYi Micro Hei", sans; /*font-family: "PingFang SC", "Lantinghei SC", "Microsoft Yahei", "Hiragino Sans GB", "Microsoft Sans Serif", "WenQuanYi Micro Hei", sans;*/ font-smoothing: initial; font-weight: 100; color: var(--text-color); line-height: 1.35; font-variant-numeric: lining-nums; margin-bottom: 1em;}
em { font-family: Georgia-Italic, STSongti-SC-Light, serif;}
strong em,em strong { font-family: Georgia-BoldItalic, STSongti-SC-Regular, serif;}
button::focus-inner,input::focus-inner { padding: 0; border: 0;}
/* 去掉各Table cell 的边距并让其边重合 */table { border-collapse: collapse; border-spacing: 0;}
/* 去除默认边框 */fieldset, img { border: 0;}
/* 块/段落引用 */blockquote { position: relative; color: #999; font-weight: 400; border-left: 1px solid #1abc9c; padding-left: 1em; margin: 1em 3em 1em 2em;}
@media only screen and ( max-width: 640px ) { blockquote { margin: 1em 0; }}
/* Firefox 以外,元素没有下划线,需添加 */acronym, abbr { border-bottom: 1px dotted; font-variant: normal;}
/* 添加鼠标问号,进一步确保应用的语义是正确的(要知道,交互他们也有洁癖,如果你不去掉,那得多花点口舌) */abbr { cursor: help;}
address, caption, cite, code, dfn, th, var { font-style: normal; font-weight: 400;}
/* 去掉列表前的标识, li 会继承,大部分网站通常用列表来很多内容,所以应该当去 */ul, ol { list-style: none;}
/* 对齐是排版最重要的因素, 别让什么都居中 */caption, th { text-align: left;}
q:before, q:after { content: '';}
/* 统一上标和下标 */sub, sup { font-size: 75%; line-height: 0; position: relative;}
:root sub, :root sup { vertical-align: baseline; /* for ie9 and other modern browsers */}
sup { top: -0.5em;}
sub { bottom: -0.25em;}
/* 让链接在 hover 状态下显示下划线 */a { color: #1abc9c;}
a:hover { text-decoration: underline;}
#write a { border-bottom: 1px solid #1abc9c;}
#write a:hover { border-bottom-color: #555; color: #555; text-decoration: none;}
/* 默认不显示下划线,保持页面简洁 */ins, a { text-decoration: none;}
/* 标记,类似于手写的荧光笔的作用 */mark { background: #fffdd1; border-bottom: 1px solid #ffedce; padding: 2px; margin: 0 5px;}
/* 代码片断 */pre, code, pre tt { font-family: Courier, 'Courier New', monospace;}
#write .md-fences { border: 1px solid #ddd; padding: 1em 0.5em; display: block; overflow-scrolling: touch;}
/* 一致化 horizontal rule */hr { border: none; border-bottom: 1px solid #cfcfcf; margin-bottom: 0.8em; height: 10px;}
#write strong { font-weight: 900; color:#383838; /*font-weight: bloder; /*color: #000;*/}
.code-tooltip.md-hover-tip strong { color: white;}
/* 保证块/段落之间的空白隔行 */#write p, #write .md-fences, #write ul, #write ol, #write dl, #write form, #write hr, #write figure,#write-p, #write-pre, #write-ul, #write-ol, #write-dl, #write-form, #write-hr, #write-table, blockquote { margin-bottom: 1.2em}
html { font-family: PingFang SC, Verdana, Helvetica Neue, Microsoft Yahei, Hiragino Sans GB, Microsoft Sans Serif, WenQuanYi Micro Hei, sans-serif;}
/* 标题应该更贴紧内容,并与其他块区分,margin 值要相应做优化 */#write h1, #write h2, #write h3, #write h4, #write h5, #write h6,#write-h1, #write-h2, #write-h3, #write-h4, #write-h5, #write-h6 { margin-top: 1.2em; margin-bottom: 0.6em; line-height: 1.35; color: #000;}
#write h1, #write-h1 { font-size: 2.4em; padding-bottom: 1em; border-bottom: 3px double #eee;}
#write h2, #write-h2 { font-size: 1.8em;}
#write h3, #write-h3 { font-size: 1.6em;}
#write h4, #write-h4 { font-size: 1.4em;}
#write h5, #write h6, #write-h5, #write-h6 { font-size: 1.2em;}
/* 在文章中,应该还原 ul 和 ol 的样式 */#write ul, #write-ul { margin-left: 1.3em; list-style: disc;}
#write ol, #write-ol { list-style: decimal; margin-left: 1.9em;}
#write li ul, #write li ol, #write-ul ul, #write-ul ol, #write-ol ul, #write-ol ol { margin-bottom: 0.8em; margin-left: 2em;}
#write li ul, #write-ul ul, #write-ol ul { list-style: circle;}
#write table th, #write table td { border: 1px solid #ddd; padding: 0.5em 1em; color: #666;}
#write table .md-table-edit th { border: none; padding: 0; color: inherit;}
#write table th, #write-table th { background: #fbfbfb;}
#write table thead th, #write-table thead th { background: #f1f1f1;}
#write table caption { border-bottom: none;}
#write em { font-weight: inherit; font-style: inherit;}
li>p { margin-bottom: 0 !important;}
/* Responsive images */#write img { max-width: 100%;}
a.md-toc-inner { border-bottom: 0 !important;}
.md-toc-h1:first-of-type:last-of-type{ display: none;}
.md-toc { font-size: inherit;}
.md-toc-h1 .md-toc-inner { font-weight: normal;}
.md-table-edit th { padding: 0 !important; border: 0 !important;}
.mac-seamless-mode #write { min-height: calc(100vh - 6em - 20px);}
.typora-quick-open-item.active { color: var(--active-file-text-color);}
*.in-text-selection, ::selection { background: var(--active-file-bg-color); text-shadow: none; color: white;}
.btn-primary { background-color: #2d2d2d; border-color: #020202;}
.btn-primary:hover, .btn-primary:focus, .btn-primary.focus, .btn-primary:active, .btn-primary.active, .open > .dropdown-toggle.btn-primary { background-color: #4e4c4e; border: #4e4c4e;}
#preference-dialog .modal-content{ background: #6e757a; --bg-color: #6e757a; --text-color: #f1f1f1; color: #f1f1f1;}
#typora-source,.typora-sourceview-on { --bg-color: #eee; background: #eee;}
.cm-s-typora-default .cm-header, .cm-s-typora-default .cm-property { color: #116098;}
.cm-s-typora-default .cm-link { color: #11987d;}
.cm-s-typora-default .cm-em { font-family: Georgia-Italic, STSongti-SC-Light, serif; color: #6f6400;}
.cm-s-typora-default .cm-em{ color: rgb(0, 22, 45);}
.CodeMirror.cm-s-typora-default div.CodeMirror-cursor{ border-left: 3px solid #6e757a;}
.cm-s-typora-default .CodeMirror-selectedtext,.typora-sourceview-on .CodeMirror-focused .CodeMirror-selected { background: #6e757a; color: white;}
.file-node-icon.fa.fa-folder:before { color: rgba(32, 43, 51, 0.49);}
#preference-dialog .megamenu-menu-panel h1 { margin-bottom: 1em;}
::scrollbar-corner { display: none; background: transparent;}
.cm-s-inner { background-color: #263238; color: rgba(233, 237, 237, 1);}.cm-s-inner .CodeMirror-gutters { background: #263238; color: rgb(83,127,126); border: none;}.cm-s-inner .CodeMirror-guttermarker, .cm-s-inner .CodeMirror-guttermarker-subtle, .cm-s-inner .CodeMirror-linenumber { color: rgb(83,127,126); }.cm-s-inner .CodeMirror-cursor { border-left: 1px solid #f8f8f0; }.cm-s-inner div.CodeMirror-selected { background: rgba(255, 255, 255, 0.15); }.cm-s-inner.CodeMirror-focused div.CodeMirror-selected { background: rgba(255, 255, 255, 0.10); }.cm-s-inner .CodeMirror-line::selection, .cm-s-inner .CodeMirror-line > span::selection, .cm-s-inner .CodeMirror-line > span > span::selection { background: rgba(255, 255, 255, 0.10); }.cm-s-inner .CodeMirror-line::selection, .cm-s-inner .CodeMirror-line > span::selection, .cm-s-inner .CodeMirror-line > span > span::selection { background: rgba(255, 255, 255, 0.10); }
.cm-s-inner .CodeMirror-activeline-background { background: rgba(0, 0, 0, 0); }.cm-s-inner .cm-keyword { color: rgba(199, 146, 234, 1); }.cm-s-inner .cm-operator { color: rgba(233, 237, 237, 1); }.cm-s-inner .cm-variable-2 { color: #80CBC4; }.cm-s-inner .cm-variable-3 { color: #82B1FF; }.cm-s-inner .cm-builtin { color: #DECB6B; }.cm-s-inner .cm-atom { color: #F77669; }.cm-s-inner .cm-number { color: #F77669; }.cm-s-inner .cm-def { color: rgba(233, 237, 237, 1); }.cm-s-inner .cm-string { color: #C3E88D; }.cm-s-inner .cm-string-2 { color: #80CBC4; }.cm-s-inner .cm-comment { color: #546E7A; }.cm-s-inner .cm-variable { color: #82B1FF; }.cm-s-inner .cm-tag { color: #80CBC4; }.cm-s-inner .cm-meta { color: #80CBC4; }.cm-s-inner .cm-attribute { color: #FFCB6B; }.cm-s-inner .cm-property { color: #80CBAE; }.cm-s-inner .cm-qualifier { color: #DECB6B; }.cm-s-inner .cm-variable-3 { color: #DECB6B; }.cm-s-inner .cm-tag { color: rgba(255, 83, 112, 1); }.cm-s-inner .cm-error { color: rgba(255, 255, 255, 1.0); background-color: #EC5F67;}.cm-s-inner .CodeMirror-matchingbracket { text-decoration: underline; color: white !important;}
/**apply to code fences with plan text**/.md-fences { background-color: #263238; color: rgba(233, 237, 237, 1); border: none;}
.md-fences .code-tooltip { background-color: #263238;}Makefile 模板
xxxxxxxxxxINCLUDES := -I. -I./include -I/opt/Ice-3.5.1/includeLIBS := -Wl,--enable-new-dtags -Wl,-rpath,/opt/Ice-3.5/lib64LIBS += -Wl,-Bstatic  -L./lib -lcpp_redis -ltacopieLIBS += -Wl,-Bdynamic -L/opt/Ice-3.5.1/lib64 -lIce -lIceUtil
CXX := g++ -std=c++11CXXFLAGS := -rdynamic -m64 -Wall -Wextra -pthread -fPIC -g $(INCLUDES)# 把所有警告当做错误:-Werror,支持 C++ 11:-std=c++11CXXFLAGS +=  -Werror -std=c++11
TARGETS := serverTARGETS += client
all: $(TARGETS)
db.cpp db.h: db.ice  slice2cpp $^
server: db.o dbi.o server.o  $(CXX) -o $@ $^ $(LIBS)
client: db.o dbi.o client.o  $(CXX) -o $@ $^ $(LIBS)
clean:  rm -f *.o $(TARGETS)
Lets Encrypt 证书制作、使用
证书制作
获取 certbot 客户端
xxxxxxxxxxwget https://dl.eff.org/certbot-autochmod a+x certbot-auto生成证书
同时生成支持 i-deer.com 和 www.i-deer.com 的证书
xxxxxxxxxx
/opt/cert/certbot-auto --no-self-upgrade certonly --webroot -w /usr/share/nginx/html --agree-tos --email c.r2009@163.com -d i-deer.com -d www.i-deer.com查看证书文件
xxxxxxxxxxtree /etc/letsencrypt/live/证书更新
证书默认 90 有效,更新不能太频繁,同一域名一周之内最多只能更新 5 次
xxxxxxxxxx
#./certbot-auto renew ./certbot-auto renew --no-self-upgrade使用 snap 制作证书
certbot-auto 不再支持所有的操作系统。certbot 团队认为维护 certbot-auto 在几乎所有流行的 UNIX 系统以及各种环境上的正常运行是一项繁重的工作,加之 certbot-auto 是基于 python 2 编写的,而 python 2 即将寿终正寝,将 certbot-auto 迁移至 python 3 需要大量工作,这非常困难,因此团队决定放弃 certbot-auto 的维护,certbot 团队使用了基于 snap 的新的分发方法。
安装 snapd
xxxxxxxxxxyum install epel-release -yyum install snapd -y启用 snapd.socket
xxxxxxxxxxsystemctl enable --now snapd.socket创建 /var/lib/snapd/snap 和 /snap 之间的链接
xxxxxxxxxxln -s /var/lib/snapd/snap /snap退出账号并重新登陆,或者重启系统,确保 snap 启用
更新 snap
xxxxxxxxxxsnap install coresnap refresh core卸载已安装的certbot。
如果之前在系统上已经部署过 certbot,则需要先将其进行卸载。
a. 卸载certbot
xxxxxxxxxxyum remove certbotb. 根据 certbot 安装位置删除相关文件
xxxxxxxxxxrm /usr/local/bin/certbot-autoc. 删除 certbot 附加软件包
xxxxxxxxxxrm -rf /opt/eff.org/certbot安装certbot
通过snap安装certbot。
xxxxxxxxxxsnap install --classic certbot创建/snap/bin/certbot 软链接,方便 certbot 命令的使用
xxxxxxxxxxln -s /snap/bin/certbot /usr/bin/certbot生成证书
cert-name指生成的证书文件的名称,可以与域名无关
xxxxxxxxxxcertbot certonly --nginx --email <email> --cert-name <cert-file-name> -d hello.com -d word.comcertbot 使用第一个域名作为证书中的 CN(common name),如果先前申请证书由于子域名传参的顺序导致 CN 与预期不符合,可以通过强制更新重新调整域名参数顺序达到更改 CN 的目的
xxxxxxxxxxcertbot certonly --force-renew -d word.com -d hello.com更新证书
xxxxxxxxxxcertbot renewAmazon Linux 2023 安装 certbot
xxxxxxxxxxdnf remove certbotdnf install python3 augeas-libspython3 -m venv /opt/certbot//opt/certbot/bin/pip install --upgrade pip/opt/certbot/bin/pip install certbot certbot-nginxln -s /opt/certbot/bin/certbot /usr/bin/certbot综合使用
基础环境:Nginx 1.12.2/CentOS 7.6
域名解析:i-deer.com(同时添加 @ 和 www 两条解析)
证书:同时支持 i-deer.com 和 www.i-deer.com
目标:
www.i-deer.com 跳转 i-deer.com
http 跳转 https
即,http://i-deer.com 和 http://www.i-deer.com 和 https://i-deer.com 和 https://www.i-deer.com 最终都跳转到 https://i-deer.com
xxxxxxxxxx  server {        listen       80;        server_name i-deer.com www.i-deer.com;        return 301 https://i-deer.com$request_uri;    }
    server {        listen 443;        server_name www.i-deer.com;        return 301 https://i-deer.com$request_uri;    }
    server {        listen 443 default_server ssl;        server_name  i-deer.com;        ssl on;
        gzip on;        gzip_disable "msie6";                gzip_vary on;        gzip_proxied any;        gzip_comp_level 6;        gzip_buffers 16 8k;        gzip_http_version 1.1;        gzip_min_length 256;        gzip_types text/plain text/css application/json application/x-javascript text/xml application/xml application/xml+rss text/javascript application/vnd.ms-fontobject application/x-font-ttf font/opentype image/svg+xml image/x-icon image/jpeg image/gif image/png;

        #ssl                     on;        #error_page 497          https://$host:443$uri;        #error_page 497         https://$host:443$request_uri?$args;
        ssl_certificate "/etc/letsencrypt/live/i-deer.com/fullchain.pem";        ssl_certificate_key "/etc/letsencrypt/live/i-deer.com/privkey.pem";        ssl_session_cache shared:SSL:1m;        ssl_session_timeout  10m;        ssl_ciphers HIGH:!aNULL:!MD5;        ssl_prefer_server_ciphers on;
        # Load configuration files for the default server block.        include /etc/nginx/default.d/*.conf;
        location /download {            alias /opt/rplab-download;            index  h5DownLoad.html index.html index.htm;        }
        location /yljdownload {            alias /opt/ylj-download;            index  h5DownLoad.html index.html index.htm;        }
        location / {            root /opt/ideer-website;        }
        error_page 404 /404.html;            location = /40x.html {        }
        error_page 500 502 503 504 /50x.html;            location = /50x.html {        }    }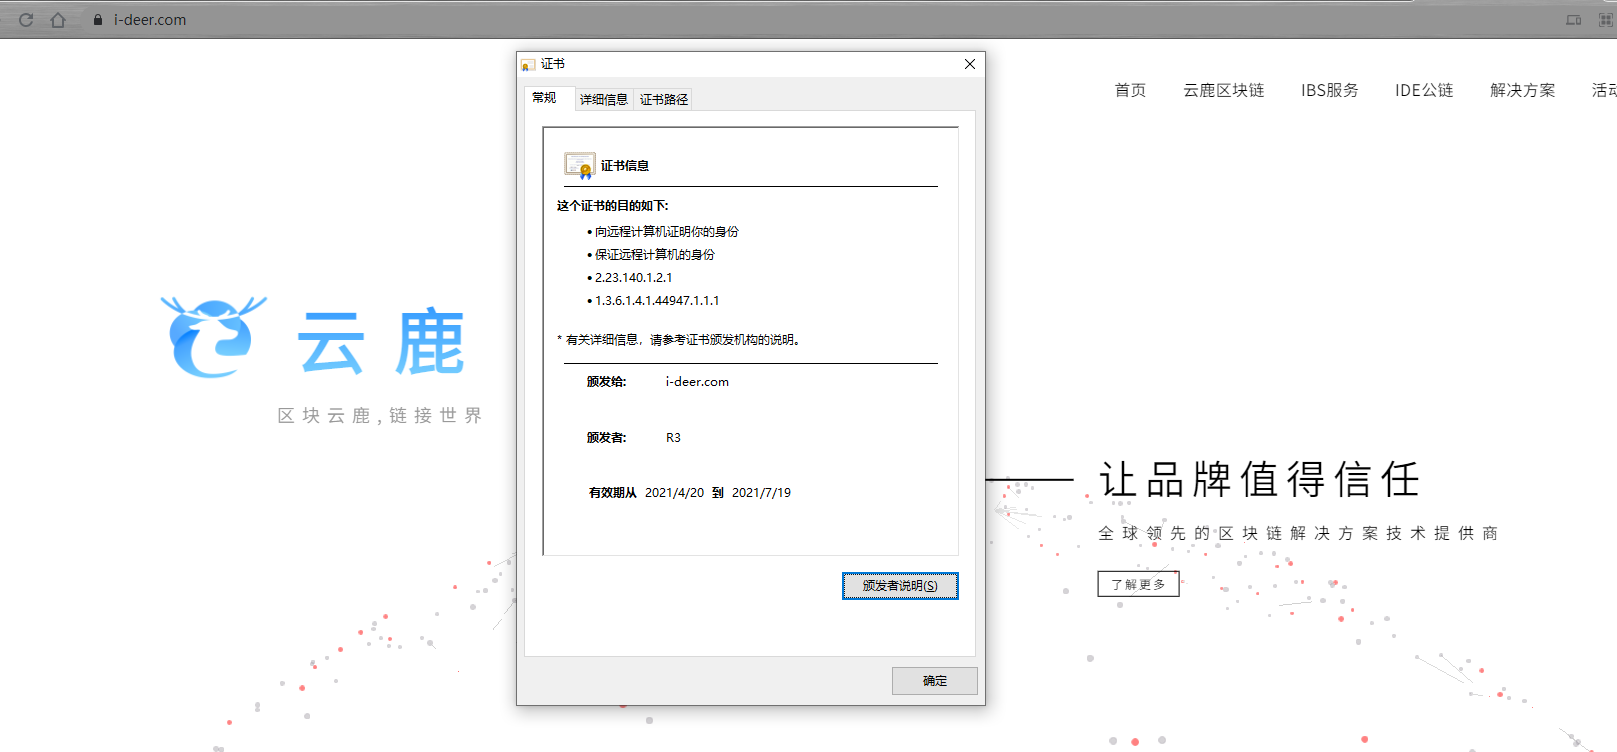
安装 CURL 支持 http2
基础环境
CentOS 6.8
Python 2.6.6
CURL 7.19.7
安装依赖库
xxxxxxxxxxyum install -y readline-devel sqlite-devel lz4 lz4-devel gdbm gdbm-devel bzip2 openssl openssl-devel libdbi-devel ncurses-libs zlib-devel _bsddb bz2 dl安装 Python 2.7.3
nghttp2 依赖 Python 2.7.x
xxxxxxxxxx# 下载、安装 Python 2.7.3wget http://python.org/ftp/python/2.7.3/Python-2.7.3.tar.bz2tar -jxvf Python-2.7.3.tar.bz2cd Python-2.7.3./configuremake -j4 allmake install
# 修复其他服务(如,YUM)对旧版本 Python 2.6.6 的依赖mv /usr/bin/python /usr/bin/python-2.6.6ln -sf /usr/local/bin/python2.7 /usr/bin/pythonsed -i "s/#\!\/usr\/bin\/python/#\!\/usr\/bin\/python-2.6.6/" /usr/bin/yum
安装 nghttp2 v1.14.x
CURL 依赖 nghttp2 提供对 http2 的支持,因此,需要先安装 nghttp2
xxxxxxxxxxgit clone https://github.com/tatsuhiro-t/nghttp2.gitcd nghttp2
# 默认 master 分支,切换到特定的分支,例如 v1.14.xgit checkout -b v1.14.x origin/v1.14.x
autoreconf -iautomakeautoconf./configuremake -j4make installecho '/usr/local/lib' > /etc/ld.so.conf.d/local.confldconfig
# 查看 nghttp2[root@localhost curl-7.46.0]# whereis libnghttp2libnghttp2: /usr/local/lib/libnghttp2.a /usr/local/lib/libnghttp2.la /usr/local/lib/libnghttp2.so
安装 CURL 7.46.0
xxxxxxxxxx# 安装 CURL 7.46.0wget http://curl.haxx.se/download/curl-7.46.0.tar.bz2tar -xvjf curl-7.46.0.tar.bz2cd curl-7.46.0./configure --with-nghttp2=/usr/local --with-sslmake -j4make install
# 替换旧版本ln -sf /usr/local/bin/curl /usr/bin/curl
确认 CURL 版本以及是否支持 http2
xxxxxxxxxx# 查看 CURL 版本以及所有支持的协议、特性[root@localhost curl-7.46.0]# curl --versioncurl 7.46.0 (x86_64-pc-linux-gnu) libcurl/7.46.0 OpenSSL/1.0.1e zlib/1.2.3 nghttp2/1.14.1Protocols: dict file ftp ftps gopher http https imap imaps pop3 pop3s rtsp smb smbs smtp smtps telnet tftpFeatures: IPv6 Largefile NTLM NTLM_WB SSL libz HTTP2 UnixSockets
# 如下提示则表明此版本 CURL 支持 http2[root@localhost curl-7.46.0]# curl --http2 -I https://nghttp2.org/HTTP/2.0 200date:Thu, 12 Apr 2018 16:31:22 GMTcontent-type:text/htmllast-modified:Thu, 12 Apr 2018 15:17:17 GMTetag:"5acf787d-19d8"accept-ranges:bytescontent-length:6616x-backend-header-rtt:0.001775strict-transport-security:max-age=31536000server:nghttpxvia:2 nghttpxx-frame-options:SAMEORIGINx-xss-protection:1; mode=blockx-content-type-options:nosniff
Mail 发送邮件
配置 /etc/mail.rc
xxxxxxxxxxset from=xuchao@bigsillybear.com smtp="smtp.bigsillybear.com"set smtp-auth-user="xuchao@bigsillybear.com" smtp-auth-password="HiBigsillybear"set smtp-auth=login发送邮件
xxxxxxxxxx# 发送主题为 test,邮件正文为 ca.pem 文件内容,包含附件 ca.pem 的邮件到 cloud_dev@bigsillybear.commail -s "test" -a ca.pem cloud_dev@bigsillybear.com < ca.pem
# 发送主题为 test,邮件正文为 hello world 的邮件到 cloud_dev@bigsillybear.comecho "hello world"|mail -s "test" cloud_dev@bigsillybear.com
Visual Studio Code 配置 GoLang 开发环境
官网下载 GoLang 安装包,安装之后 go version 查看版本
xxxxxxxxxx$ go versiongo version go1.10.1 windows/amd64安装时勾选添加环境变量,不需要单独添加环境变量;否则,需要新添加环境变量,如下:
计算机(右键)-> 属性 -> 高级系统设置 -> 高级 -> 环境变量 -> 系统变量
添加 变量名
GOROOT,值为安装目录,如C:\app\Go\变量名
Path,追加值C:\app\Go\bin;
设置环境变量
GOPATH,具体操作如步骤 1 所示,值为后续你存放源码的目录,如D:\go打开
Git Bash,设置Go Module全局代理,依次安装如下依赖项
xxxxxxxxxx# Enable the go modules featureexport GO111MODULE=on# Set the GOPROXY environment variableexport GOPROXY=https://goproxy.ioxxxxxxxxxxgo get -u -v github.com/nsf/gocodego get -u -v github.com/rogpeppe/godefgo get -u -v github.com/golang/lint/golintgo get -u -v github.com/lukehoban/go-outlinego get -u -v sourcegraph.com/sqs/goreturnsgo get -u -v golang.org/x/tools/cmd/gorenamego get -u -v github.com/tpng/gopkgsgo get -u -v github.com/newhook/go-symbolsgo get -u -v golang.org/x/tools/cmd/guru
# 可选择性下载# protobuf 相关,需要安装 protocgo get -u -v github.com/golang/protobuf/protoc-gen-gogo get -u -v github.com/golang/protobuf/proto# grpcgo get -u -v google.golang.org/grpc安装 VS Code
安装 VS Code 各种插件,打开 VS Code,按 Ctrl+Shift+P,输入 install ext,输入 go,选中安装即可
VS Code 支持各种语法,同理,安装对应的插件即可,如,需要支持 C++,安装 C++ 插件即可
Shell 终端提示符设置
xxxxxxxxxxPS1 是 linux 里头的一个默认的环境变量,用来设置命令提示符的环境变量。 \d :代表日期,格式为 weekday month date,例如:"Mon Aug 1" \H :完整的主机名称。例如:我的机器名称为:fc4.linux,则这个名称就是 fc4.linux \h :仅取主机的第一个名字,如上例,则为 fc4,.linux 则被省略 \t :显示时间为 24 小时格式,如:HH:MM:SS \T :显示时间为 12 小时格式 \A :显示时间为 24 小时格式:HH:MM \u :当前用户的账号名称 \v :BASH 的版本信息 \w :完整的工作目录名称。家目录会以 ~ 代替 \W :利用 basename 取得工作目录名称,所以只会列出最后一个目录 \# :下达的第几个命令 \$ :提示字符,如果是 root 时,提示符为:# ,普通用户则为:$目标:让 shell 只显示最后一个目录名而不显示完整的路径,并且不显示主机名
编辑 ~/.bashrc,将所有的 PS1 中的 \w 替换为 \W,并去掉 @\h
重新打开终端即可生效
修改前
xxxxxxxxxxroot@ibc-VirtualBox:~/chaincode/tmp#修改后
xxxxxxxxxxroot:fabric#阿里云挂载磁盘
查看系统分件格式
xxxxxxxxxx[root@ ~]# df -h -T/dev/vda1 ext4 40G 4.6G 33G 13% /devtmpfs devtmpfs 7.5G 0 7.5G 0% /devtmpfs tmpfs 7.6G 0 7.6G 0% /dev/shmtmpfs tmpfs 7.6G 344K 7.6G 1% /runtmpfs tmpfs 7.6G 0 7.6G 0% /sys/fs/cgrouptmpfs tmpfs 1.6G 0 1.6G 0% /run/user/0查看未挂载磁盘
xxxxxxxxxx[root@ ~]# fdisk -l
Disk /dev/vda: 42.9 GB, 42949672960 bytes, 83886080 sectorsUnits = sectors of 1 * 512 = 512 bytesSector size (logical/physical): 512 bytes / 512 bytesI/O size (minimum/optimal): 512 bytes / 512 bytesDisk label type: dosDisk identifier: 0x000d2717
   Device Boot      Start         End      Blocks   Id  System/dev/vda1   *        2048    83884031    41940992   83  Linux
Disk /dev/vdb: 1099.5 GB, 1099511627776 bytes, 2147483648 sectorsUnits = sectors of 1 * 512 = 512 bytesSector size (logical/physical): 512 bytes / 512 bytesI/O size (minimum/optimal): 512 bytes / 512 bytes
挂载磁盘
xxxxxxxxxx[root@ ~]# mount /dev/vdb /data如果挂载出现如下错误:
xxxxxxxxxxmount: /dev/vdb is write-protected, mounting read-onlymount: unknown filesystem type '(null)'需要对磁盘进行初始化,如下所示:
xxxxxxxxxxmkfs.ext4 /dev/vdb确认已挂载
卸载磁盘
umount /data即可
xxxxxxxxxx[root@ ~]# df -h -TFilesystem Type Size Used Avail Use% Mounted on/dev/vda1 ext4 40G 4.6G 33G 13% /devtmpfs devtmpfs 7.5G 0 7.5G 0% /devtmpfs tmpfs 7.6G 0 7.6G 0% /dev/shmtmpfs tmpfs 7.6G 344K 7.6G 1% /runtmpfs tmpfs 7.6G 0 7.6G 0% /sys/fs/cgrouptmpfs tmpfs 1.6G 0 1.6G 0% /run/user/0/dev/vdb ext4 1008G 40G 918G 5% /data阿里云添加 swap 交换分区
阿里云 ECS 服务器的 swap 功能默认没有开启,因为 swap 功能会增加磁盘 IO 的占用率,降低磁盘寿命和性能,另一方面也可以借此让用户购买更大的内存。启用 swap 分区,一定程度上可以降低物理内存的使用压力,但如果云服务器上运行的应用确实需要更多的内存,还是需要购买物理内存。
创建分区文件
xxxxxxxxxx# 以创建 4G 为例,可自行调整[root@ ~]# dd if=/dev/zero of=/mnt/swap bs=4M count=10241024+0 records in1024+0 records out4294967296 bytes (4.3 GB) copied, 37.8632 s, 113 MB/s设置交换分区文件
xxxxxxxxxx[root@ ~]# mkswap /mnt/swap修改内核参数
值越大,表示越积极使用 swap 分区,越小表示越积极使用物理内存
默认值
swappiness=60,表示内存使用率超过100-60=40%时开始使用交换分区
swappiness=0的时候表示最大限度使用物理内存,然后才是 swap 空间`
swappiness=100的时候表示积极使用 swap 分区,并把内存上的数据及时搬运到 swap空间
xxxxxxxxxx[root@ ~]# vim /etc/sysctl.confvm.swappiness = 60使内核参数修改生效
xxxxxxxxxx[root@ ~]# sysctl -p启用此交换分区的交换功能
xxxxxxxxxx[root@ ~]# swapon /mnt/swapswapon: /mnt/swap: insecure permissions 0644, 0600 suggested.[root@ ~]# chmod 0600 /mnt/swap设置开机时自动启用 swap 分区
xxxxxxxxxx[root@ ~]# echo "/mnt/swap swap swap defaults 0 0" >> /etc/fstab确认 swap 分区是否生效
xxxxxxxxxx[root@ ~]# cat /proc/swapsFilename Type Size Used Priority/mnt/swap file 4194300 0 -2[root@wwhs-application ~]# [root@ ~]# free -m total used free shared buff/cache availableMem: 1838 1308 80 0 449 368Swap: 4095 0 4095如果需要关闭 swap 分区,修改 /etc/fstab 文件,删除或注释相关配置,取消 swap 的自动挂载
xxxxxxxxxx[root@ ~]# swapoff /mnt/swap阿里云系统盘扩容
系统:CentOS 7.x
控制台扩容之后一定要通过控制台重启服务器,命令行重启无效
安装工具
xxxxxxxxxxyum install -y cloud-utils-growpart查看现有磁盘大小
xxxxxxxxxxfdisk -l查看磁盘分区大小
xxxxxxxxxxdf -h为系统盘的第一个分区扩容
xxxxxxxxxxgrowpart /dev/vda 1为系统盘的
/dev/vda1分区扩容文件系统
xxxxxxxxxx resize2fs /dev/vda1确认磁盘分区大小已变更
xxxxxxxxxxdf -h阿里云数据盘扩容
系统:CentOS 7.x
控制台扩容之后一定要通过控制台重启服务器,命令行重启无效
如果挂载多个数据盘,修改对应的设备名称即可(例如,vdc1)
使用
df -hT查看系统类型,如果是 xfs 系统,扩容文件系统resize2fs替换为xfs_growfs
安装工具
xxxxxxxxxxyum install -y cloud-utils-growpart查看现有磁盘大小
xxxxxxxxxxfdisk -l查看磁盘分区大小
xxxxxxxxxxdf -h为系统盘的第一个分区扩容
xxxxxxxxxxgrowpart /dev/vdb 1为系统盘的
/dev/vdb1分区扩容文件系统
如果失败,尝试
resize2fs /dev/vdb
xxxxxxxxxx resize2fs /dev/vdb1确认磁盘分区大小已变更
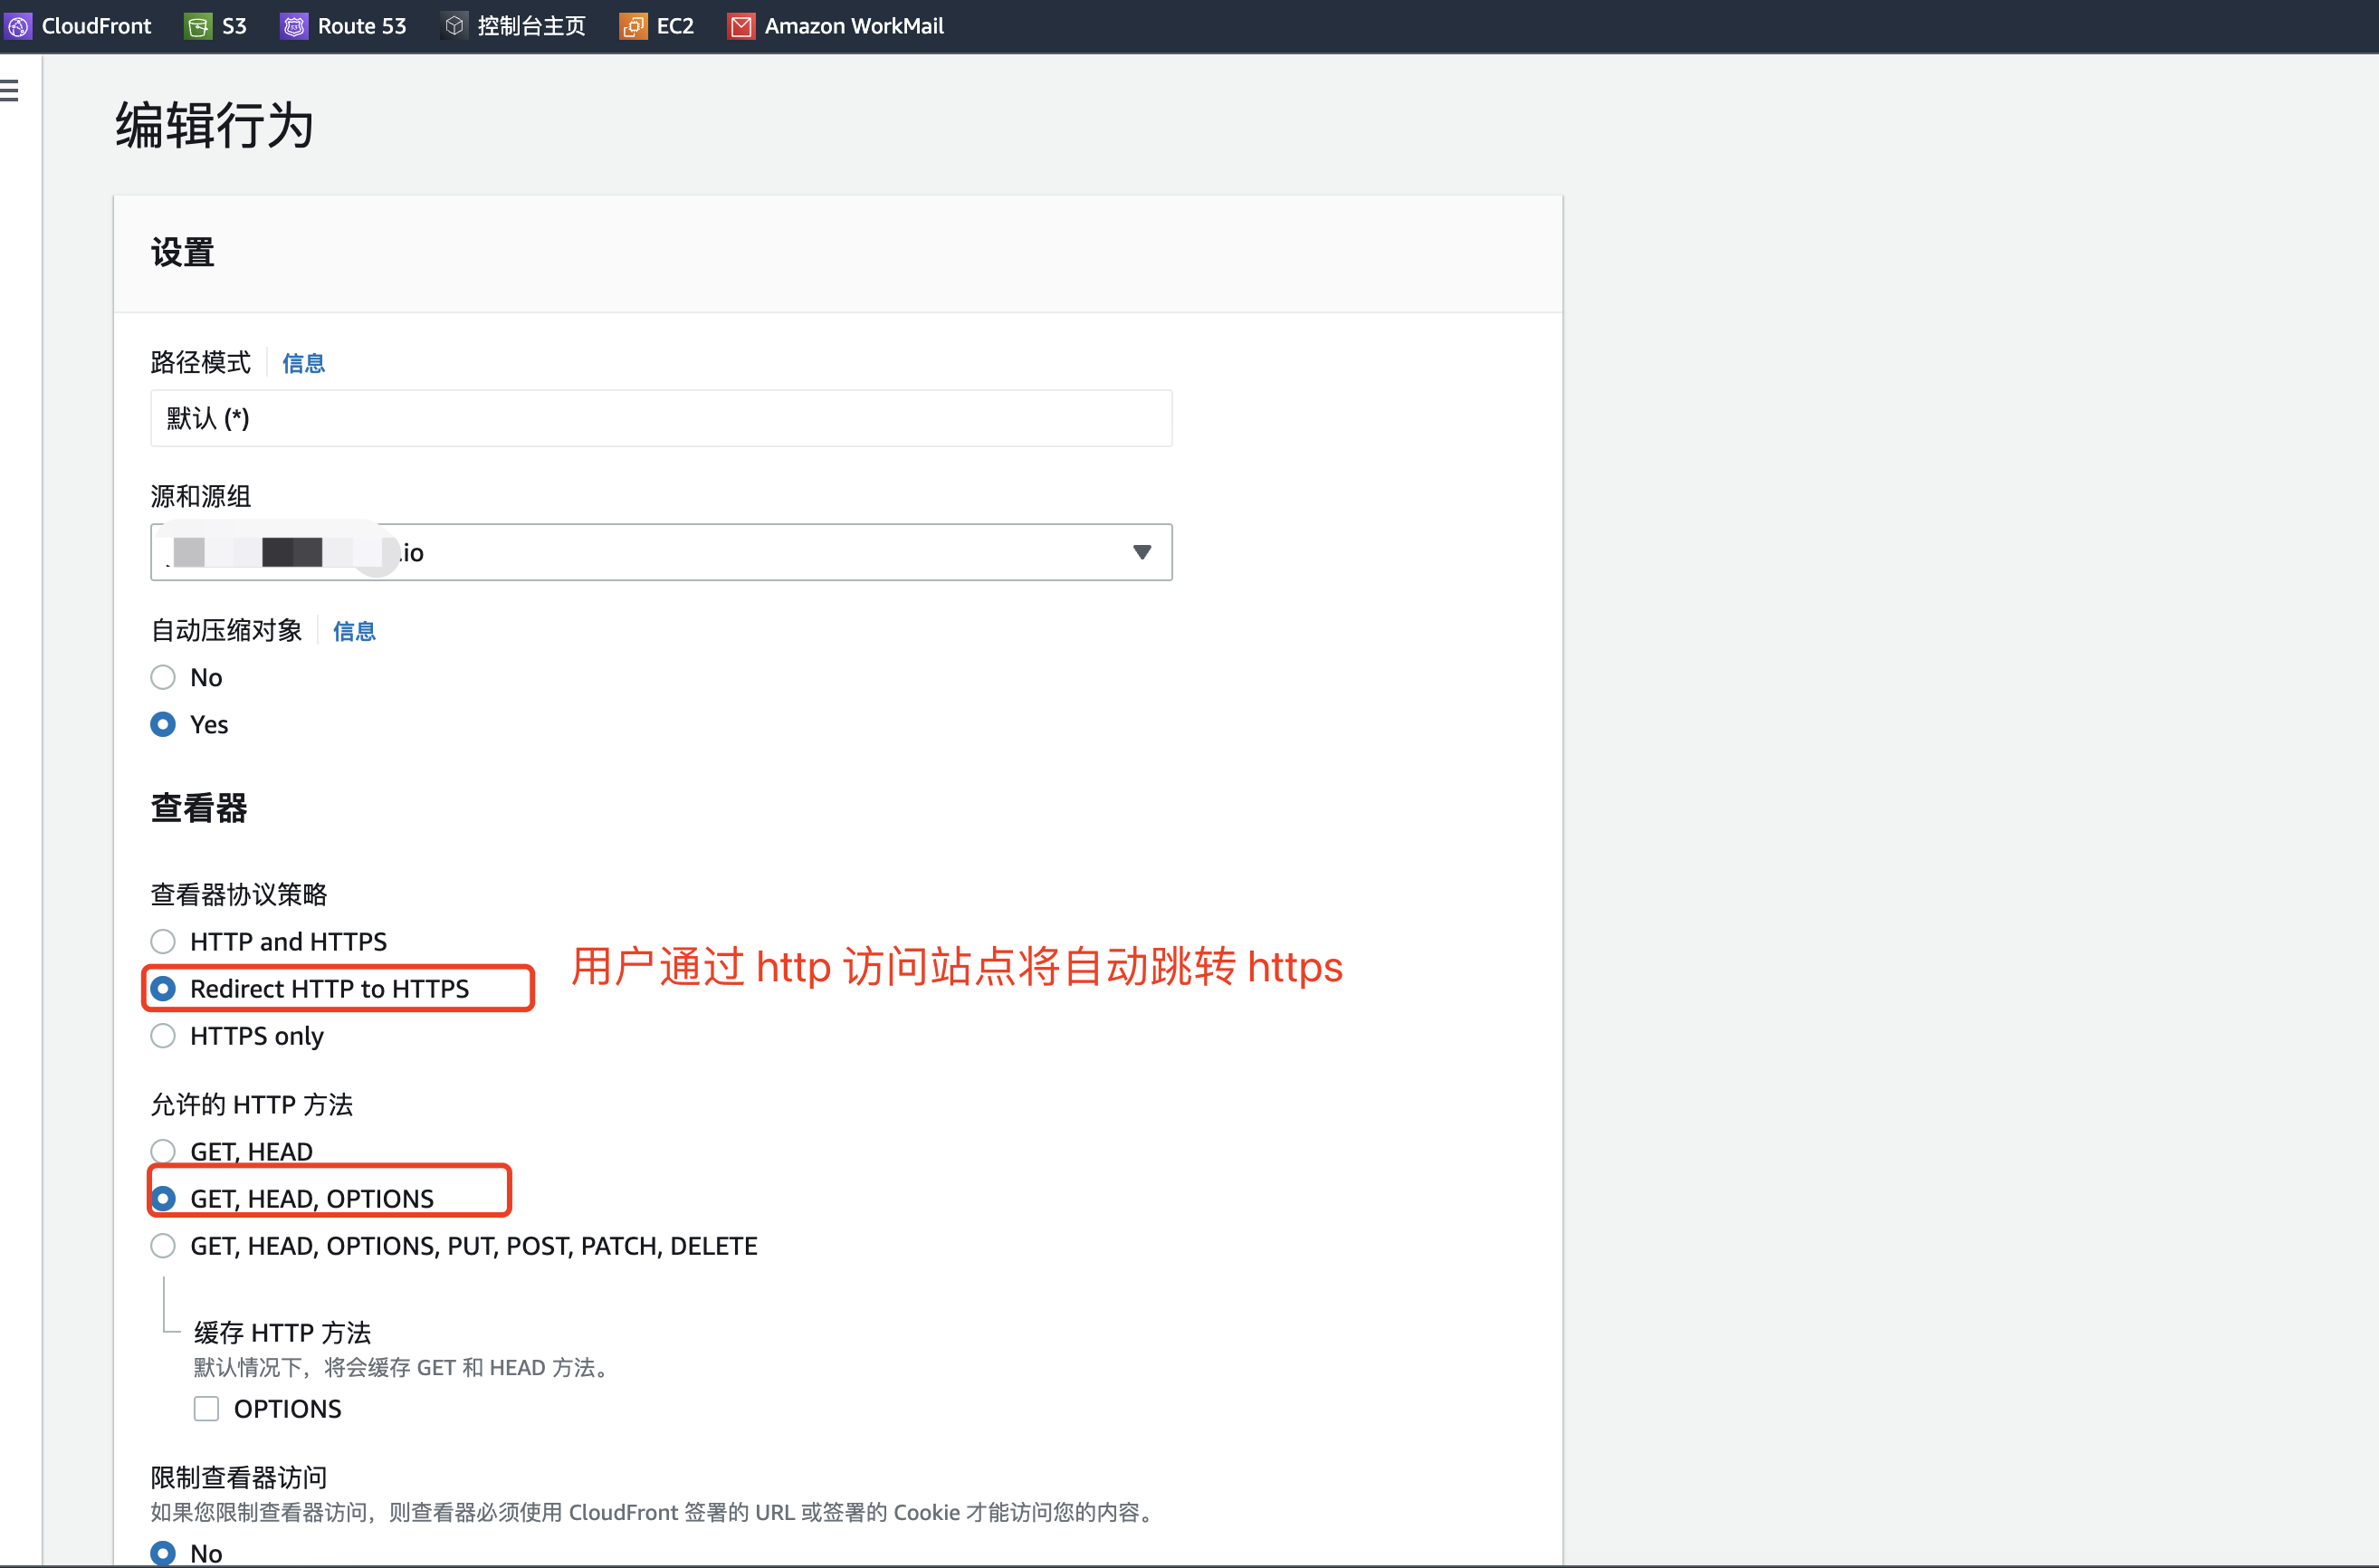
xxxxxxxxxxdf -hAWS CloudFront
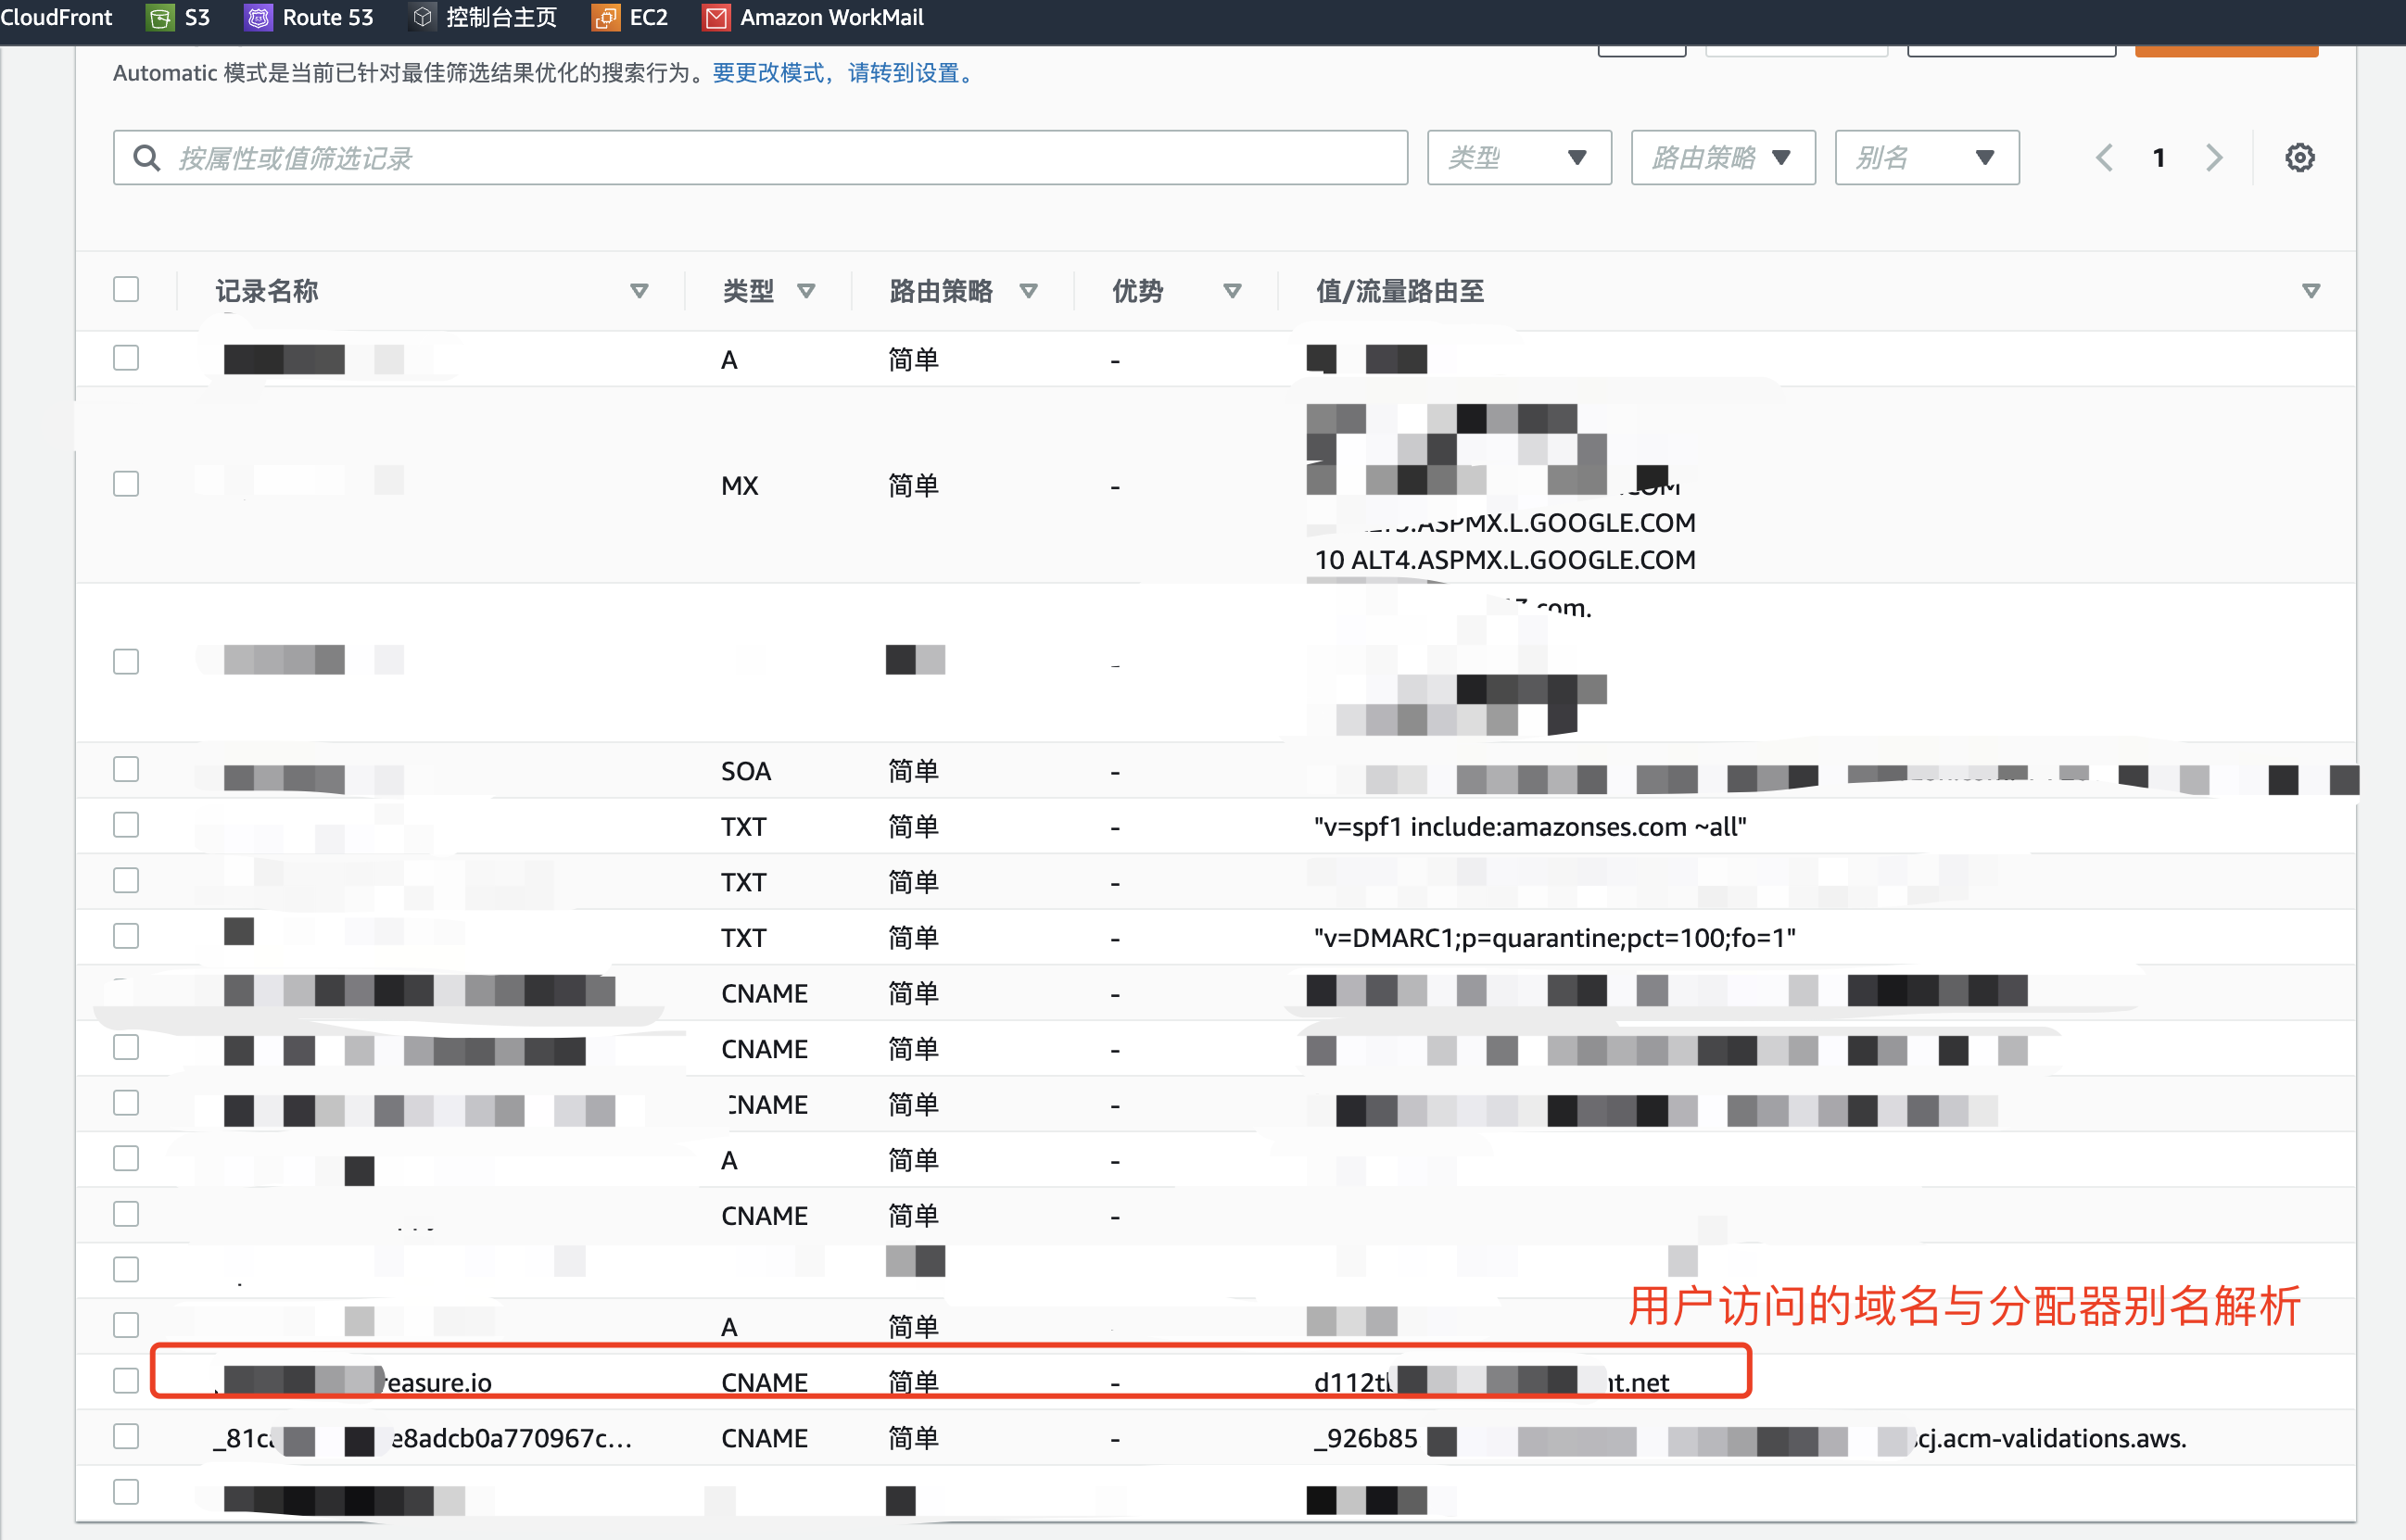
整体逻辑:用户最终访问的域名 -> 域名解析中 CNAME 解析找到分配器对应的域名 -> 分配器访问源站点
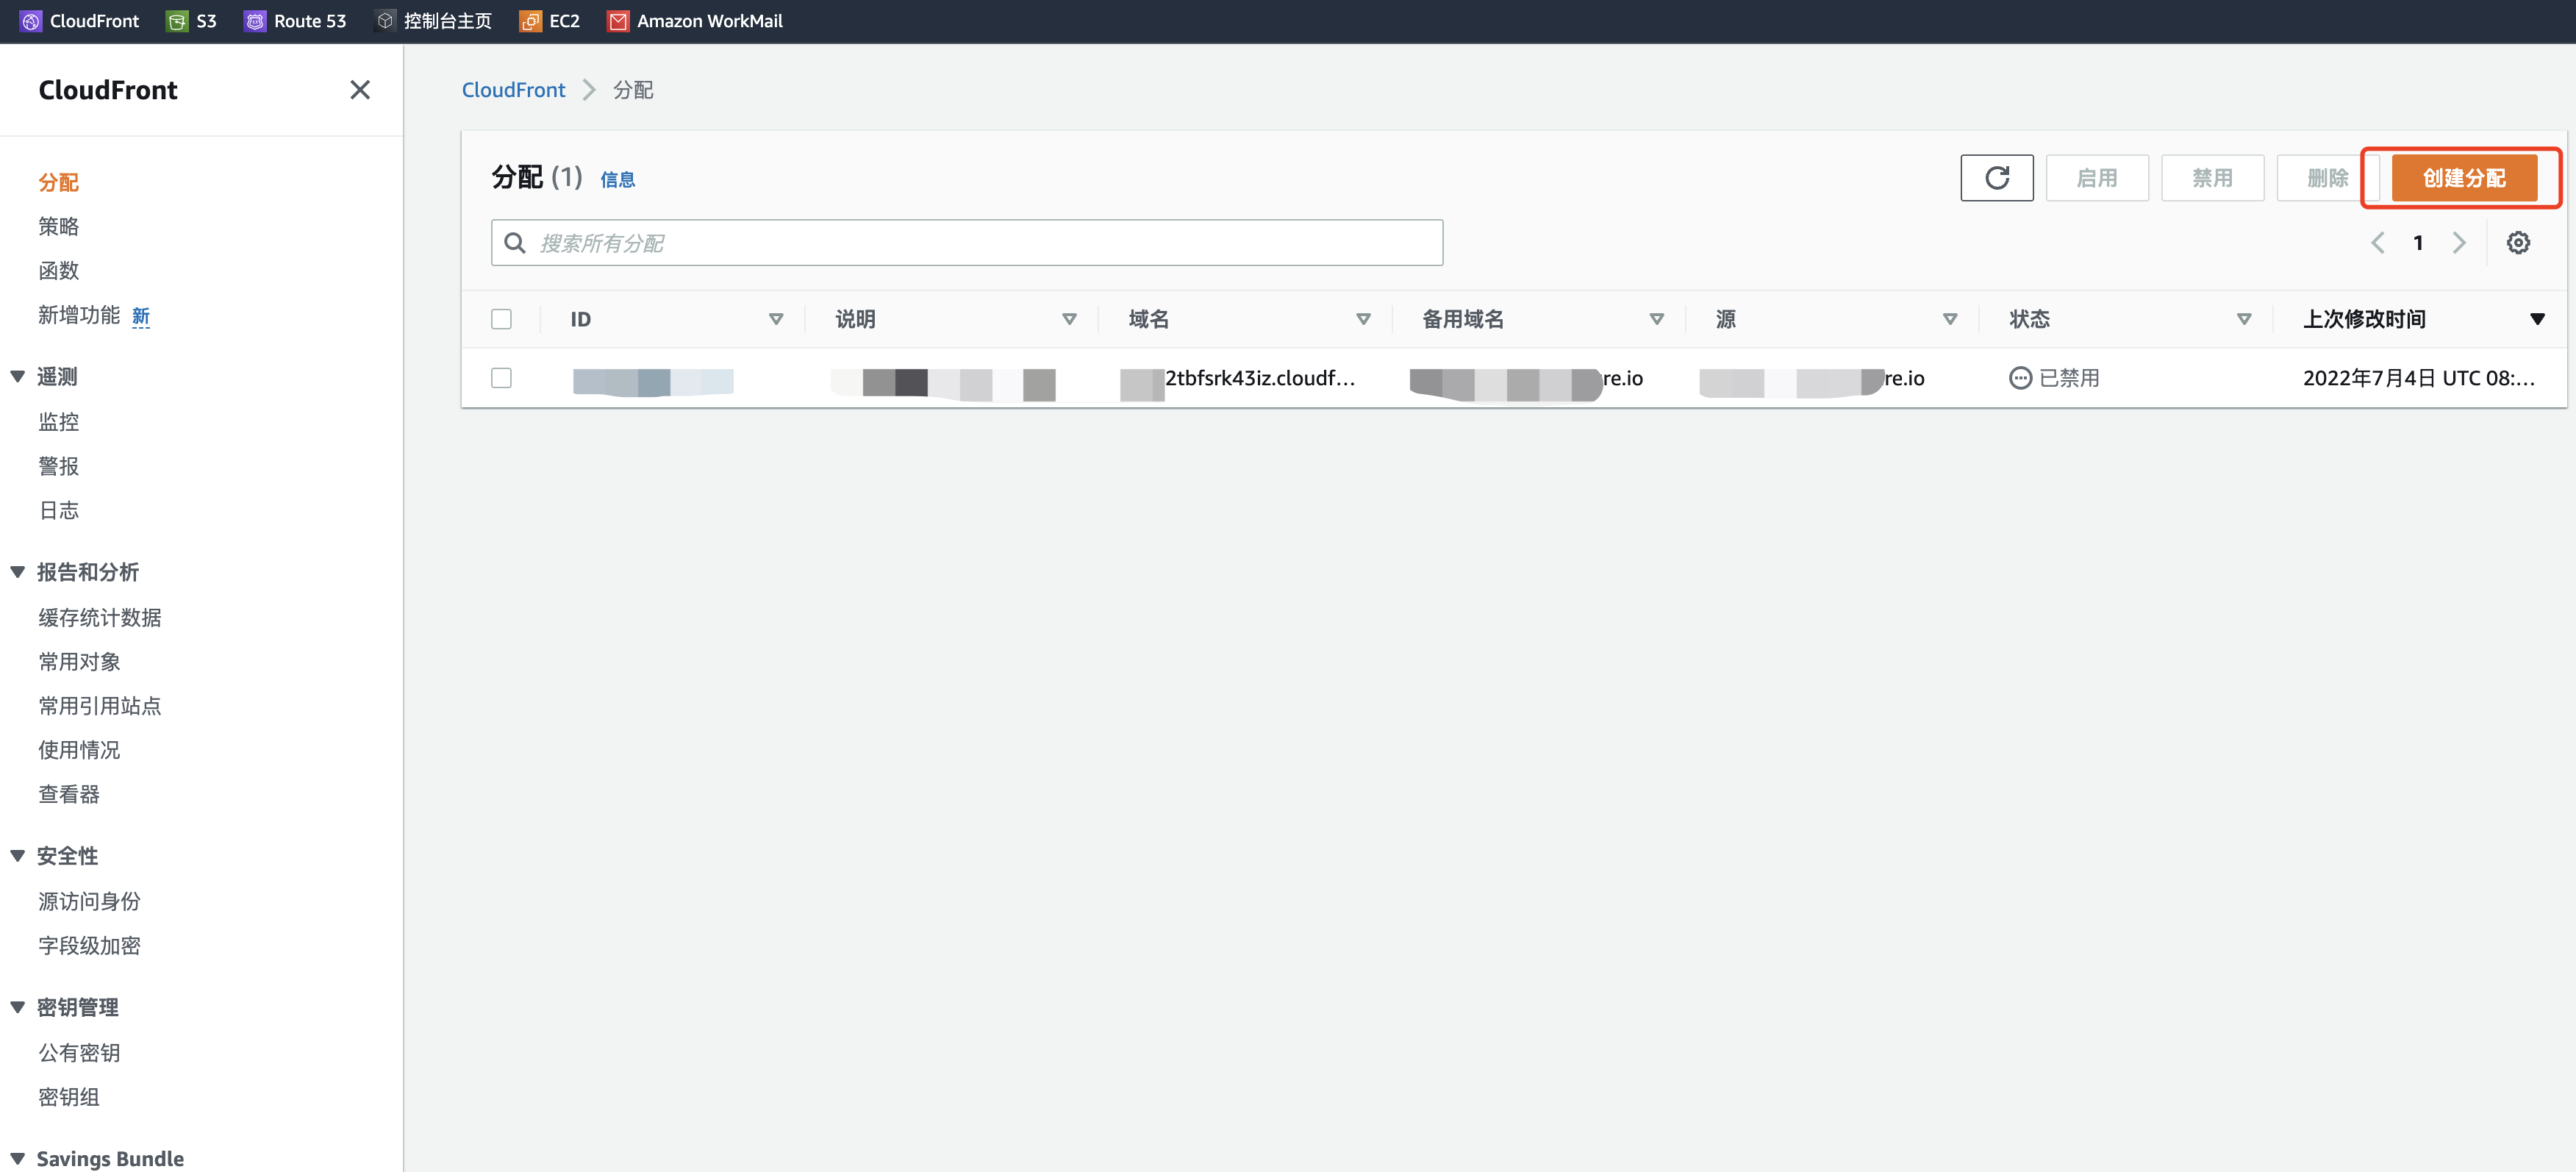
配置分配器
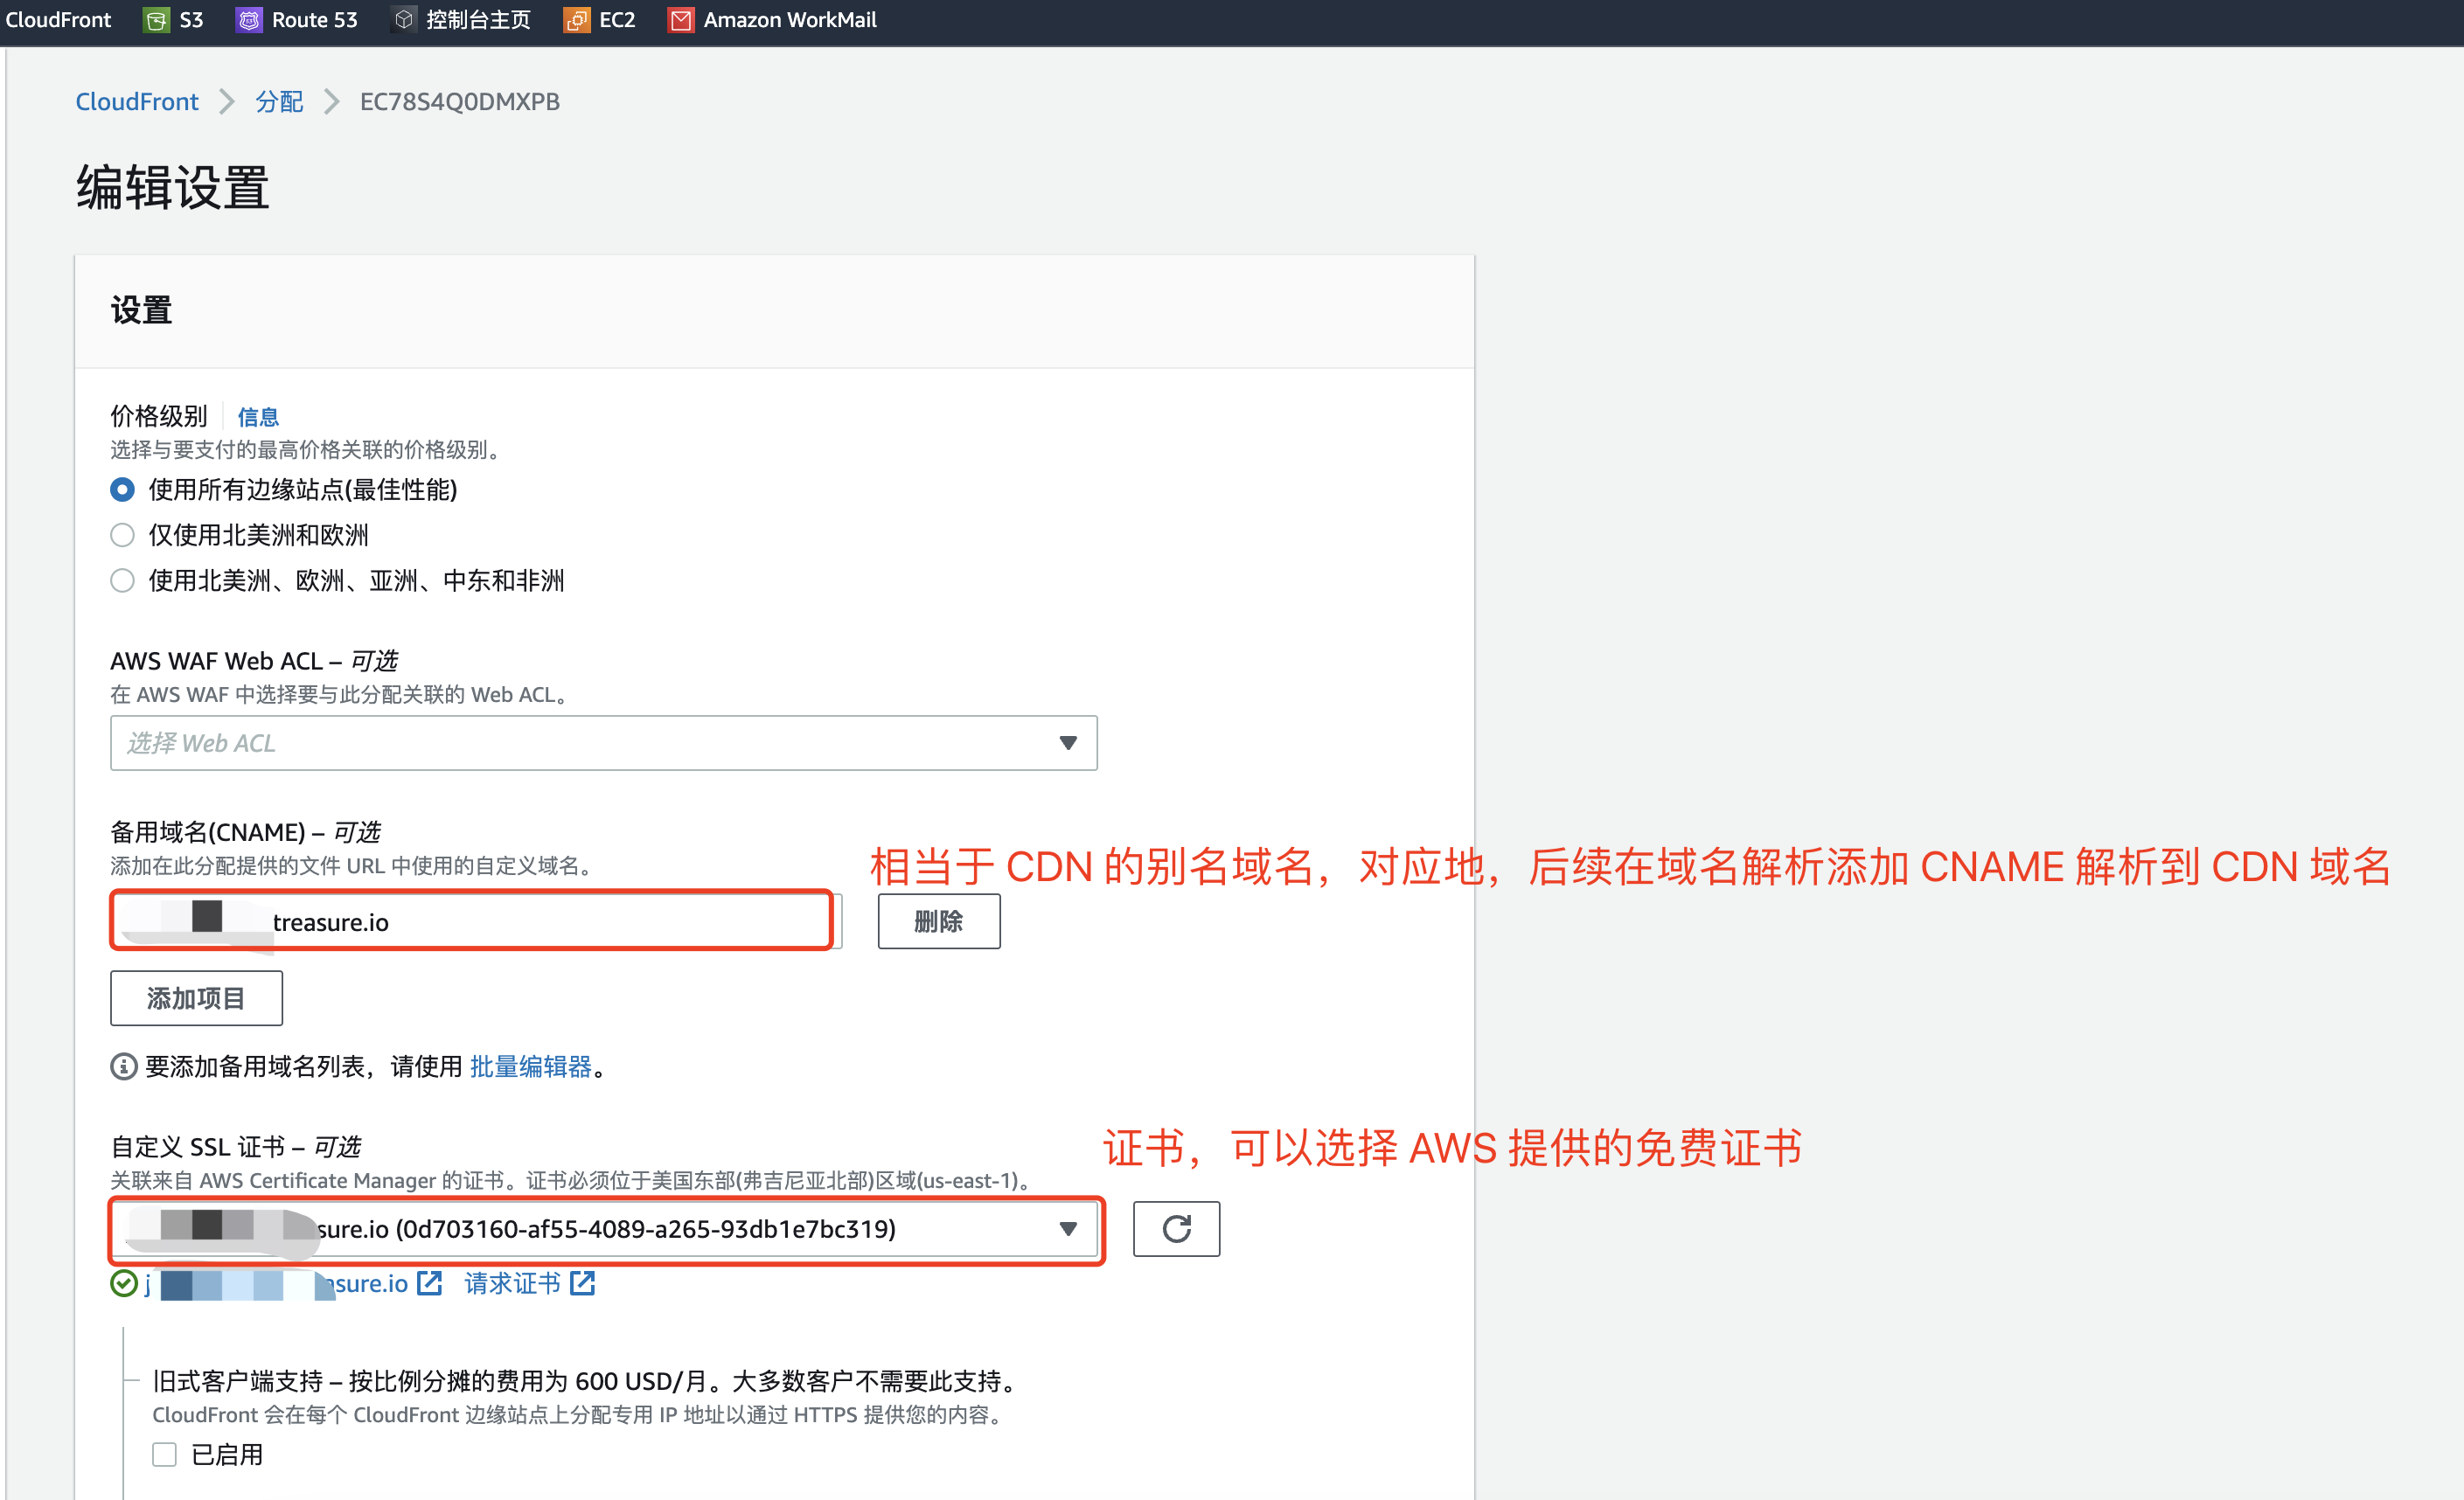

AWS CloudFront 分配器对应的域名 https://d123bfsrk43iz.cloudfront.net,备用域名填写用户最终访问的域名 X,换言之,用户通过访问 X 来访问通过 AWS CloudFront 实现加速的站点
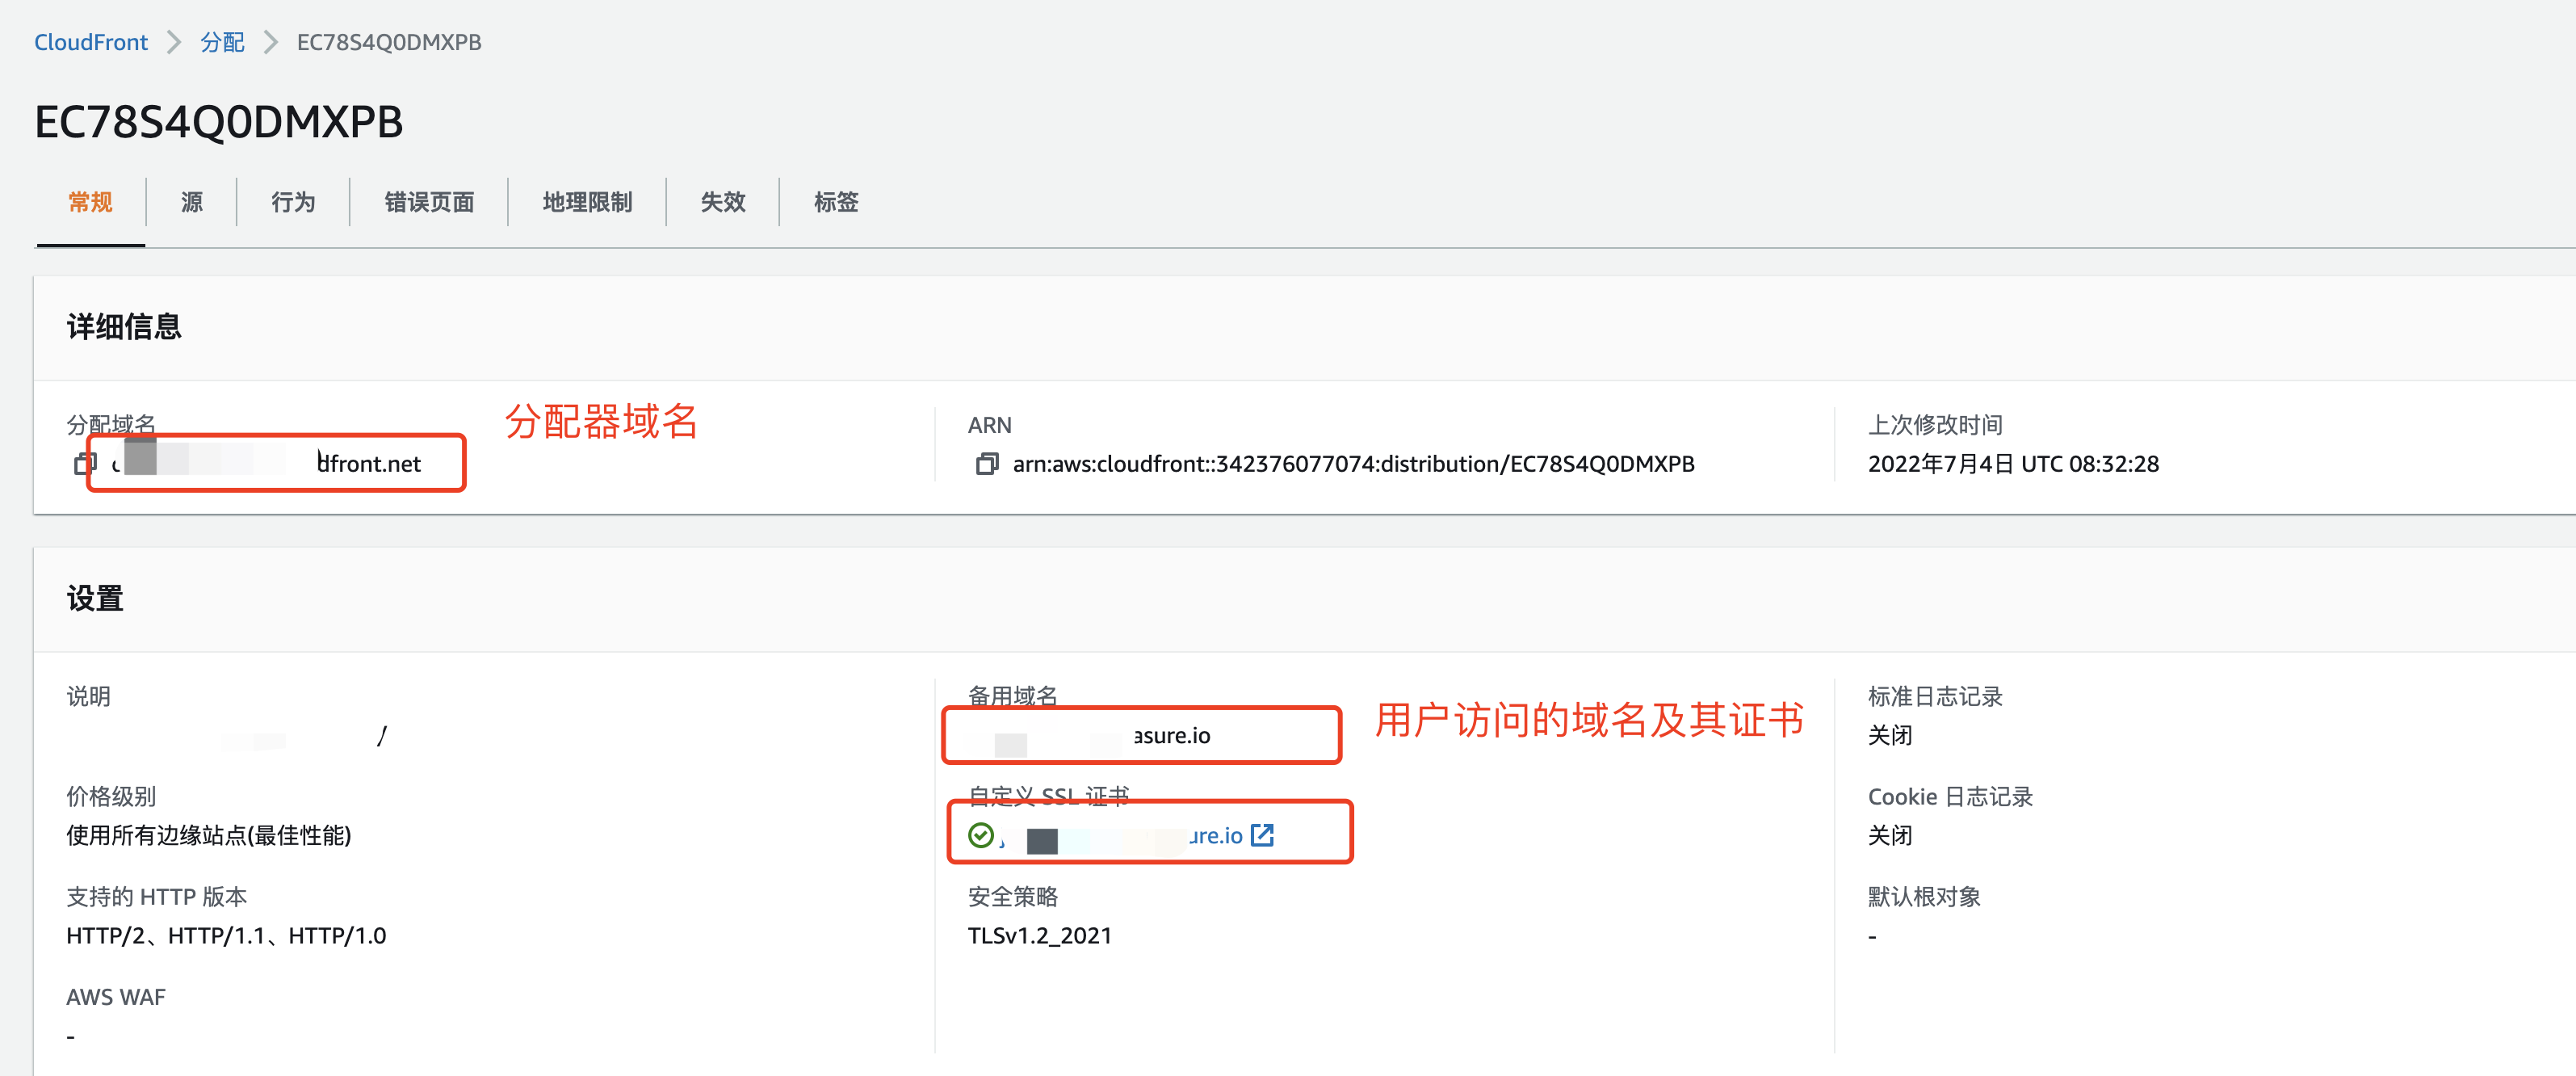
在域名解析添加 CNAME 别名解析
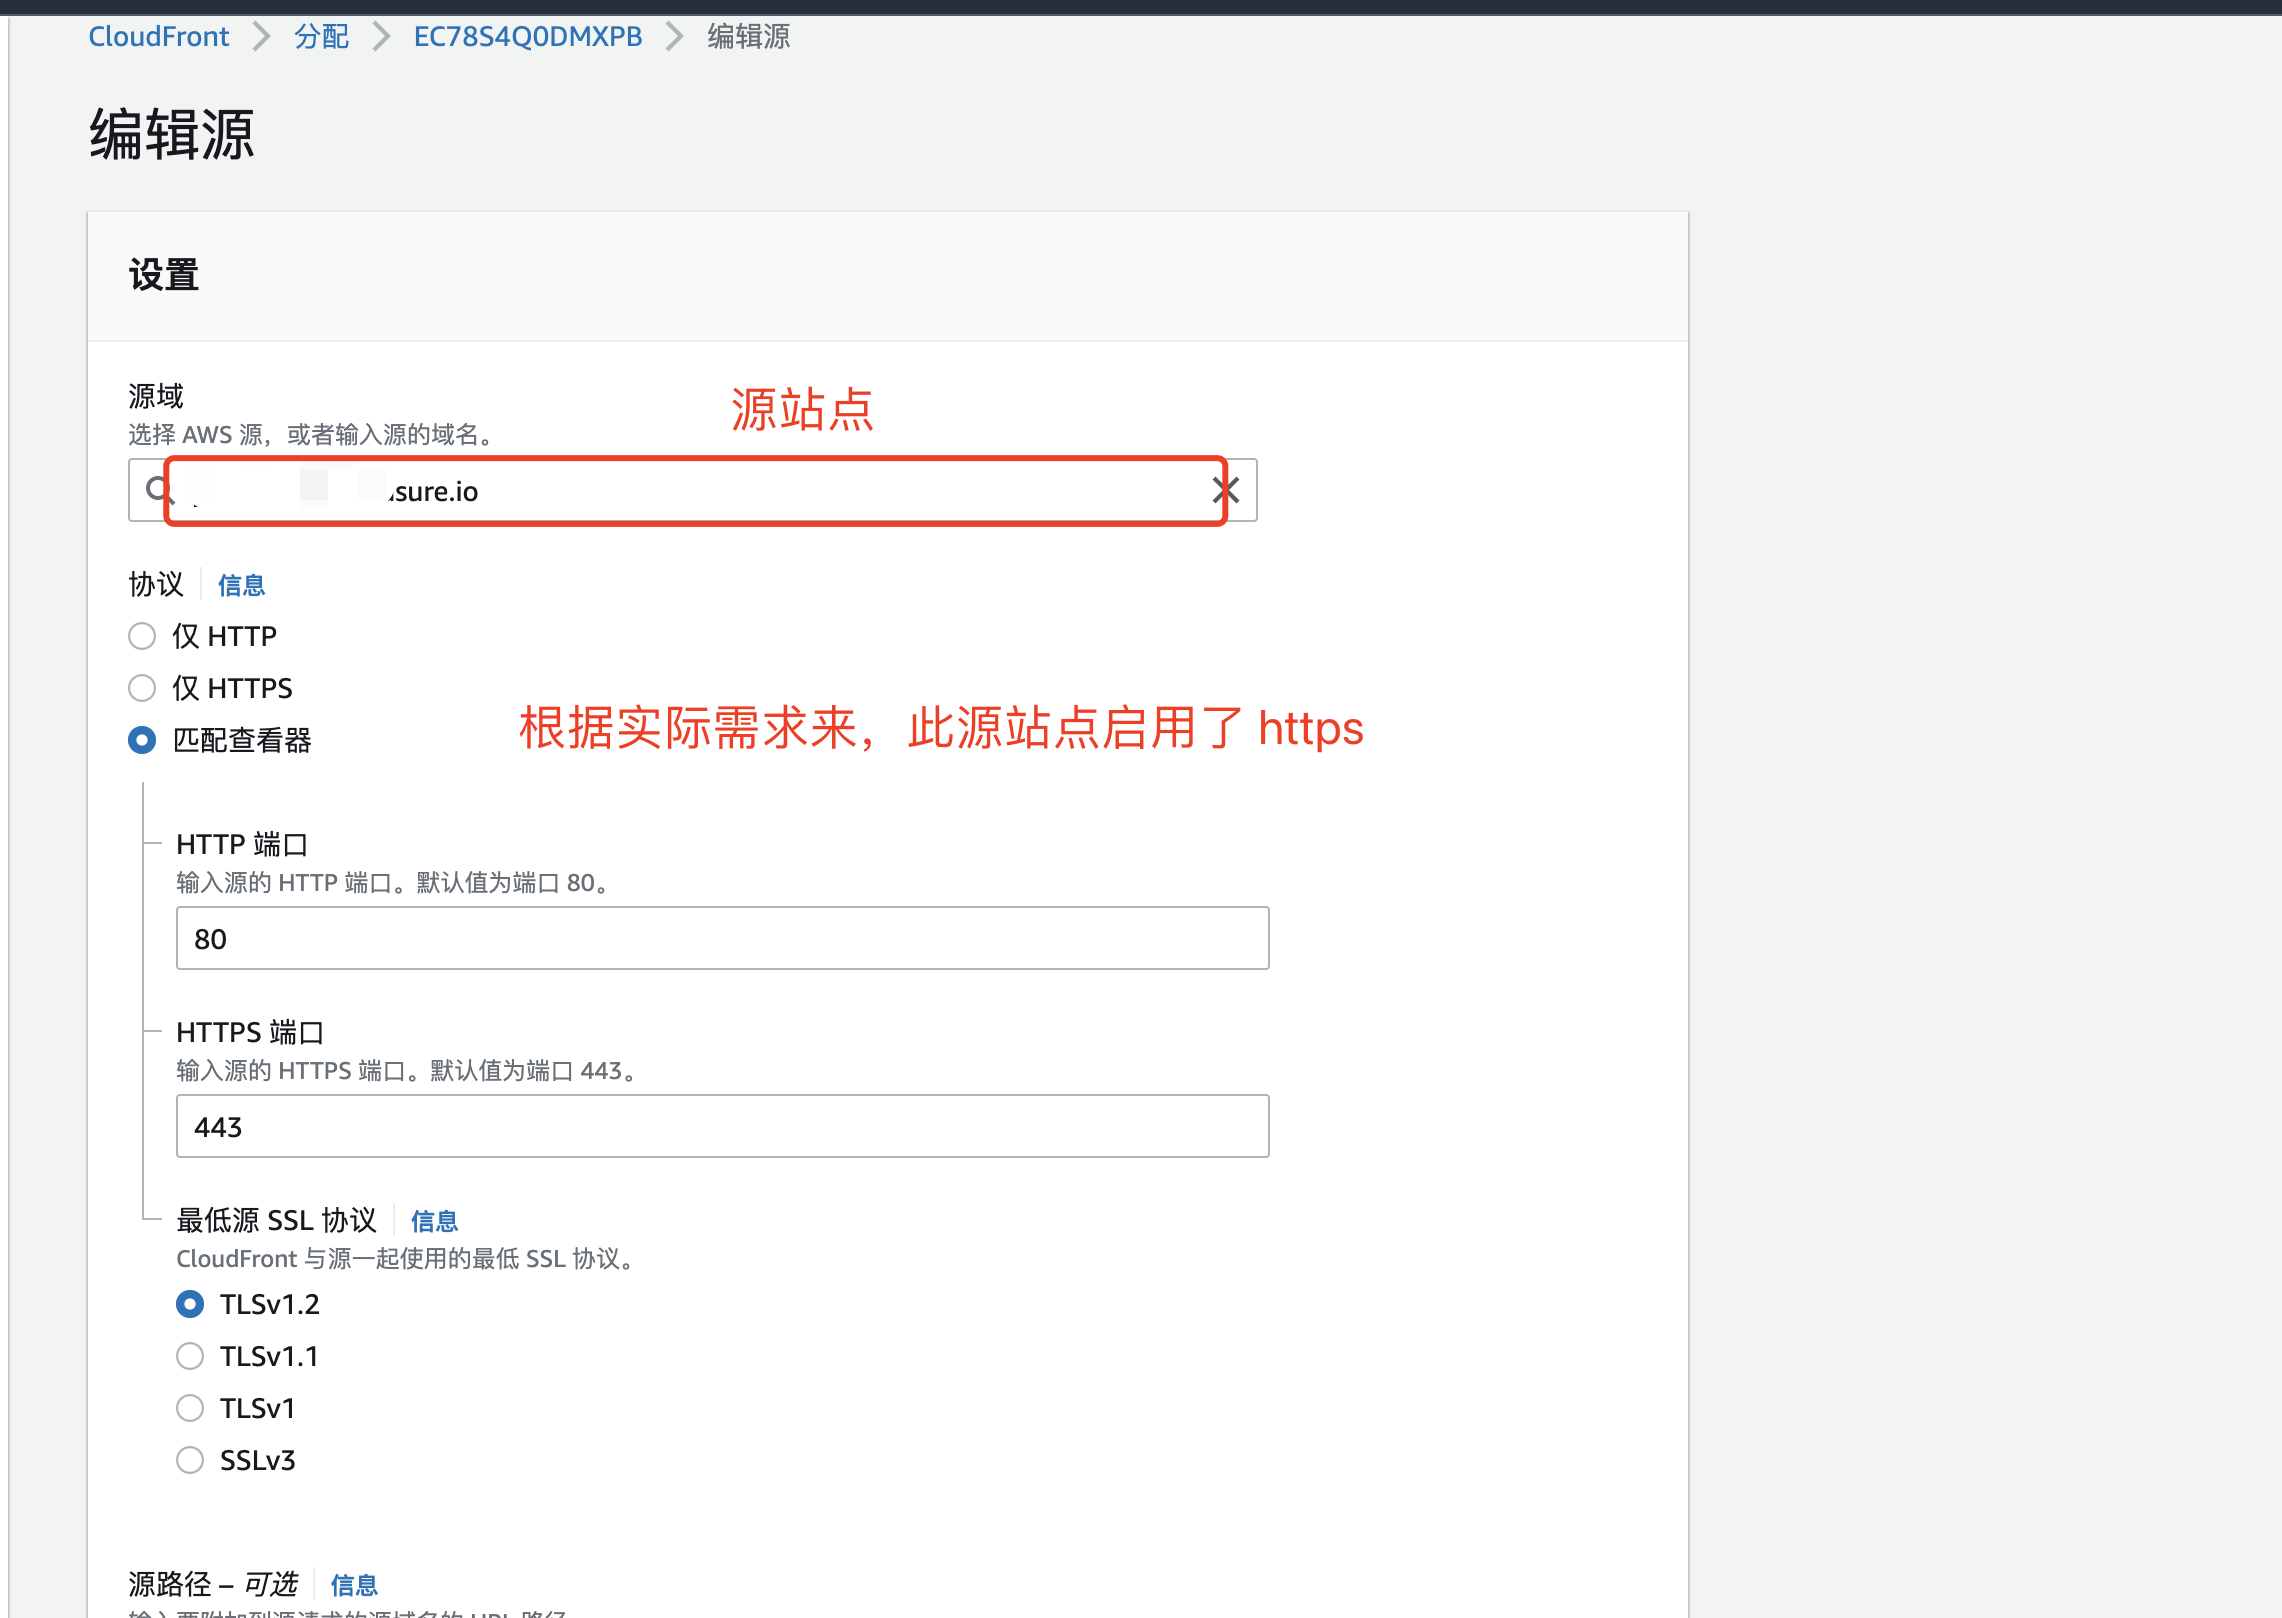
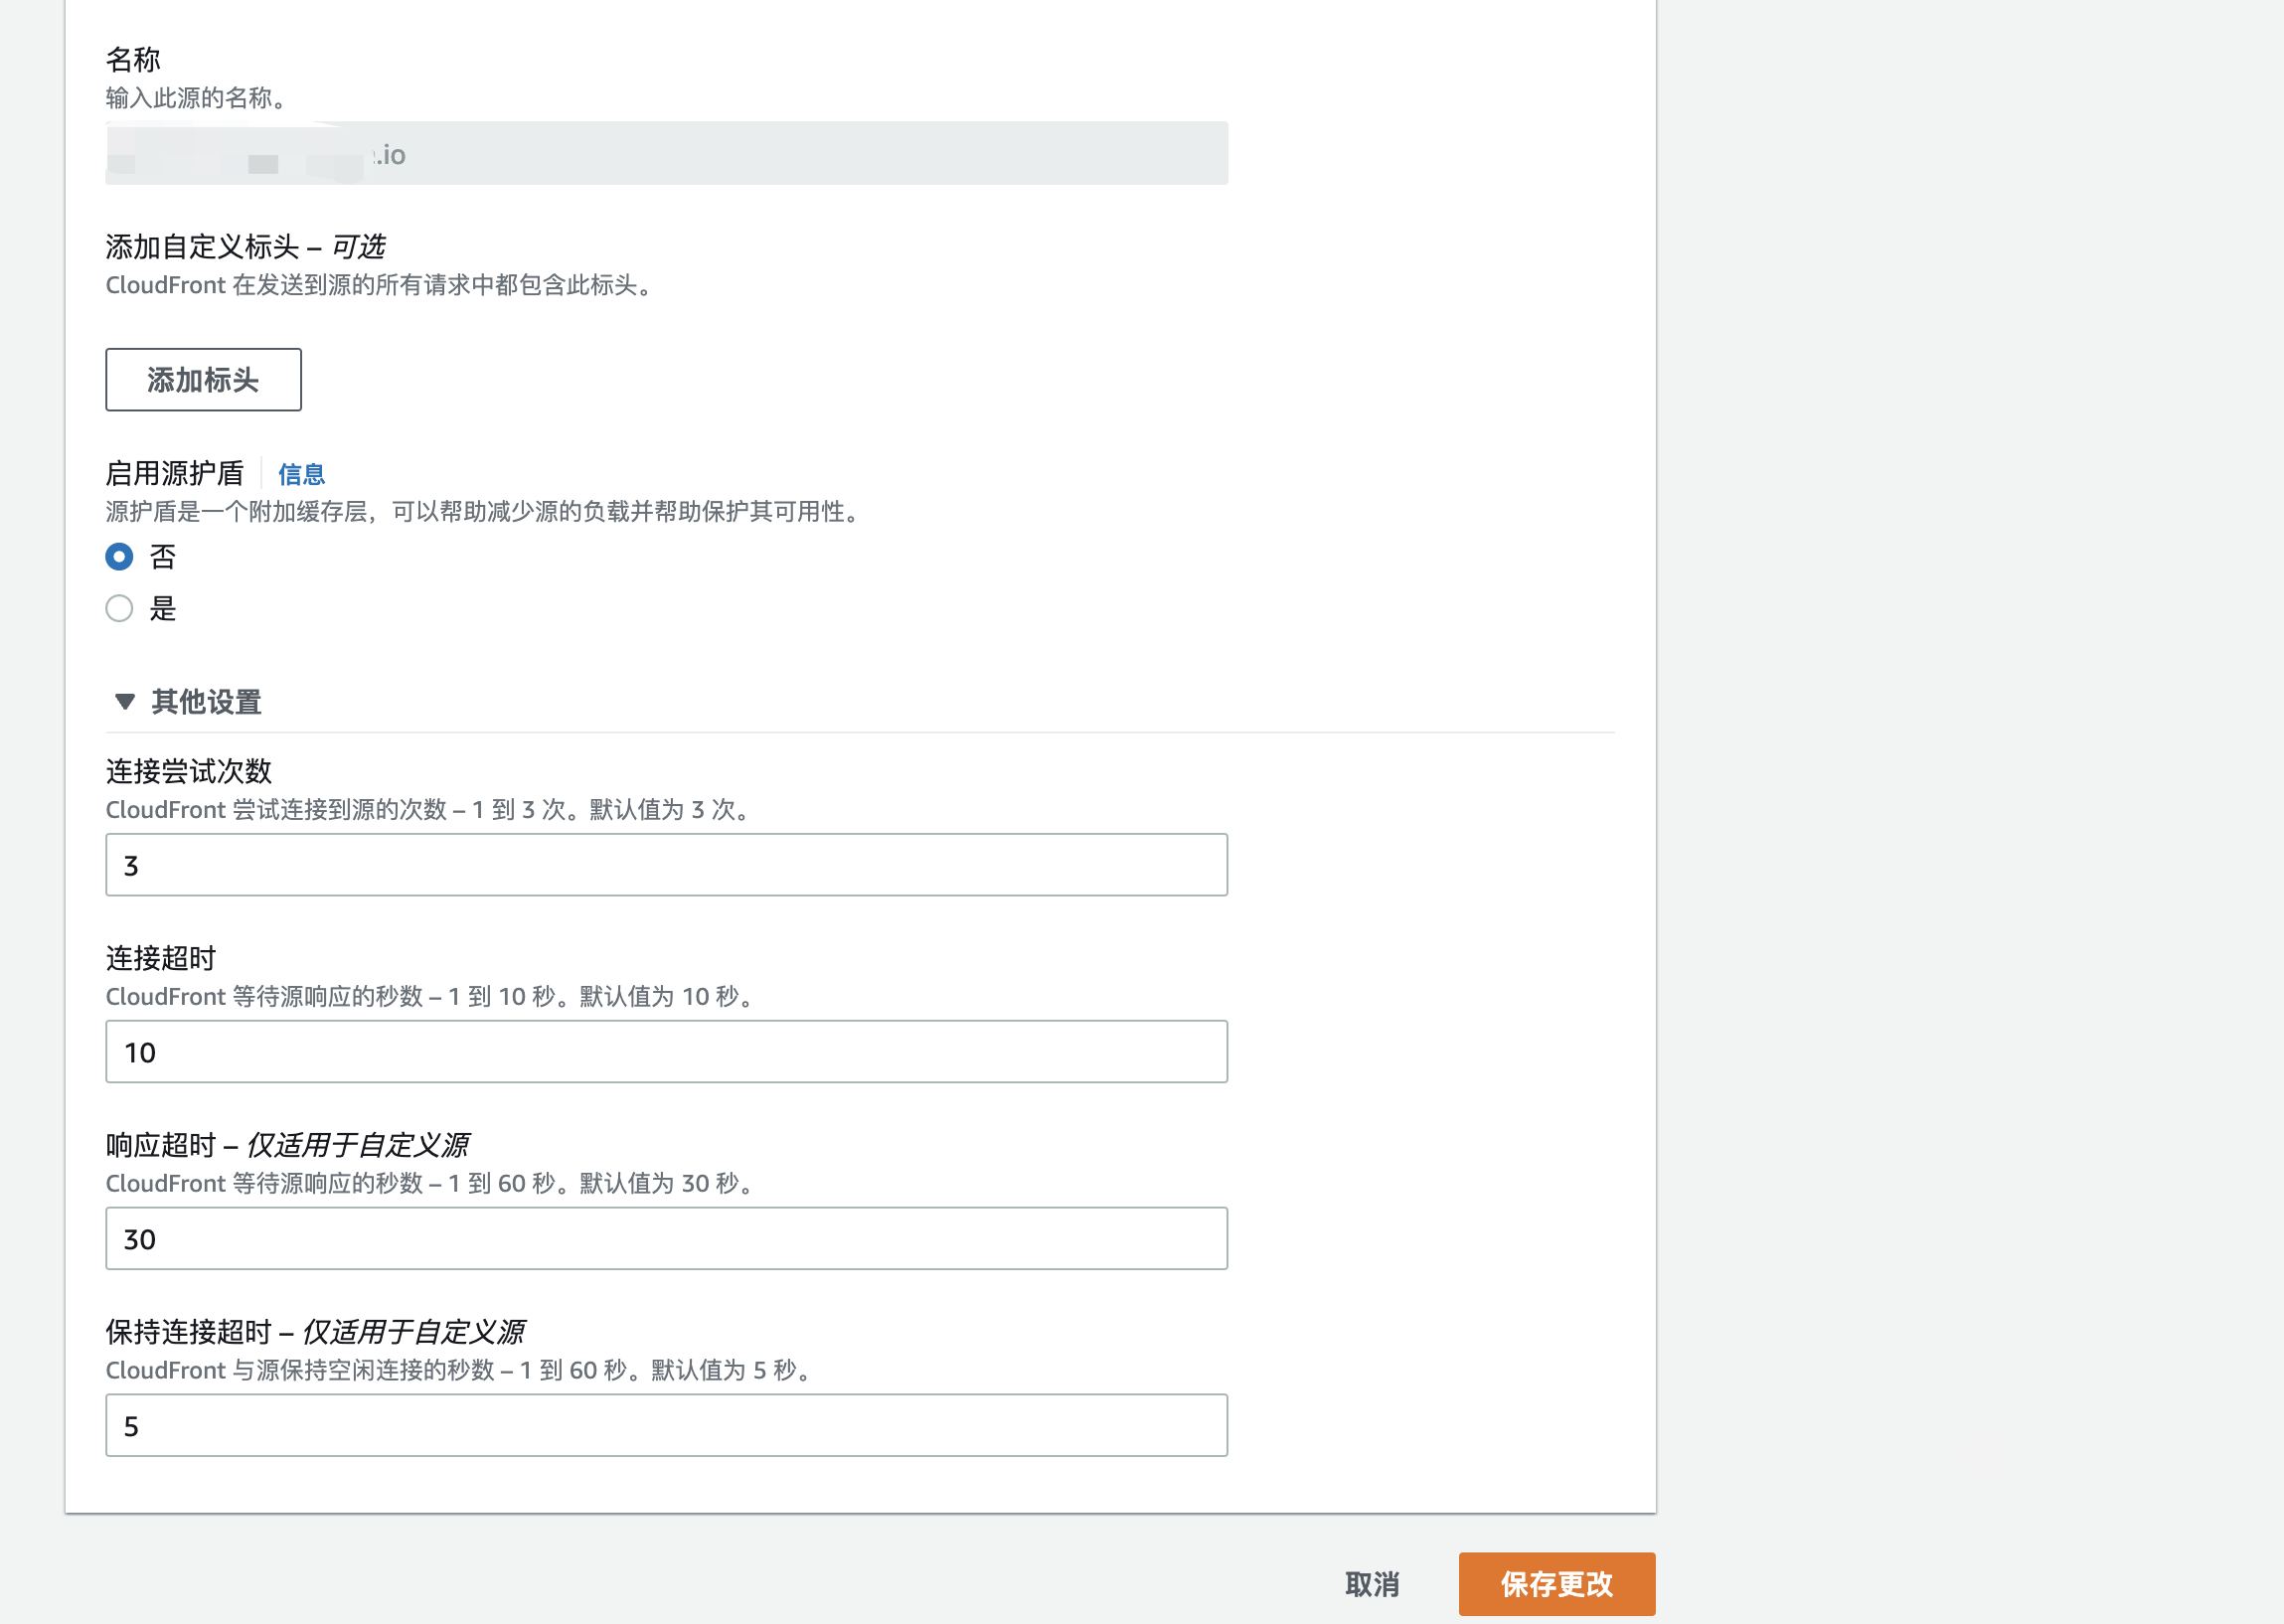
配置源
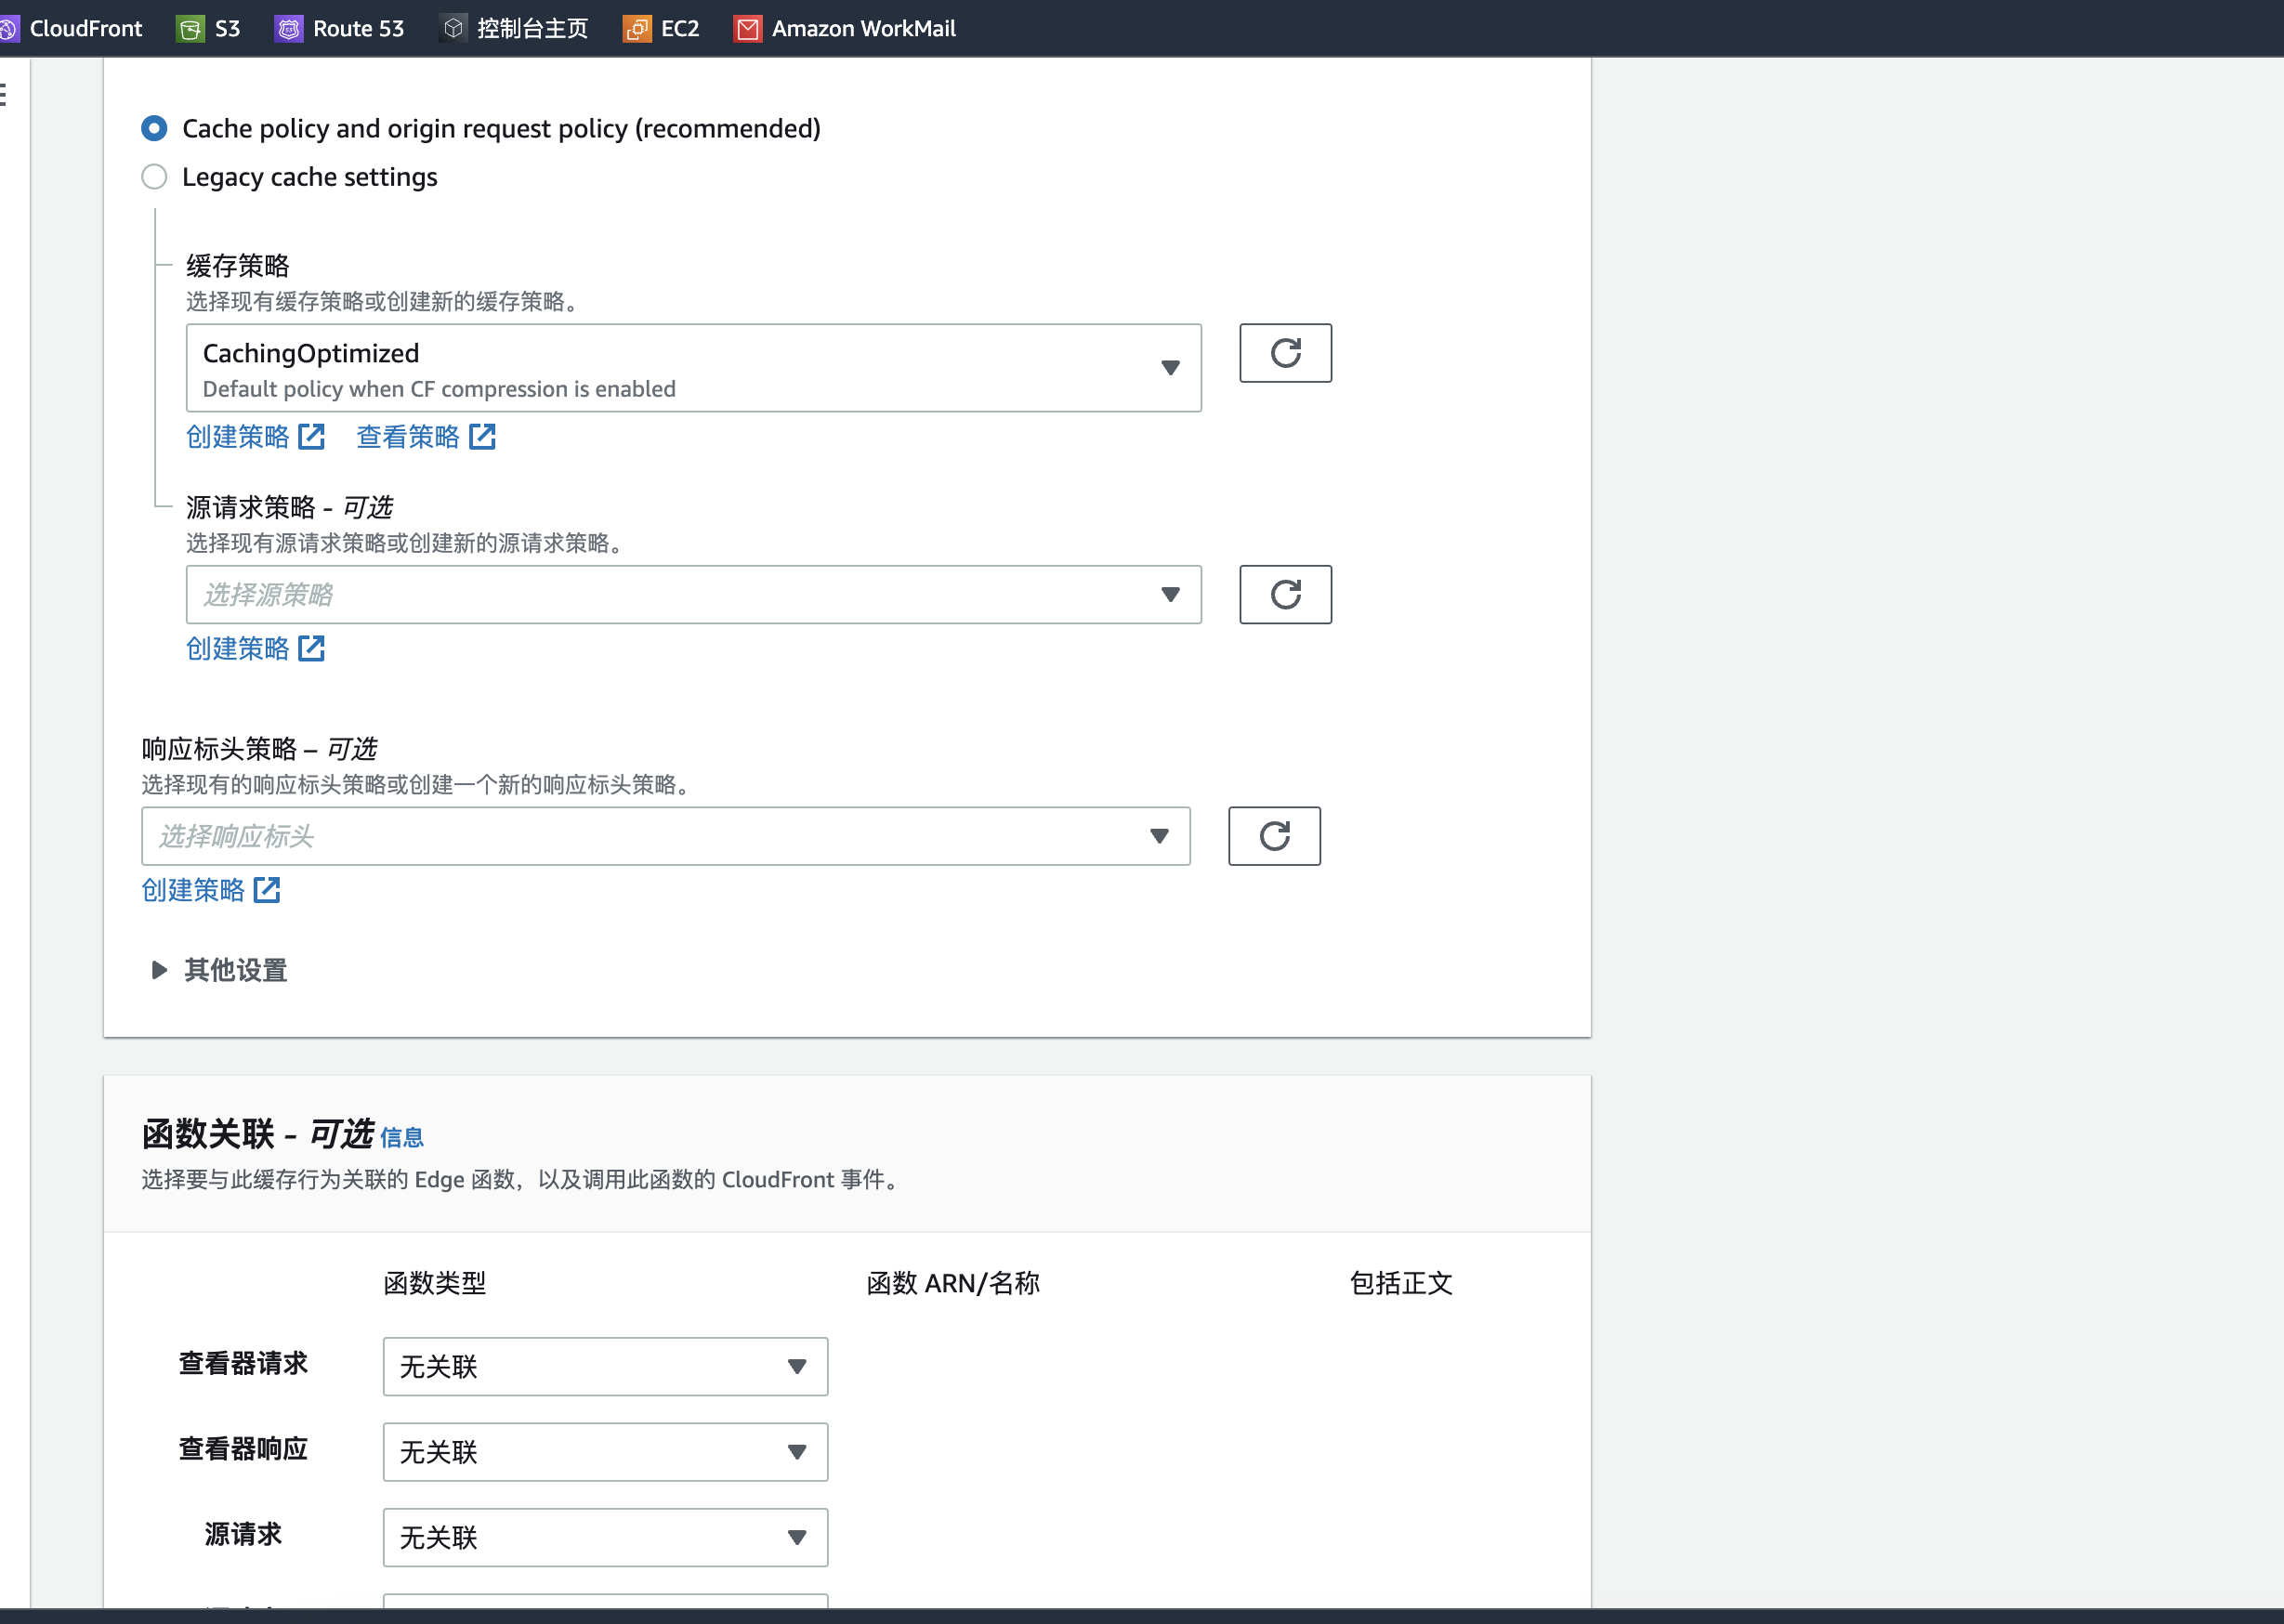
配置行为
如果要实现用户通过 http 访问站点自动跳转到 https,则选择
Redirect HTTP to HTTPS策略
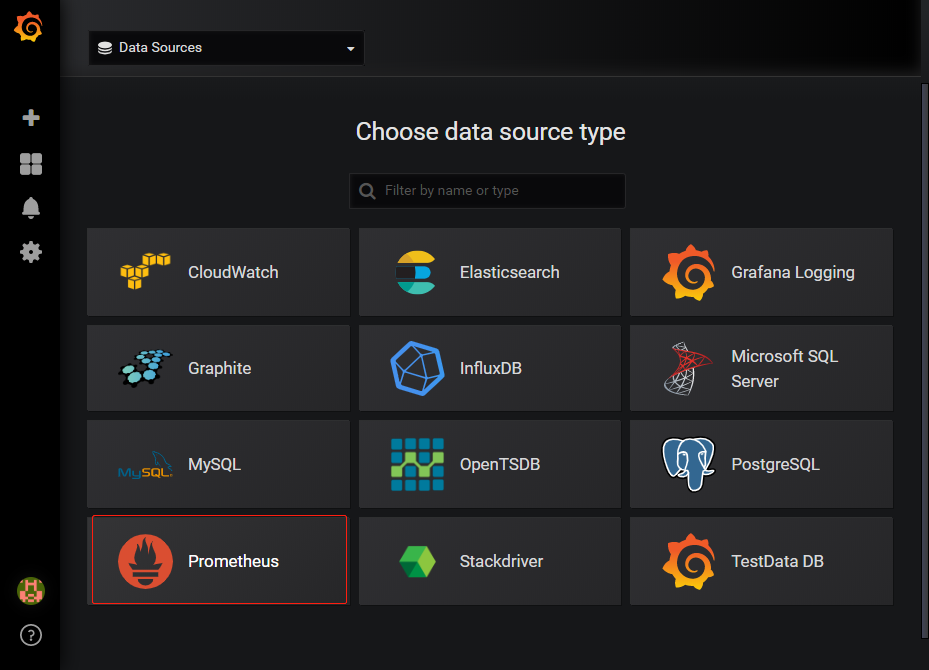
Prometheus+Grafana 监控告警
系统:CentOS 7.6
安装 prometheus
添加用户和组
xxxxxxxxxxgroupadd prometheusmkdir -p /opt/prometheususeradd -g prometheus prometheus -d /opt/prometheus下载并解压 prometheus
xxxxxxxxxxcd ~wget https://github.com/prometheus/prometheus/releases/download/v2.5.0/prometheus-2.5.0.linux-amd64.tar.gztar -xvf prometheus-2.5.0.linux-amd64.tar.gzcd prometheus-2.5.0.linux-amd64/mv * /opt/prometheus/创建运行目录
xxxxxxxxxxcd /opt/prometheus/mkdir {data,cfg,logs,bin} -pmv prometheus promtool bin/mv prometheus.yml cfg/目录授权
xxxxxxxxxxchown -R prometheus.prometheus /opt/prometheus添加环境变量
xxxxxxxxxxvim /etc/profileexport PATH=/opt/prometheus/bin:$PATH:$HOME/binsource /etc/profile创建启动服务
xxxxxxxxxxvim /etc/systemd/system/prometheus.service
[Unit]Description=PrometheusDocumentation=https://prometheus.io/After=network.target
[Service]Type=simpleUser=prometheusExecStart=/opt/prometheus/bin/prometheus --config.file=/opt/prometheus/cfg/prometheus.yml --storage.tsdb.path=/opt/prometheus/dataRestart=on-failure
[Install]WantedBy=multi-user.target
启动服务
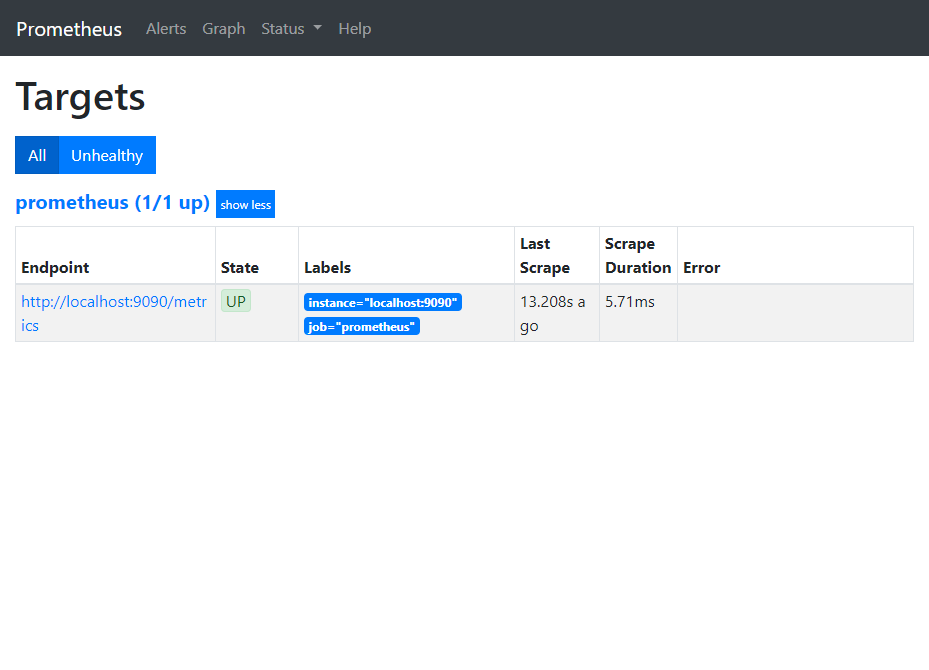
xxxxxxxxxxsystemctl daemon-reloadsystemctl enable prometheus.servicesystemctl start prometheus.service验证服务
通过 http://<host>:9090 可以访问 prometheus,并查看信息
安装 grafana
下载并安装
xxxxxxxxxxwget https://dl.grafana.com/oss/release/grafana-5.4.0-1.x86_64.rpmyum localinstall grafana-5.4.0-1.x86_64.rpm启动服务
xxxxxxxxxxsystemctl daemon-reloadsystemctl enable grafana-server.servicesystemctl start grafana-server.service验证服务
通过 http://<host>:3000 可以访问 grafana,默认账户密码 admin/admin,并查看信息

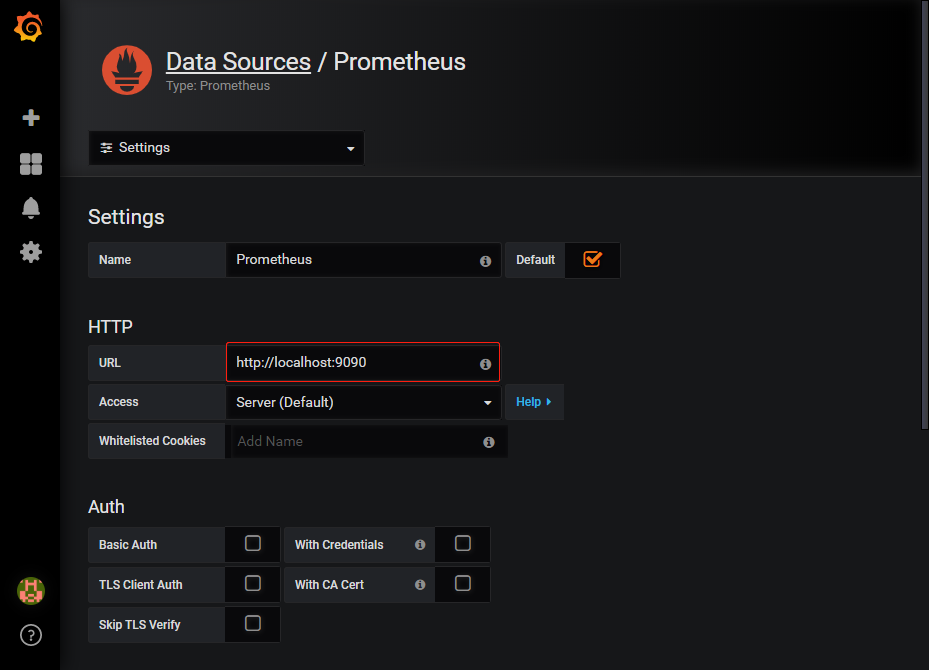
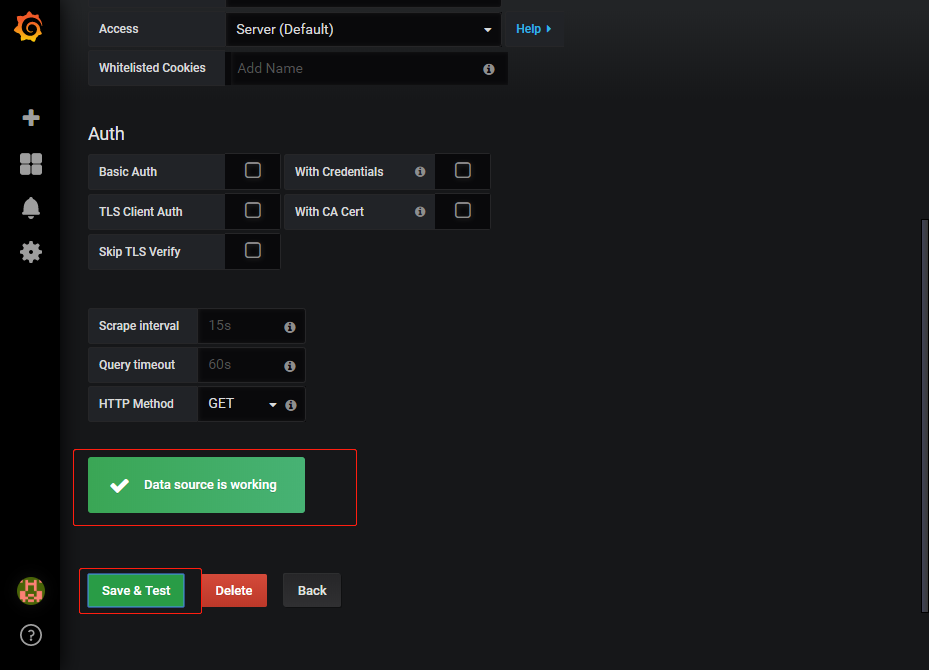
添加 prometheus 数据源
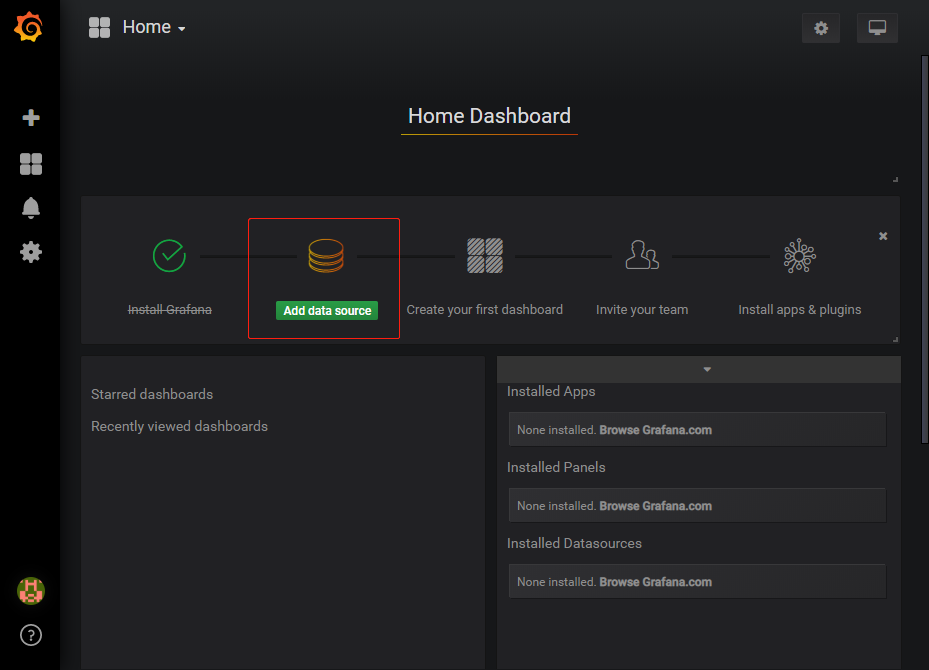
选择 prometheus 数据源
填写 URL,点击测试并保存
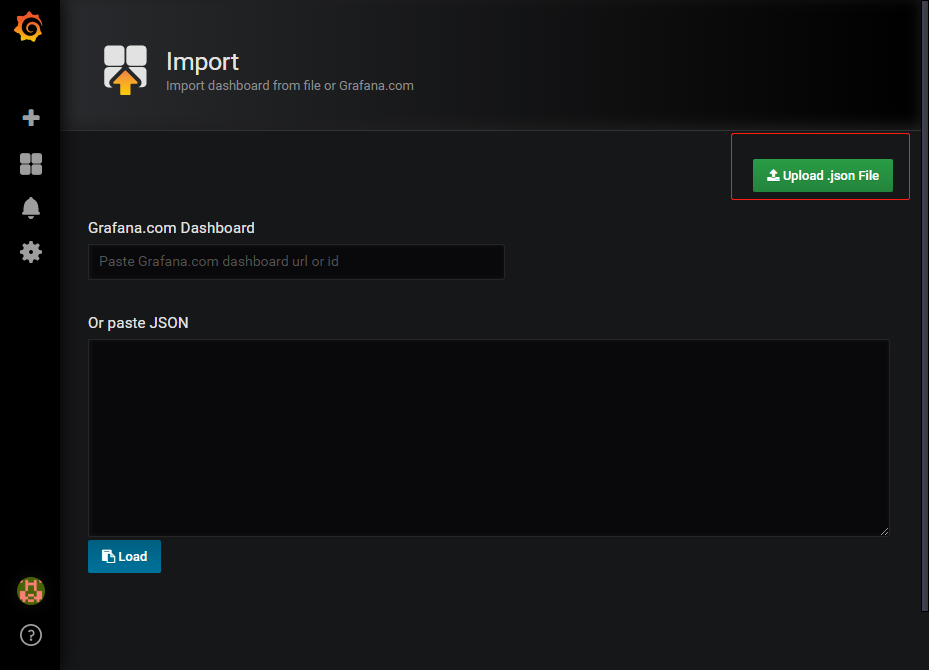
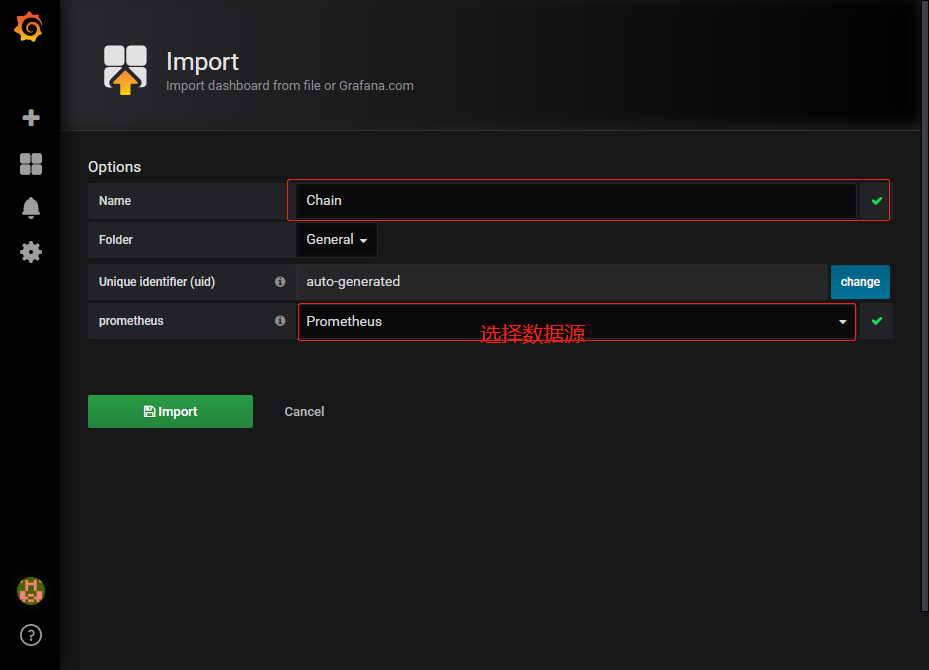
配置监控面板
添加监控面板有两种方式,其一为新建,其二使用之前面板的配置文件,导入即可。此处,使用导入原配置文件。
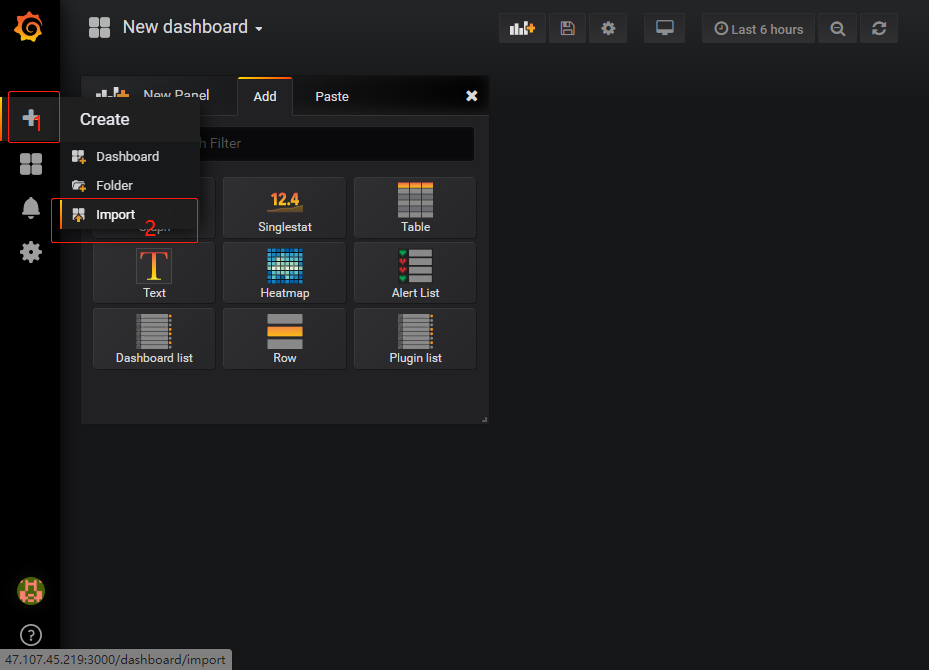
可以选择上传本地配置文件或者粘贴配置文件内容
选择之前配置好的 prometheus 数据源
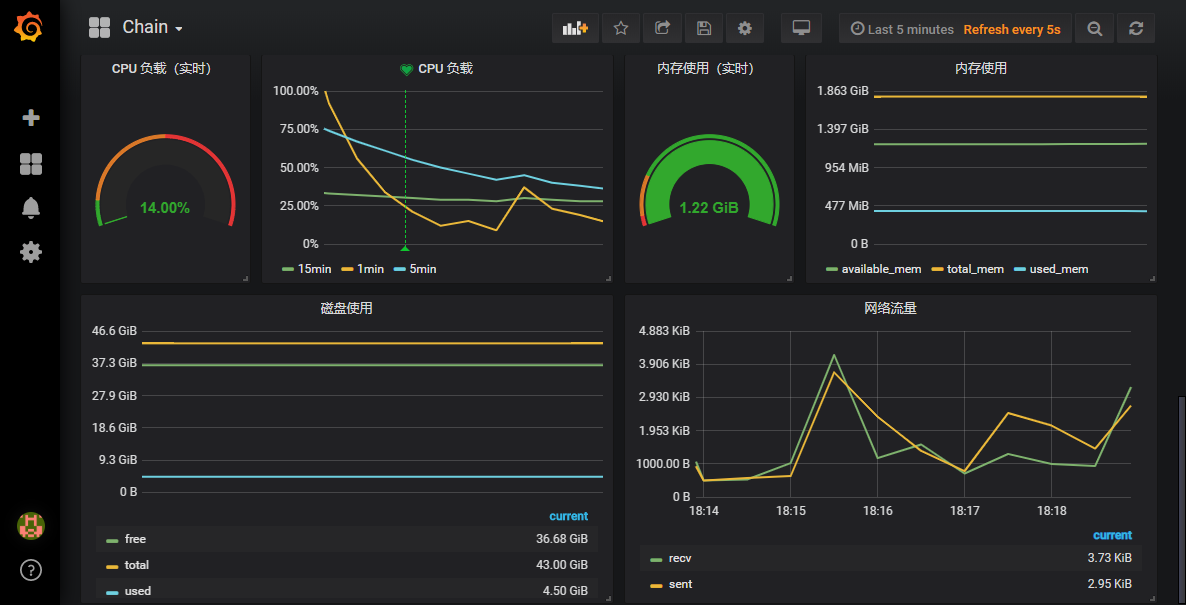
将数据可视化效果如下所示
配置告警
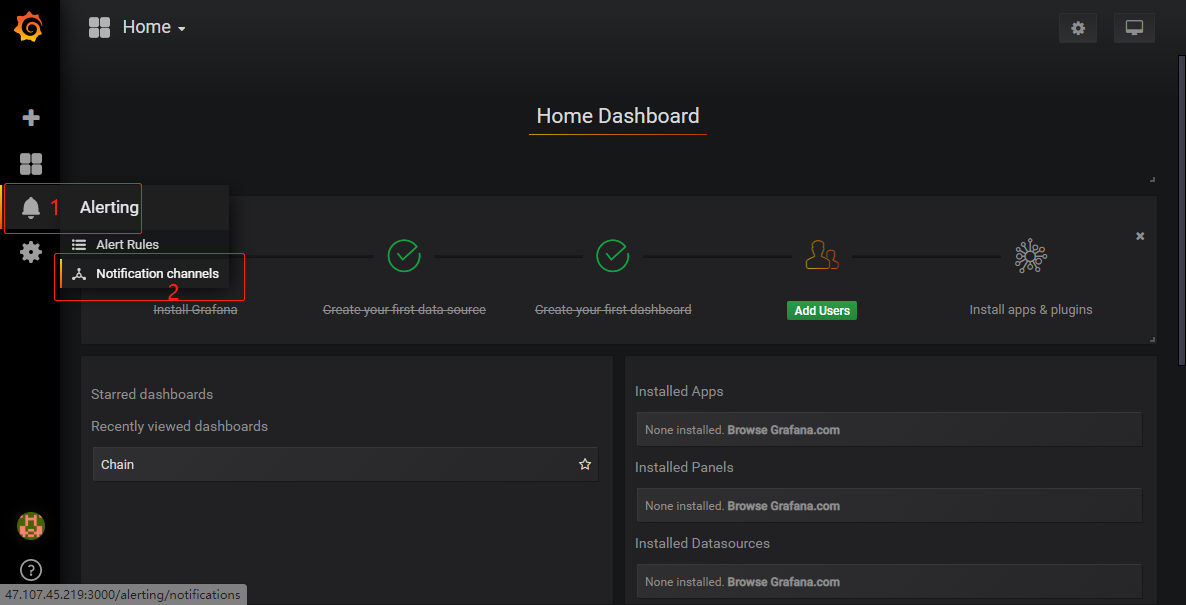
点击添加通道
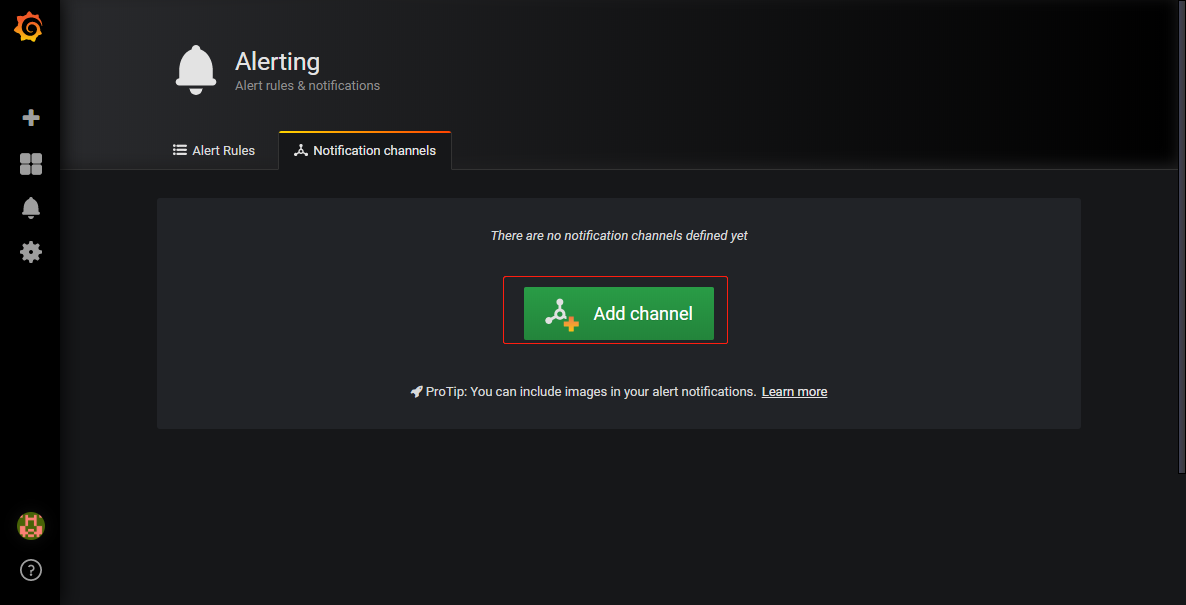
配置钉钉告警通道
添加钉钉告警通道,可以先测试一次
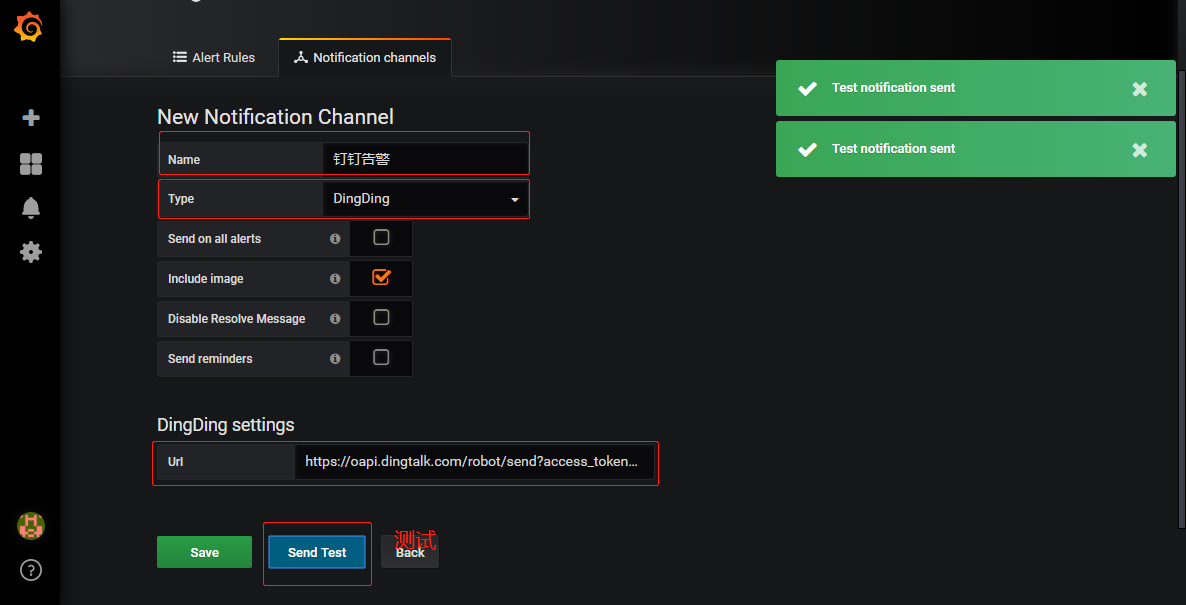
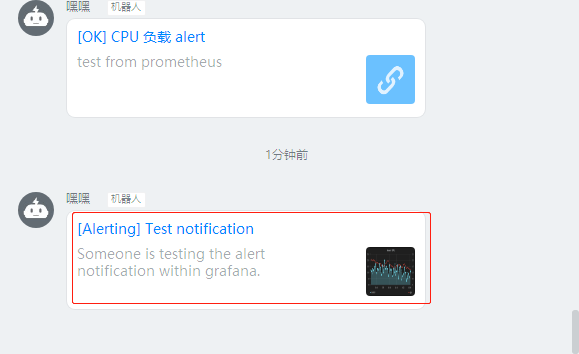
测试结果如下所示
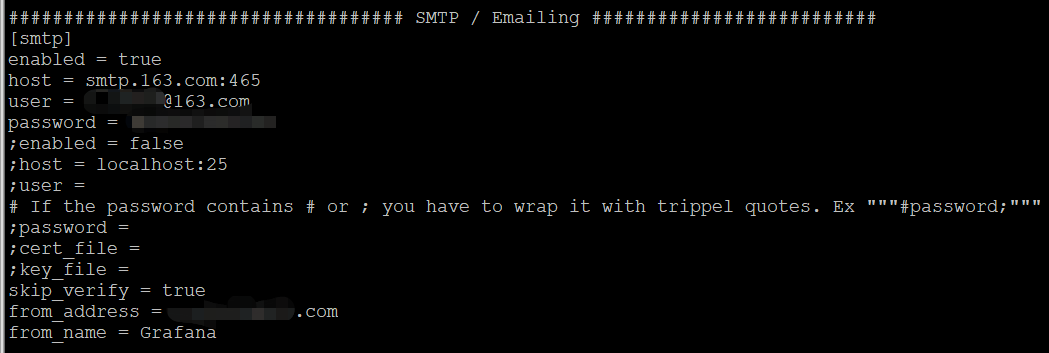
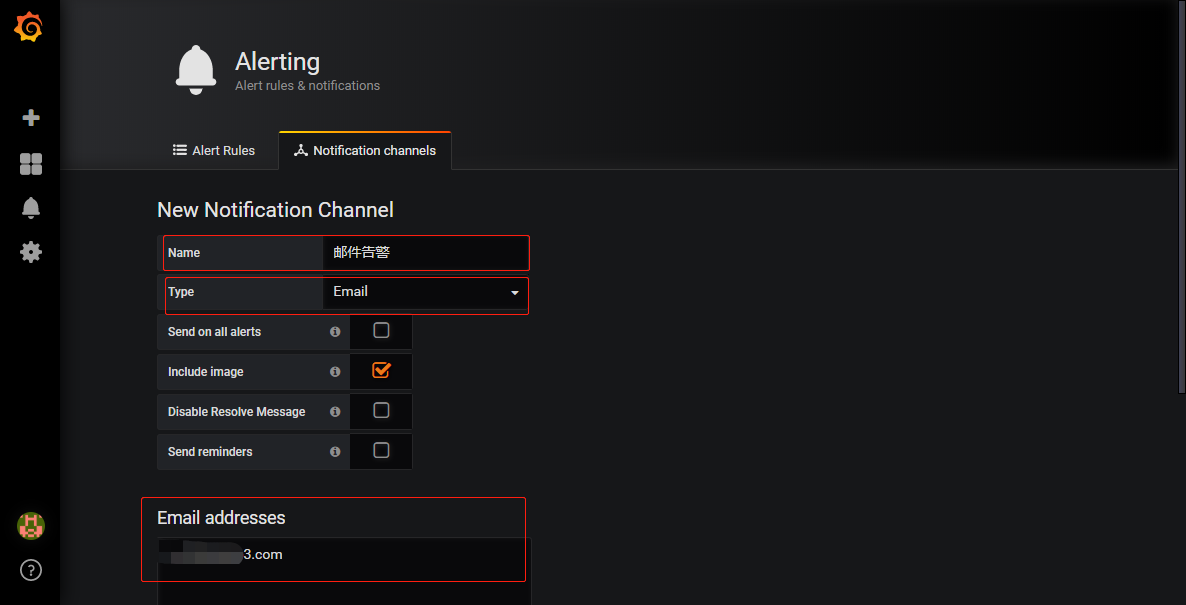
配置邮件告警通道
在 grafana 配置文件 /etc/grafana/grafana.ini 配置邮件告警发送邮箱信息
添加邮件告警,包含告警接收邮箱信息
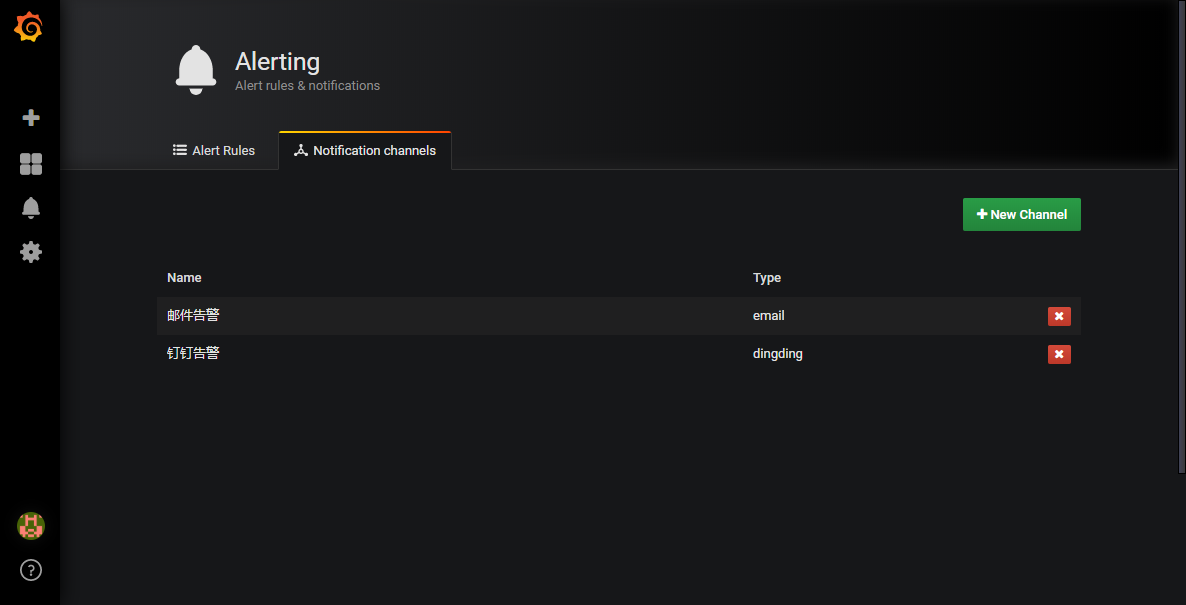
查看告警通道列表
配置告警规则
配置每 5 秒钟检测一次,如果 CPU 使用率超过 30% 就告警的规则
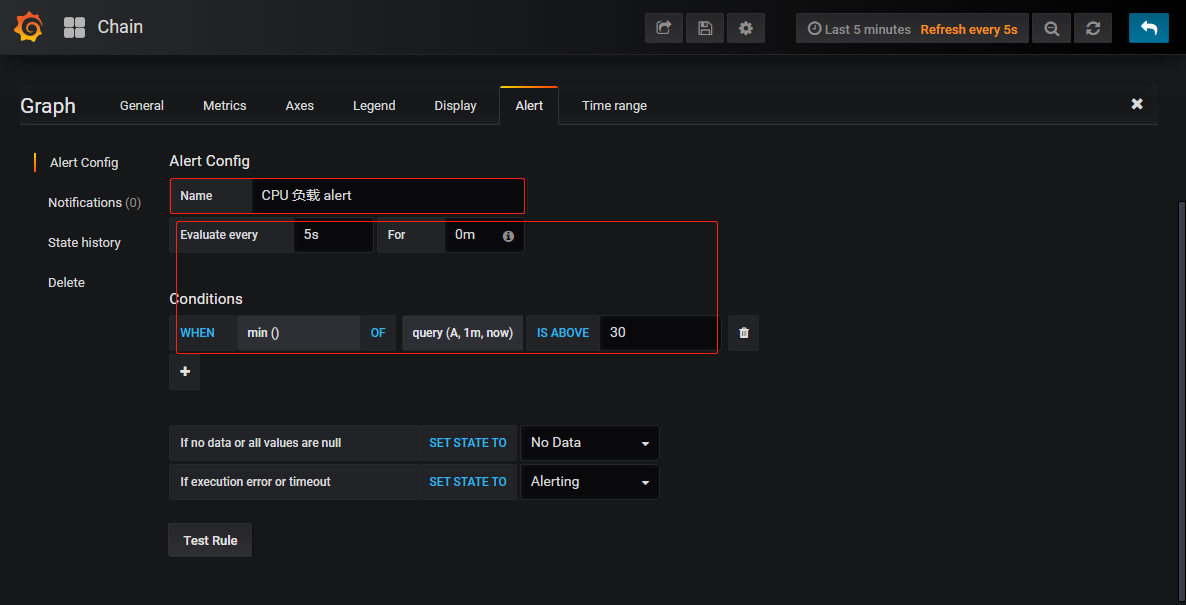
如果检测到状态为健康,如下所示(默认,红色代表不健康)

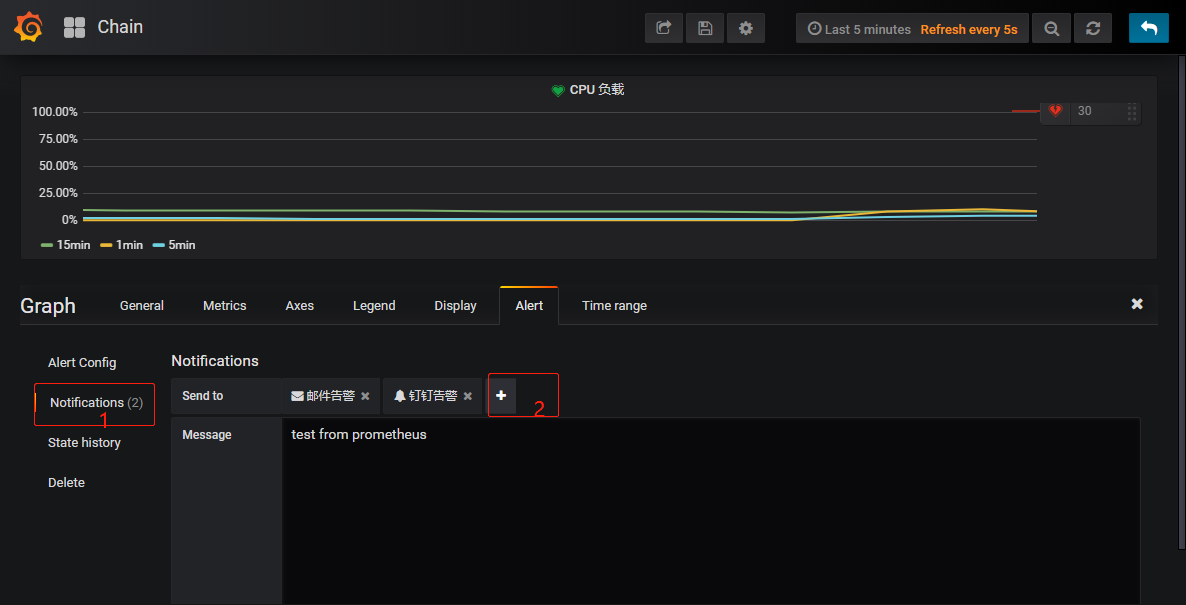
绑定告警通道,可以同时绑定多个通道,触发告警之后多个通道通知
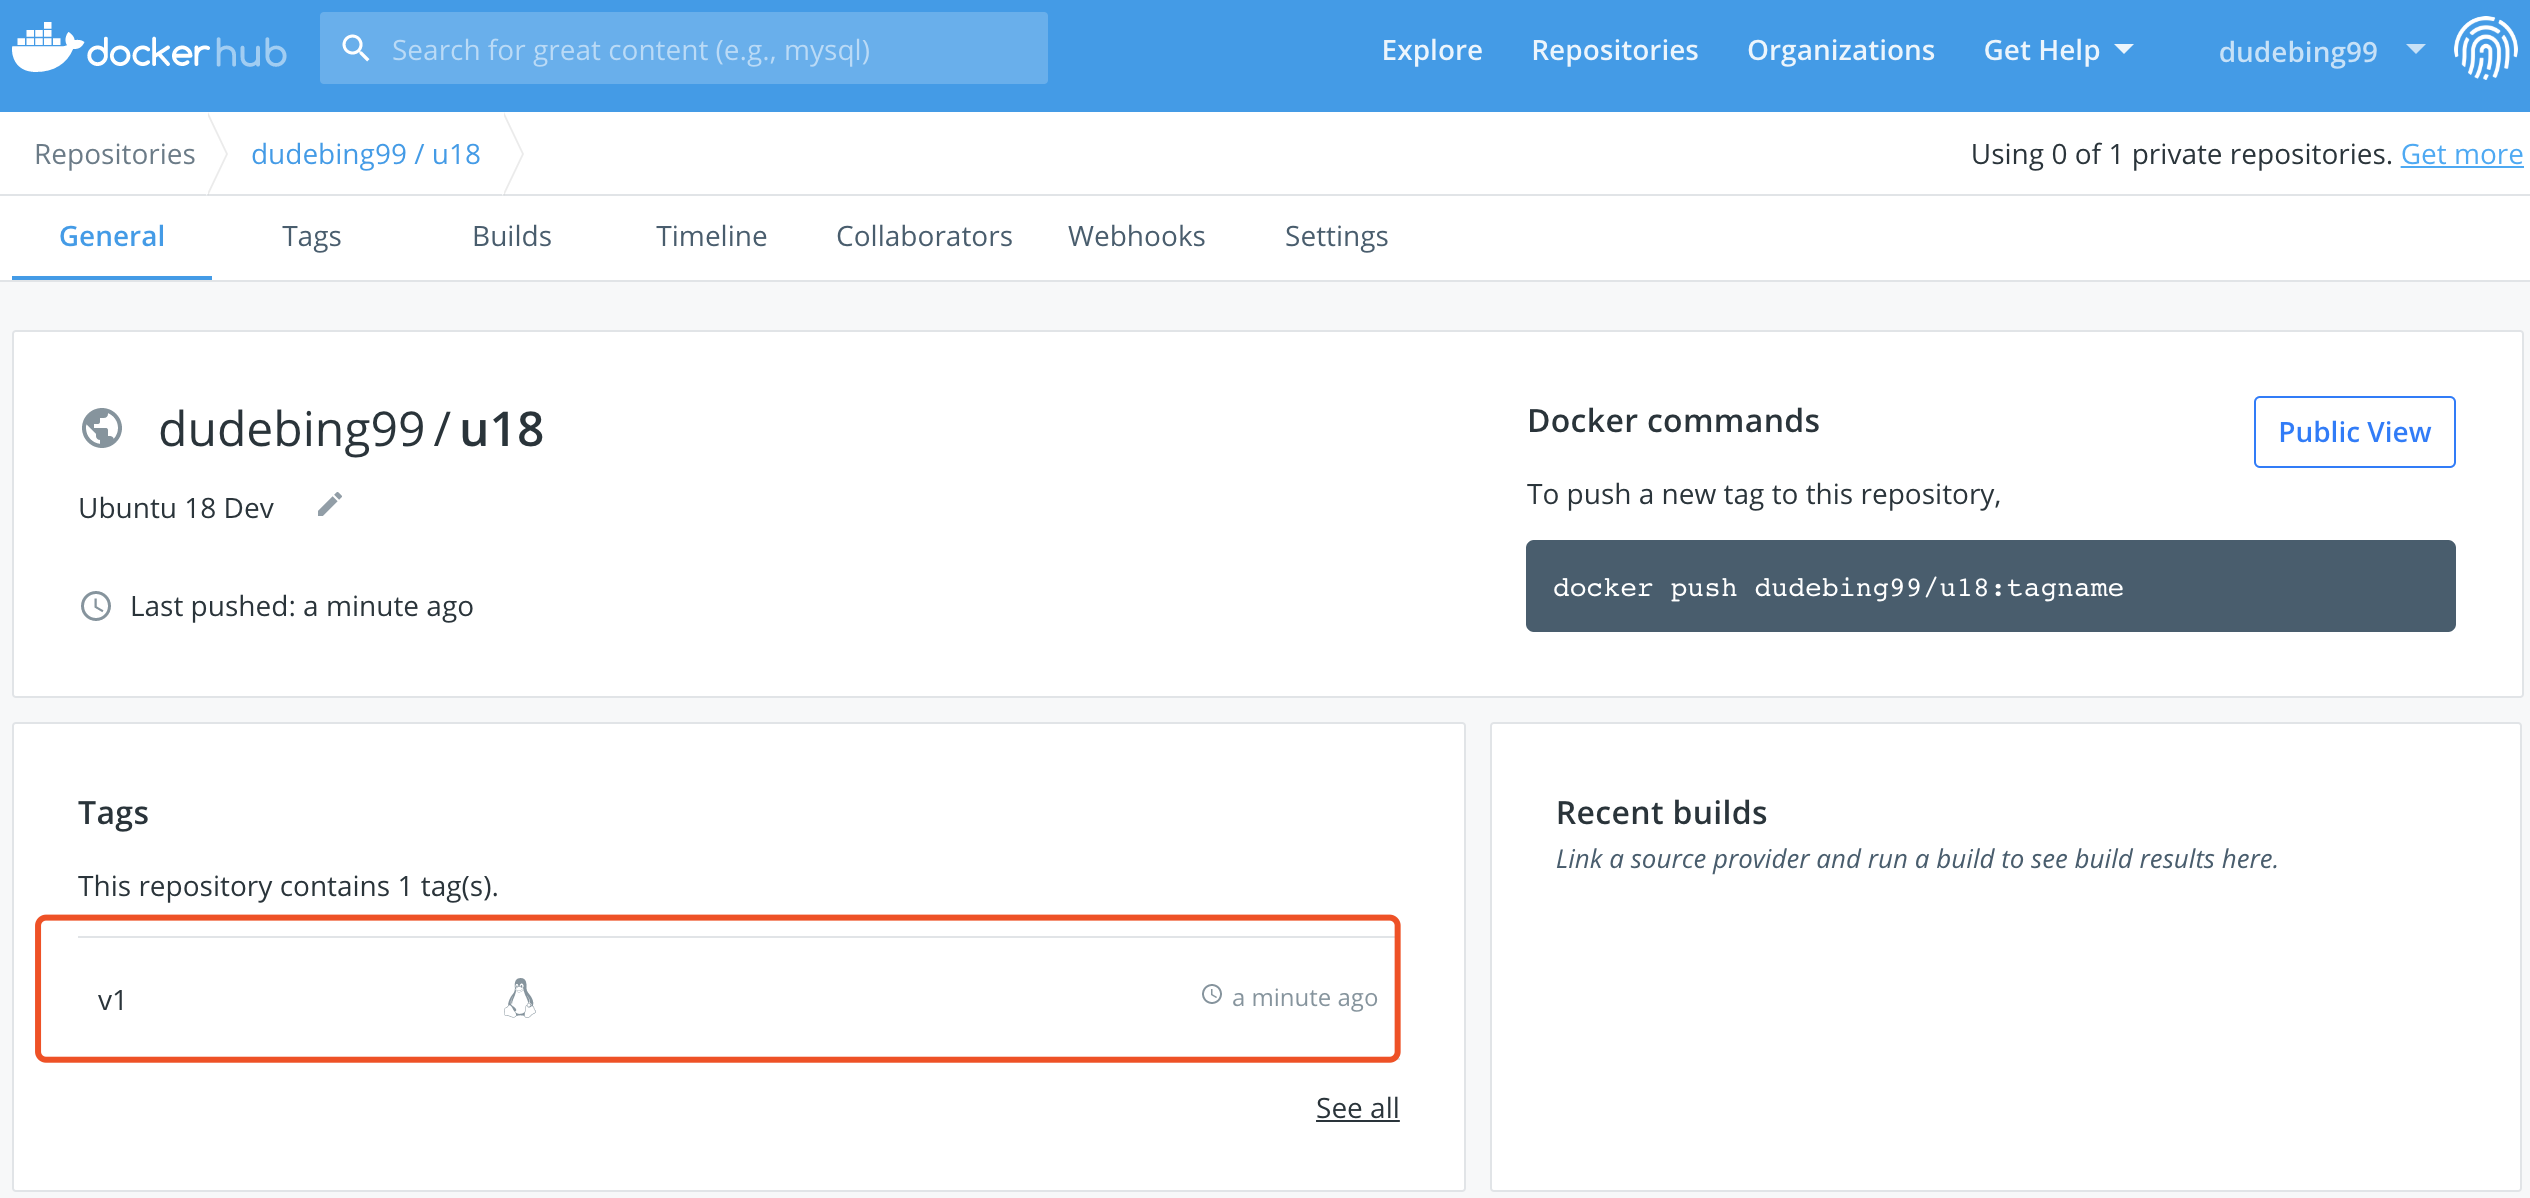
DockerHub 上传镜像
https://hub.docker.com/ 注册账户,并创建镜像仓库
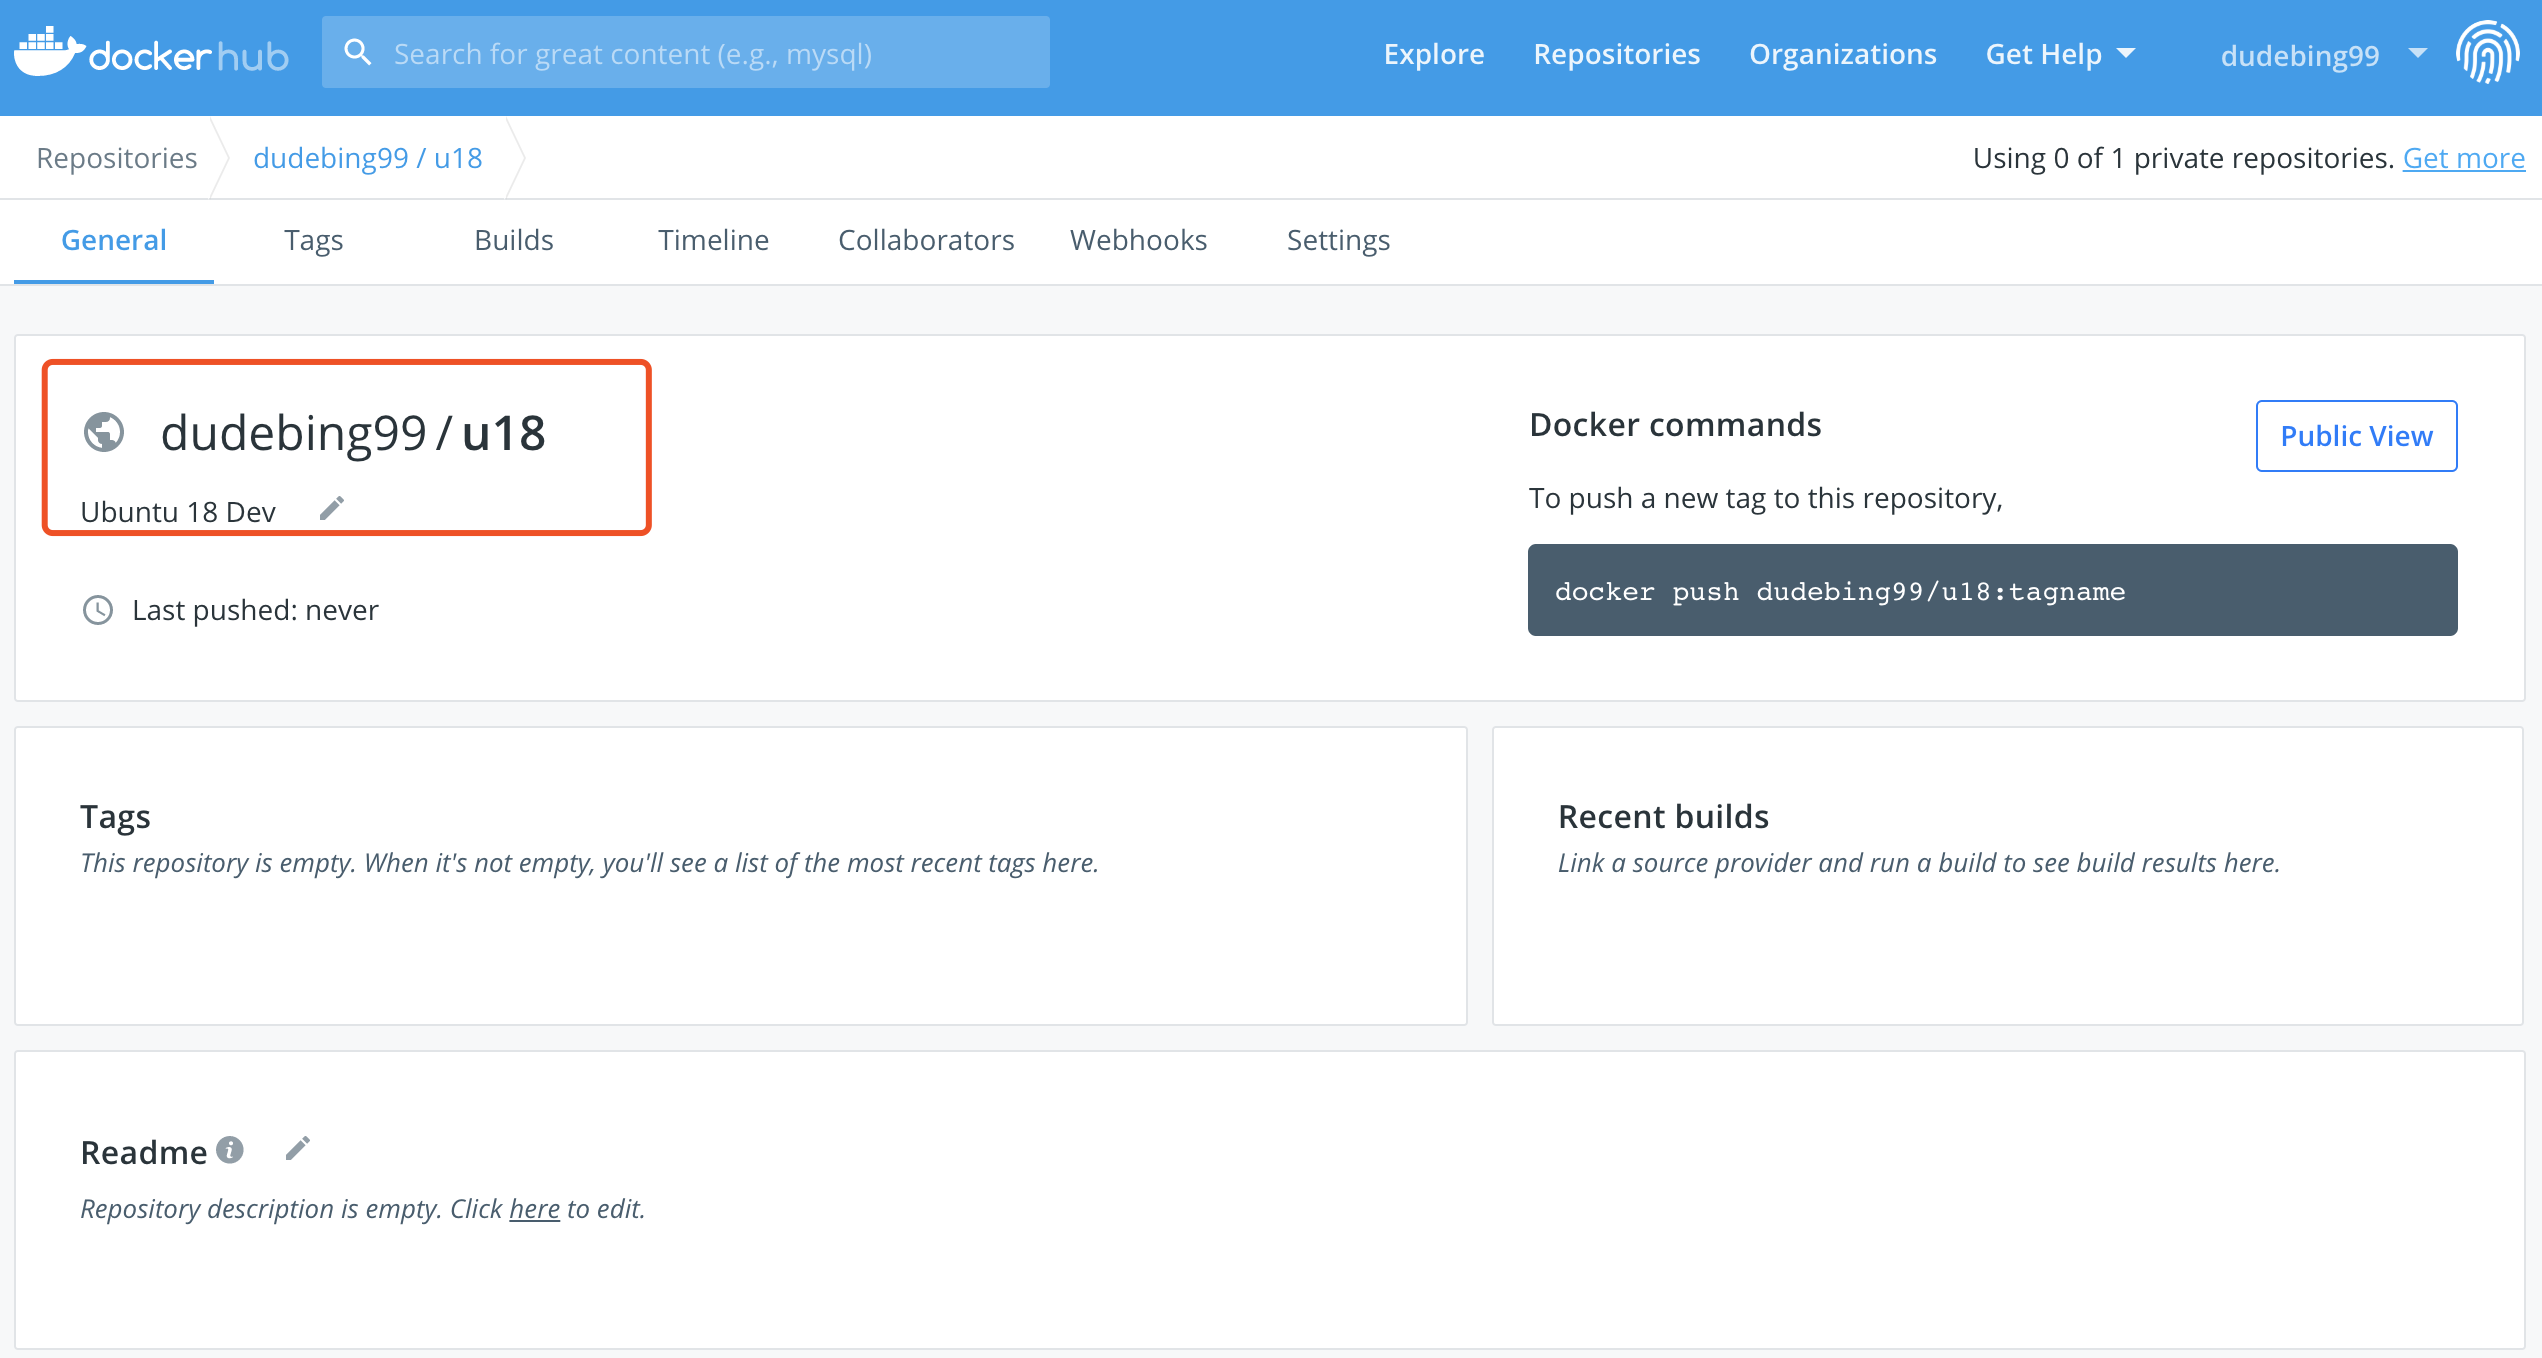
基于已有容器创建镜像
镜像仓库为
dudebing99/u18,镜像 tag 为v1

xxxxxxxxxx➜ ~ docker commit 512411c00fb4 dudebing99/u18:v1sha256:a51369e90faf0ff8be95942e6999613ba8e3081f9ad66e7e1ae092a75b46aa29查看本地镜像
xxxxxxxxxx➜ ~ docker imagesREPOSITORY TAG IMAGE ID CREATED SIZEdudebing99/u18 v1 a51369e90faf 43 seconds ago 745MBubuntu 16.04 56bab49eef2e 2 months ago 123MBubuntu 18.04 775349758637 2 months ago 64.2MBcentos latest 0f3e07c0138f 3 months ago 220MBubuntu 14.04 2c5e00d77a67 8 months ago 188MBmysql 5.7.21 5195076672a7 22 months ago 371MB上传镜像到 DockerHub
命令格式:
docker push <hub-user>/<repo-name>:<tag>
xxxxxxxxxx➜ ~ docker push dudebing99/u18:v1The push refers to repository [docker.io/dudebing99/u18]ec2f7e3800b2: Pushedv1: digest: sha256:6643590adf8bd4301008e6fc72ad0443c1a1cc21510e050ba8ec5445a15a9ef1 size: 1365查看镜像
查看镜像详情,拉取镜像命令 docker pull dudebing99/u18:v1
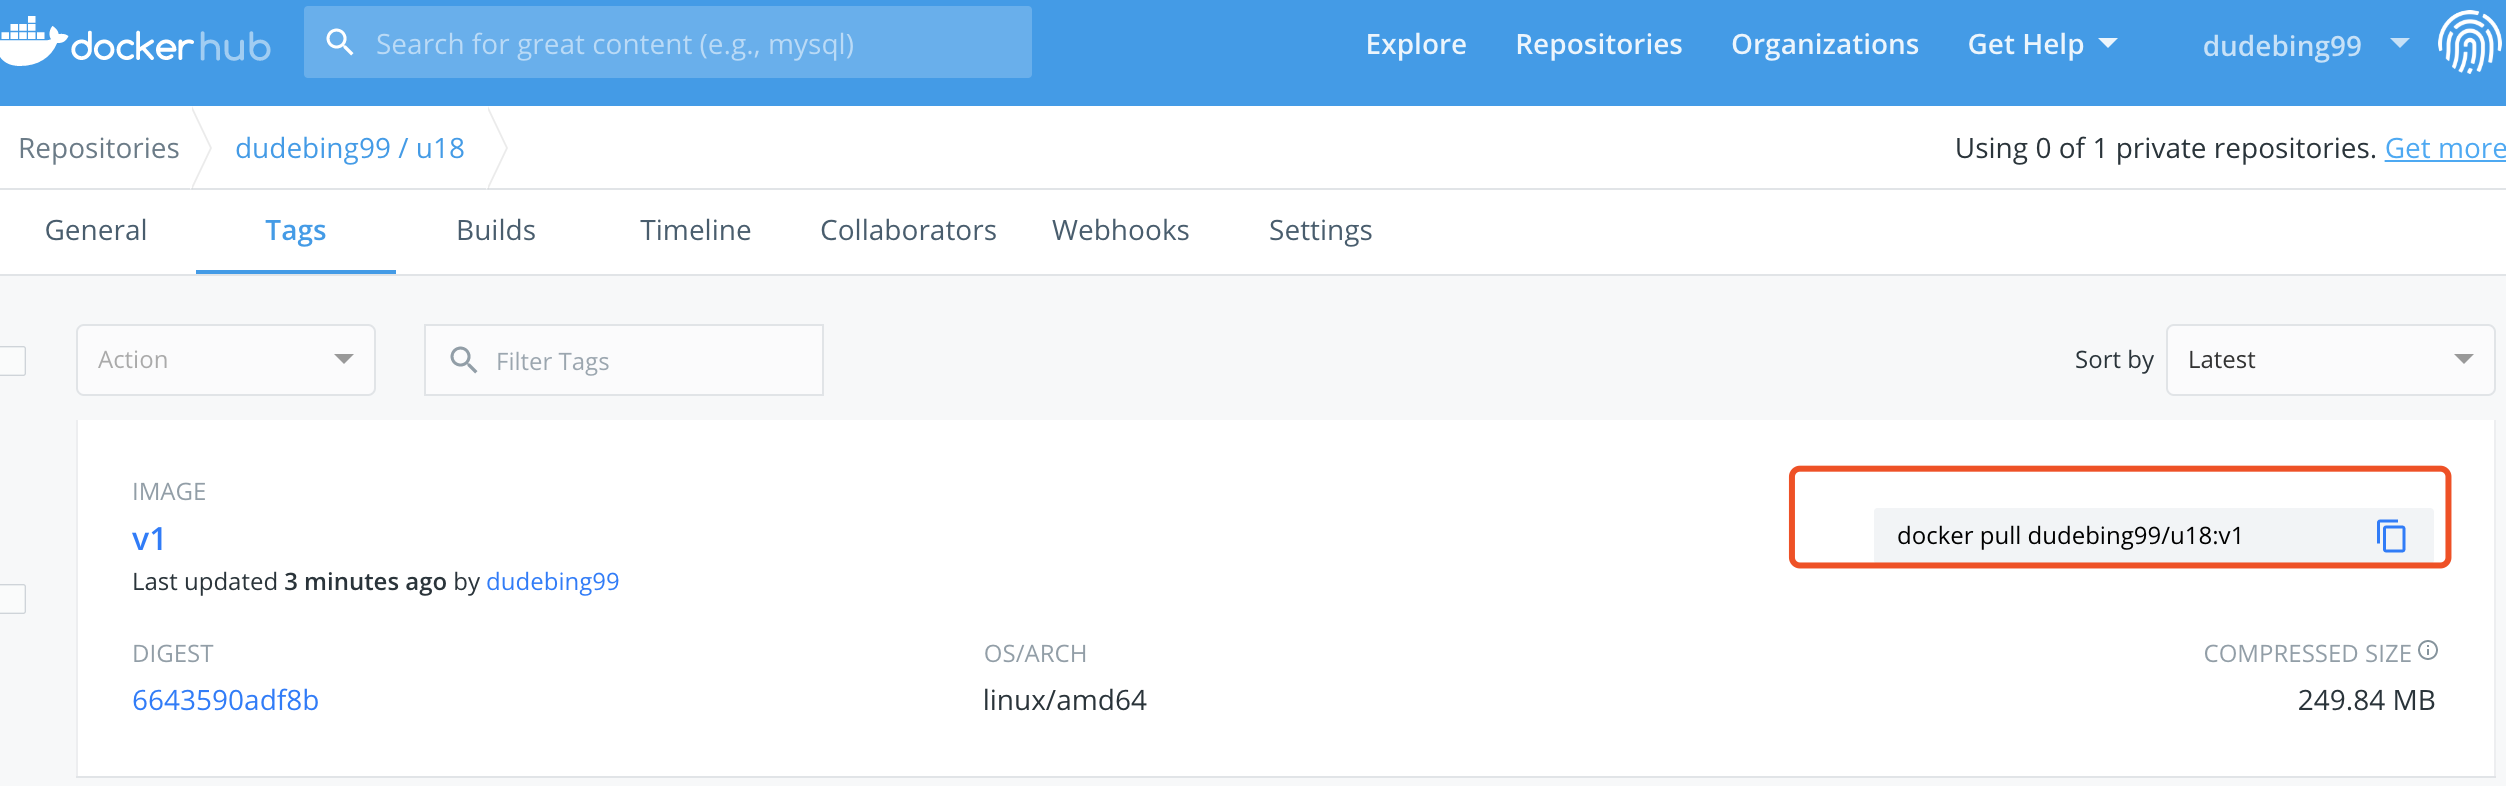
从 DockerHub 拉取镜像
xxxxxxxxxxroot@ubuntu:~# docker imagesREPOSITORY TAG IMAGE ID CREATED SIZEroot@ubuntu:~# docker pull dudebing99/u18:v1v1: Pulling from dudebing99/u187ddbc47eeb70: Pull complete c1bbdc448b72: Pull complete 8c3b70e39044: Pull complete 45d437916d57: Pull complete 97b648407d44: Pull complete Digest: sha256:6643590adf8bd4301008e6fc72ad0443c1a1cc21510e050ba8ec5445a15a9ef1Status: Downloaded newer image for dudebing99/u18:v1root@ubuntu:~# docker imagesREPOSITORY TAG IMAGE ID CREATED SIZEdudebing99/u18 v1 a51369e90faf 5 hours ago 745MBroot@ubuntu:~# docker search dudebing99NAME DESCRIPTION STARS OFFICIAL AUTOMATEDdudebing99/u18 Ubuntu 18 Dev 0 CentOS 安装 vsftpd
CentOS 7.6/vsftpd 3.0.2
按照 vsftpd
xxxxxxxxxxyum install vsftpd ftp -y添加用户
xxxxxxxxxxuseradd -d /home/ftp -g ftp -s /sbin/nologin kevin -p 123456passwd kevin配置 vsftpd
xxxxxxxxxx[root@wwhs ~]# cat /etc/vsftpd/vsftpd.conf anonymous_enable=NOlocal_enable=YESwrite_enable=YESlocal_umask=022dirmessage_enable=YESxferlog_enable=YESxferlog_std_format=YESxferlog_file=/var/log/vsftpd.logftpd_banner=Welcome to FTP service.listen=YES
pam_service_name=vsftpduserlist_enable=YESuserlist_deny=NOuserlist_file=/etc/vsftpd/user_listtcp_wrappers=YESdownload_enable=YES
connect_from_port_20=YES
pasv_enable=YESpasv_promiscuous=YESpasv_min_port=10000pasv_max_port=20000
# 限速 500KBytelocal_max_rate=500000
配置 user_list
xxxxxxxxxx[root@wwhs ~]# cat /etc/vsftpd/user_list # vsftpd userlist# If userlist_deny=NO, only allow users in this file# If userlist_deny=YES (default), never allow users in this file, and# do not even prompt for a password.# Note that the default vsftpd pam config also checks /etc/vsftpd/ftpusers# for users that are denied.#kevin配置 pam
xxxxxxxxxx[root@wwhs ~]# cat /etc/pam.d/vsftpd #%PAM-1.0session optional pam_keyinit.so force revokeauth required pam_listfile.so item=user sense=deny file=/etc/vsftpd/ftpusers onerr=succeed#auth required pam_shells.soauth include password-authaccount include password-authsession required pam_loginuid.sosession include password-auth防火墙开放 21、20、30000-31000 端口
xxxxxxxxxx-A INPUT -p tcp -m multiport --dport 20,21 -m state --state NEW -j ACCEPT-A INPUT -p tcp -m state --state NEW -m tcp --dport 21 -j ACCEPT-A INPUT -p tcp --dport 30000:31000 -j ACCEPT启动服务
xxxxxxxxxxservice vsftpd startCentOS 安装 Apache Tomcat 9,支持 http2
xxxxxxxxxx
PWD=`pwd`ROOT=$PWD
echo "install gcc"yum install gcc -y
echo "install expect"yum install expect -y
echo "yum install curl"yum install curl -y
echo "install jdk"tar -zxvf jdk-8u111-linux-x64.tar.gzmv jdk1.8.0_111/ /usr/local
cat >> /etc/profile << EOF#add jdk related environment variablesJAVA_HOME=/usr/local/jdk1.8.0_111CLASSPATH=.:\$JAVA_HOME/jre/lib/rt.jar:\$JAVA_HOME/lib/dt.jar:\$JAVA_HOME/lib/tools.jarJRE_HOME=\$JAVA_HOME/jre
export JAVA_HOME=\$JAVA_HOMEexport CLASSPATH=\$CLASSPATHexport JRE_HOME=\$JRE_HOMEexport PATH=\$PATH:\$JAVA_HOME/binEOF
echo "set env temporary"JAVA_HOME=/usr/local/jdk1.8.0_111CLASSPATH=.:$JAVA_HOME/jre/lib/rt.jar:$JAVA_HOME/lib/dt.jar:$JAVA_HOME/lib/tools.jarJRE_HOME=$JAVA_HOME/jreexport JAVA_HOME=$JAVA_HOMEexport CLASSPATH=$CLASSPATHexport JRE_HOME=$JRE_HOMEexport PATH=$PATH:$JAVA_HOME/bin
echo "install apr"tar -xzvf apr-1.5.2.tar.gzcd apr-1.5.2./configure --prefix=/usr/local/aprmake -j4make installcd -rm -rf apr-1.5.2
echo "install apr-util"tar -xzvf apr-util-1.5.4.tar.gzcd apr-util-1.5.4./configure --prefix=/usr/local/apr-util --with-apr=/usr/local/aprmake -j4make installcd -rm -rf apr-util-1.5.4
echo "install openssl"tar -xzvf openssl-1.0.2h.tar.gzcd openssl-1.0.2h./config shared --prefix=/usr/local/opensslmake dependmake -j4make installcd -rm -rf openssl-1.0.2h
echo "install apache tomcat"tar -xzvf apache-tomcat-9.0.0.M17.tar.gzmv apache-tomcat-9.0.0.M17 /usr/localcd /usr/local/apache-tomcat-9.0.0.M17/bintar -xzvf tomcat-native.tar.gzcd tomcat-native-1.2.10-src/native./configure --prefix=/usr/local/native --with-apr=/usr/local/apr --with-ssl=/usr/local/opensslmake -j4make install
cat >> /etc/profile << EOF#add native related environment variablesNATIVE_HOME=/usr/local/native
export NATIVE_HOME=\$NATIVE_HOMEexport LD_LIBRARY_PATH=\$LD_LIBRARY_PATH:\$NATIVE_HOME/libEOF
NATIVE_HOME=/usr/local/nativeexport NATIVE_HOME=$NATIVE_HOMEexport LD_LIBRARY_PATH=$LD_LIBRARY_PATH:$NATIVE_HOME/lib
echo "gen cert related"mkdir $ROOT/certcd $ROOT/certopenssl genrsa -out server.key 2048openssl rsa -in server.key -out server.key
cat > gen_cert.sh << EOF
set timeout 30
spawn openssl req -new -x509 -key server.key -out ca.crt -days 3650expect { "Country Name (2 letter code)" { send "cn\r"; exp_continue }
"State or Province Name (full name)" { send "Guang Dong\r"; exp_continue }
"Locality Name (eg, city)" { send "Shen Zhen\r"; exp_continue }
"Organization Name (eg, company)" { send "xxx.com\r"; exp_continue }
"Organizational Unit Name (eg, section)" { send "Dev\r"; exp_continue }
"Common Name (eg, your name or your server's hostname)" { send "stream service\r"; exp_continue }
"Email Address" { send "dev@xxx.com\r"; exp_continue }}EOF
chmod +x gen_cert.sh./gen_cert.shcd $ROOTcp -r $ROOT/cert/* /usr/local/apache-tomcat-9.0.0.M17/confrm -rf $ROOT/cert
echo "modify tomcat conf"cat > /usr/local/apache-tomcat-9.0.0.M17/conf/server.xml << EOF<?xml version="1.0" encoding="UTF-8"?><!-- Licensed to the Apache Software Foundation (ASF) under one or more contributor license agreements. See the NOTICE file distributed with this work for additional information regarding copyright ownership. The ASF licenses this file to You under the Apache License, Version 2.0 (the "License"); you may not use this file except in compliance with the License. You may obtain a copy of the License at
http://www.apache.org/licenses/LICENSE-2.0
Unless required by applicable law or agreed to in writing, software distributed under the License is distributed on an "AS IS" BASIS, WITHOUT WARRANTIES OR CONDITIONS OF ANY KIND, either express or implied. See the License for the specific language governing permissions and limitations under the License.--><!-- Note: A "Server" is not itself a "Container", so you may not define subcomponents such as "Valves" at this level. Documentation at /docs/config/server.html --><Server port="8005" shutdown="SHUTDOWN"> <Listener className="org.apache.catalina.startup.VersionLoggerListener" /> <!-- Security listener. Documentation at /docs/config/listeners.html <Listener className="org.apache.catalina.security.SecurityListener" /> --> <!--APR library loader. Documentation at /docs/apr.html --> <Listener className="org.apache.catalina.core.AprLifecycleListener" SSLEngine="on" /> <!-- Prevent memory leaks due to use of particular java/javax APIs--> <Listener className="org.apache.catalina.core.JreMemoryLeakPreventionListener" /> <Listener className="org.apache.catalina.mbeans.GlobalResourcesLifecycleListener" /> <Listener className="org.apache.catalina.core.ThreadLocalLeakPreventionListener" />
<!-- Global JNDI resources Documentation at /docs/jndi-resources-howto.html --> <GlobalNamingResources> <!-- Editable user database that can also be used by UserDatabaseRealm to authenticate users --> <Resource name="UserDatabase" auth="Container" type="org.apache.catalina.UserDatabase" description="User database that can be updated and saved" factory="org.apache.catalina.users.MemoryUserDatabaseFactory" pathname="conf/tomcat-users.xml" /> </GlobalNamingResources>
<!-- A "Service" is a collection of one or more "Connectors" that share a single "Container" Note: A "Service" is not itself a "Container", so you may not define subcomponents such as "Valves" at this level. Documentation at /docs/config/service.html --> <Service name="Catalina">
<!--The connectors can use a shared executor, you can define one or more named thread pools--> <!-- <Executor name="tomcatThreadPool" namePrefix="catalina-exec-" maxThreads="150" minSpareThreads="4"/> -->
<!-- A "Connector" represents an endpoint by which requests are received and responses are returned. Documentation at : Java HTTP Connector: /docs/config/http.html Java AJP Connector: /docs/config/ajp.html APR (HTTP/AJP) Connector: /docs/apr.html Define a non-SSL/TLS HTTP/1.1 Connector on port 8080 --> <Connector port="8080" protocol="HTTP/1.1" connectionTimeout="20000" redirectPort="8443" /> <!-- A "Connector" using the shared thread pool--> <!-- <Connector executor="tomcatThreadPool" port="8080" protocol="HTTP/1.1" connectionTimeout="20000" redirectPort="8443" /> --> <!-- Define a SSL/TLS HTTP/1.1 Connector on port 8443 This connector uses the NIO implementation. The default SSLImplementation will depend on the presence of the APR/native library and the useOpenSSL attribute of the AprLifecycleListener. Either JSSE or OpenSSL style configuration may be used regardless of the SSLImplementation selected. JSSE style configuration is used below. --> <!-- <Connector port="8443" protocol="org.apache.coyote.http11.Http11NioProtocol" maxThreads="150" SSLEnabled="true"> <SSLHostConfig> <Certificate certificateKeystoreFile="conf/localhost-rsa.jks" type="RSA" /> </SSLHostConfig> </Connector> --> <!-- Define a SSL/TLS HTTP/1.1 Connector on port 8443 with HTTP/2 This connector uses the APR/native implementation which always uses OpenSSL for TLS. Either JSSE or OpenSSL style configuration may be used. OpenSSL style configuration is used below. --> <!-- <Connector port="8443" protocol="org.apache.coyote.http11.Http11AprProtocol" maxThreads="150" SSLEnabled="true" > <UpgradeProtocol className="org.apache.coyote.http2.Http2Protocol" /> <SSLHostConfig> <Certificate certificateKeyFile="conf/localhost-rsa-key.pem" certificateFile="conf/localhost-rsa-cert.pem" certificateChainFile="conf/localhost-rsa-chain.pem" type="RSA" /> </SSLHostConfig> </Connector> -->
<Connector port="8443" protocol="org.apache.coyote.http11.Http11AprProtocol" maxThreads="150" SSLEnabled="true" > <UpgradeProtocol className="org.apache.coyote.http2.Http2Protocol" /> <SSLHostConfig> <Certificate certificateKeyFile="conf/server.key" certificateFile="conf/ca.crt" type="RSA" /> </SSLHostConfig> </Connector>
<!-- Define an AJP 1.3 Connector on port 8009 --> <Connector port="8009" protocol="AJP/1.3" redirectPort="8443" />
<!-- An Engine represents the entry point (within Catalina) that processes every request. The Engine implementation for Tomcat stand alone analyzes the HTTP headers included with the request, and passes them on to the appropriate Host (virtual host). Documentation at /docs/config/engine.html -->
<!-- You should set jvmRoute to support load-balancing via AJP ie : <Engine name="Catalina" defaultHost="localhost" jvmRoute="jvm1"> --> <Engine name="Catalina" defaultHost="localhost">
<!--For clustering, please take a look at documentation at: /docs/cluster-howto.html (simple how to) /docs/config/cluster.html (reference documentation) --> <!-- <Cluster className="org.apache.catalina.ha.tcp.SimpleTcpCluster"/> -->
<!-- Use the LockOutRealm to prevent attempts to guess user passwords via a brute-force attack --> <Realm className="org.apache.catalina.realm.LockOutRealm"> <!-- This Realm uses the UserDatabase configured in the global JNDI resources under the key "UserDatabase". Any edits that are performed against this UserDatabase are immediately available for use by the Realm. --> <Realm className="org.apache.catalina.realm.UserDatabaseRealm" resourceName="UserDatabase"/> </Realm>
<Host name="localhost" appBase="webapps" unpackWARs="true" autoDeploy="true">
<!-- SingleSignOn valve, share authentication between web applications Documentation at: /docs/config/valve.html --> <!-- <Valve className="org.apache.catalina.authenticator.SingleSignOn" /> -->
<!-- Access log processes all example. Documentation at: /docs/config/valve.html Note: The pattern used is equivalent to using pattern="common" --> <Valve className="org.apache.catalina.valves.AccessLogValve" directory="logs" prefix="localhost_access_log" suffix=".txt" pattern="%h %l %u %t "%r" %s %b" />
</Host> </Engine> </Service></Server>EOF
echo "start tomcat"cd /usr/local/apache-tomcat-9.0.0.M17/bin./startup.sh
sleep 5
echo "test tomcat"curl -k -I https://localhost:8443
echo "stop tomcat"cd /usr/local/apache-tomcat-9.0.0.M17/bin./shutdown.sh
echo ""echo "ATTENTION: RUN 'source /etc/profile'"echo ""CentOS 安装 VNC
安装软件包
yum install tigervnc* -y
修改 /root/.vnc/xstartup 文件,包括注释、新增,如下所示
# xterm -geometry 80x24+10+10 -ls -title "VNCDESKTOP Desktop" &
# twm &
gnome-session &
修改 /etc/sysconfig/vncservers,修改如下行
VNCSERVERARGS[1]="-geometry 1360x768"
配置防火墙,允许默认端口 5901(或者,关闭防火墙)
启动服务
service vncserver start
安装客户端,并连接
客户端连接服务器信息 VNC Server: xxx.xxx.xxx.xxx:5901
xxx.xxx.xxx.xxx 为 VNC Server 的 IP 地址
其他命令
vncpasswd 修改 VNC 连接密码
vncserver --list 查看启动的会话实例(session)
vncserver :2 启动第二个实例,默认监听 5902 端口,具体可通过 netstat 命令查看
vncserver -kill :2 停止第二个实例
CentOS 安装 Python 3.5
xxxxxxxxxx1. CentOS 6.8 安装 Python 的依赖包
yum groupinstall "Development tools"yum install zlib-devel bzip2-devel openssl-devel ncurses-devel sqlite-devel readline-devel tk-devel gdbm-devel db4-devel libpcap-devel xz-devel
2. 下载 Python3.5 的源码包并编译
wget https://www.python.org/ftp/python/3.5.0/Python-3.5.0.tgztar xf Python-3.5.0.tgzcd Python-3.5.0./configure --prefix=/usr/local --enable-sharedmakemake installln –s /usr/local/bin/python3 /usr/bin/python3
3. 在运行 Python 之前需要配置库
echo /usr/local/lib >> /etc/ld.so.conf.d/local.confldconfig
4. 运行演示python3 --versionPython 3.5.0
5. 删除编译 Python 时所需要的库(可不删除)yum groupremove "Development tools" --remove-leaveasyum remove zlib-devel bzip2-devel openssl-devel ncurses-devel sqlite-devel readline-devel tk-devel gdbm-devel db4-devel libpcap-devel xz-devel --remove-leaves
6. 设置别名方便使用alias py=python3
CentOS 安装 ICE
xxxxxxxxxx1.下载 Ice 源码cd /optwget http://www.zeroc.com/download/Ice/3.5/Ice-3.5.1.tar.gzwget http://www.zeroc.com/download/Ice/3.5/ThirdParty-Sources-3.5.1.tar.gz
2. 安装依赖库yum -y install gcc gcc-c++ expat-devel bzip2 bzip2-develyum -y install openssl*
2.1 安装第三方资源tar xvf ThirdParty-Sources-3.5.1.tar.gzcd ThirdParty-Sources-3.5.1tar xvf mcpp-2.7.2.tar.gzcd mcpp-2.7.2patch -p0 < ../mcpp/patch.mcpp.2.7.2./configure CFLAGS=-fPIC --enable-mcpplib --disable-sharedmake && make installcd ../
2.2 安装 BerkeleyDBtar zxf db-5.3.21.NC.tar.gzcd db-5.3.21.NCpatch -p0 < ../db/patch.db.5.3.21cd build_unix../dist/configure --prefix=/usr --enable-cxxmake && make install
(说明:db 的默认安装 prefix 路径是:/usr/local/BerkeleyDB.5.3,需要改为 /usr,否则 make Ice 时会找不到路径)
3. 安装 ICEcd /opttar xvf Ice-3.5.1.tar.gzcd Ice-3.5.1/cppmake && make install
4. 环境变量设置(vim /etc/profile)#add ice install dir to path for all usersICE_HOME=/opt/Ice-3.5.1
export LD_LIBRARY_PATH=$LD_LIBRARY_PATH:$ICE_HOME/lib:$ICE_HOME/lib64export PATH=$PATH:$ICE_HOME/bin
CentOS 安装 GCC 4.9.2
注意:GCC 4.8.1 支持 C++11 全部特性
xxxxxxxxxx1. 下载 GCC 的源码包 gcc-4.9.2.tar.gz,以及三个依赖的安装包,依赖包的版本及其下载地址在 GCC 源码包目录 gcc-4.9.2/contrib/download_prerequisites 脚本文件中有指明。  ftp://ftp.gnu.org/gnu/gmp/gmp-4.3.2.tar.bz2  http://www.mpfr.org/mpfr-2.4.2/mpfr-2.4.2.tar.bz2  http://www.multiprecision.org/mpc/download/mpc-0.8.1.tar.gz
  备用下载地址:http://ftp.vim.org/languages/gcc/infrastructure/
2. 编译、安装依赖包2.1 安装 gmp-4.3.2  cd gmp-4.3.2  mkdir build && cd build  ../configure --prefix=/usr/local/gmp-4.3.2  make -j4  make install
2.2 安装 mpfr  cd mpfr-2.4.2  mkdir build && cd build  ../configure --prefix=/usr/local/mpfr-2.4.2 --with-gmp=/usr/local/gmp-4.3.2  make -j4  make install
2.3 安装 mpc  cd mpc-0.8.1  mkdir build && cd build  ../configure --prefix=/usr/local/mpc-0.8.1 --with-gmp=/usr/local/gmp-4.3.2 --with-mpfr=/usr/local/mpfr-2.4.2  make -j4  make install
2.4 在 /etc/profile 添加环境变量  GCC_RELATED_LIBS=/usr/local/gmp-4.3.2/lib:/usr/local/mpfr-2.4.2/lib:/usr/local/mpc-0.8.1/lib  export LD_LIBRARY_PATH=$LD_LIBRARY_PATH:$GCC_RELATED_LIBS
3. 安装 GCC  cd gcc-4.9.2  mkdir build && cd build  ../configure --prefix=/usr/local/gcc-4.9.2 --enable-threads=posix --disable-checking --disable-multilib --enable-languages=c,c++ --with-gmp=/usr/local/gmp-4.3.2 --with-mpfr=/usr/local/mpfr-2.4.2 --with-mpc=/usr/local/mpc-0.8.1  make -j4  make install
CentOS 安装 MySQL 5.7
主要包括配置防火墙、修改初始密码、允许远程访问三部分
MySQL 配置文件目录: /etc/my.cnf,默认数据目录: /var/lib/mysql
安装 MySQL 5.7
xxxxxxxxxx
echo "remove mariadb if exists"yum -y remove mariadb*
echo "download mysql rpm"wget http://dev.mysql.com/get/mysql57-community-release-el7-11.noarch.rpm
echo "install mysql rpm"rpm -ivh mysql57-community-release-el7-11.noarch.rpm
echo "install mysql server"rpm --import https://repo.mysql.com/RPM-GPG-KEY-mysql-2022yum install -y mysql-community-server
echo "enable mysql"systemctl enable mysqld
echo "delete mysql rpm"rm -rf mysql57-community-release-el7-11.noarch.rpm
echo "start mysql"systemctl start mysqld
echo "done"开启 3306 端口
xxxxxxxxxx/sbin/iptables -I INPUT -p tcp --dport 3306 -j ACCEPT/etc/rc.d/init.d/iptables save修改初始密码
低版本 MySQL, authentication_string 字段为 password
从错误日志文件查看原始密码
xxxxxxxxxx[root@iZwz929qlep1i7nh1ogn0iZ ~]# cat /var/log/mysqld.log |grep password2019-12-06T07:20:48.142601Z 1 [Note] A temporary password is generated for root@localhost: 89bwv3O/HGo5修改密码
xxxxxxxxxxmysql -h 127.0.0.1 -u root -p'89bwv3O/HGo5';> use mysql;> update user set plugin='mysql_native_password' where user='root';> update user set authentication_string=password('123456') where user='root';> flush privileges;允许远程访问
xxxxxxxxxx> CREATE USER 'root'@'%' IDENTIFIED BY '123456'; # MySQL8.0 以后已经不支持,所以必须先创建用户,然后再授权> grant all privileges on *.* to 'root'@'%' identified by '123456' with grant option;CentOS 安装 Redis 4.0.9
运行环境:Cent OS 6.8
安装
xxxxxxxxxxwget http://download.redis.io/releases/redis-4.0.9.tar.gztar -xzvf redis-4.0.9.tar.gzcd redis-4.0.9make -j4# 测试,可跳过make testmake install
# 拷贝默认配置文件mkdir -p /etc/rediscp sentinel.conf redis.conf /etc/redis/
配置 redis.conf
Redis server/cluster 对应的配置文件 redis.conf
Redis Sentinel 对应的配置文件 sentinel.conf
xxxxxxxxxx# 默认只监听 127.0.0.1:6379,一般情况下,需要添加外网监听bind 127.0.0.1 192.168.2.99protected-mode yesport 6379tcp-backlog 511timeout 0tcp-keepalive 300daemonize yessupervised nopidfile /var/run/redis.pidloglevel noticelogfile /var/log/redis.logdatabases 16always-show-logo yessave 900 1save 300 10save 60 10000stop-writes-on-bgsave-error yesrdbcompression yesrdbchecksum yesdbfilename dump.rdbdir /var/lib/redisslave-serve-stale-data yesslave-read-only yesrepl-diskless-sync norepl-diskless-sync-delay 5repl-disable-tcp-nodelay noslave-priority 100lazyfree-lazy-eviction nolazyfree-lazy-expire nolazyfree-lazy-server-del noslave-lazy-flush noappendonly noappendfilename "appendonly.aof"appendfsync everysecno-appendfsync-on-rewrite noauto-aof-rewrite-percentage 100auto-aof-rewrite-min-size 64mbaof-load-truncated yesaof-use-rdb-preamble nolua-time-limit 5000slowlog-log-slower-than 10000slowlog-max-len 128latency-monitor-threshold 0notify-keyspace-events ""hash-max-ziplist-entries 512hash-max-ziplist-value 64list-max-ziplist-size -2list-compress-depth 0set-max-intset-entries 512zset-max-ziplist-entries 128zset-max-ziplist-value 64hll-sparse-max-bytes 3000activerehashing yesclient-output-buffer-limit normal 0 0 0client-output-buffer-limit slave 256mb 64mb 60client-output-buffer-limit pubsub 32mb 8mb 60hz 10aof-rewrite-incremental-fsync yes运行与测试
xxxxxxxxxxredis_server /etc/redis/redis.confxxxxxxxxxx[root@localhost ~]# redis-cli127.0.0.1:6379> pingPONG127.0.0.1:6379> set name kevinOK127.0.0.1:6379> get name"kevin"127.0.0.1:6379> exitCentOS 安装 RabbitMQ
运行环境:CentOS 7.2
安装依赖
xxxxxxxxxxyum install ncurses ncurses-base ncurses-devel ncurses-libs ncurses-static ncurses-term ocaml-curses ocaml-curses-devel openssl-devel zlib-devel make ncurses-devel gcc gcc-c++ unixODBC unixODBC-devel openssl openssl-devel perl socat -y安装 erlang
xxxxxxxxxxcd /usr/local/wget http://erlang.org/download/otp_src_20.0.tar.gztar -zxvf otp_src_20.0.tar.gzcd otp_src_20.0./configure --prefix=/usr/local/erlang --with-ssl -enable-threads -enable-smmp-support -enable-kernel-poll --enable-hipe --without-javacmake && make install在 /etc/profile 添加环境变量:export PATH=$PATH:/usr/local/erlang/bin
source /etc/profile 使环境变量生效
安装 RabbitMQ
xxxxxxxxxxrpm --import https://www.rabbitmq.com/rabbitmq-release-signing-key.asccd /usr/localwget -O rabbitmq-server-3.6.10-1.el7.noarch.rpm https://www.rabbitmq.com/releases/rabbitmq-server/v3.6.10/rabbitmq-server-3.6.10-1.el7.noarch.rpmyum install rabbitmq-server-3.6.10-1.el7.noarch.rpm -y新建空的配置文 /etc/rabbitmq/rabbitmq.config
tcp 默认监听端口 5672,此处修改为 15671
xxxxxxxxxx[{ rabbit, [{ tcp_listeners, [{"0.0.0.0",15671}] }]}, { rabbitmq_management, [{ listener, [ {port,15672}, {ip,"0.0.0.0"}, {ssl,false} ] }]}].设置服务自启动、并启动服务
xxxxxxxxxxsystemctl enable rabbitmq-serversystemctl start rabbitmq-server启用RabbitMQ的管理插件、并重启服务
xxxxxxxxxxrabbitmq-plugins enable rabbitmq_managementsystemctl restart rabbitmq-server此时,使用 http://
:15672 即可访问
配置 RabbitMQ 默认数据库和日志路径
xxxxxxxxxxmkdir /usr/local/rabbitmq_dirchown rabbitmq:rabbitmq /usr/local/rabbitmq_dirchmod 777 /usr/local/rabbitmq_dir创建 /etc/rabbitmq/rabbitmq-env.conf
xxxxxxxxxxRABBITMQ_MNESIA_BASE=/usr/local/rabbitmq_dirRABBITMQ_LOG_BASE=/usr/local/rabbitmq_dir重启服务
xxxxxxxxxxsystemctl restart rabbitmq-server添加 RabbitMQ 用户,并设置其角色和权限
xxxxxxxxxx#添加用户,用户名和密码均为"admin"rabbitmqctl add_user admin admin
#设置用户角色为administratorrabbitmqctl set_user_tags admin administrator
#为admin分配vhost "/"的权限rabbitmqctl set_permissions -p / admin ".*" ".*" ".*"
systemctl restart rabbitmq-server
此时,使用该账户即可登陆 http://
:15672
RabbitMQ 其他常用命令
xxxxxxxxxx#列出所有用户rabbitmqctl list_users
#删除用户rabbitmqctl delete_user xxx(用户名)#清除用户权限rabbitmqctl clear_permissions -p vhostpath xxxx(用户名)#列出用户权限rabbitmqctl list_user_permissions xxx(用户名)#修改密码rabbitmqctl change_password xxx(用户名) newpassword
CentOS 安装 Siege
Siege 是 linux 下的一个 web 系统的压力测试工具,支持多链接,支持 get 和 post 请求,可以对 web 系统进行多并发下持续请求的压力测试。
运行环境:Cent OS 6.8
安装
xxxxxxxxxxwget http://download.joedog.org/siege/siege-latest.tar.gztar -xzvf siege-latest.tar.gz# 根据实际情况切换目录cd siege-4.0.4/./configuremake -j4make install使用 siege -h 查看简要使用说明;使用 man siege 查看详细使用说明,包括示例。
CentOS/Ubuntu 安装 wrk
一个简单的 http benchmark 工具,能做很多基本的 http 性能测试,wrk 能用很少的线程压出很大的并发量。
运行环境:CentOS 6.8
安装
xxxxxxxxxxgit clone https://github.com/wg/wrk.gitcd wrkmake -j将 wrk 所在路径添加环境变量,或者 mv wrk /bin 即可
CentOS 安装 pip
xxxxxxxxxx# 安装 Python 2.7.4
# 安装 setuptoolswget --no-check-certificate https://pypi.python.org/packages/source/s/setuptools/setuptools-1.4.2.tar.gz# 解压:tar -xvf setuptools-1.4.2.tar.gzcd setuptools-1.4.2# 使用 Python 2.7.4 安装 setuptoolspython setup.py install
# 安装 pipcurl  https://bootstrap.pypa.io/get-pip.py | python2.7 -
# 确认安装[root@localhost~]# pip -Vpip 10.0.1 from /usr/local/lib/python2.7/site-packages/pip (python 2.7)
CentOS 安装 MySQLdb
xxxxxxxxxxwget https://files.pythonhosted.org/packages/a5/e9/51b544da85a36a68debe7a7091f068d802fc515a3a202652828c73453cad/MySQL-python-1.2.5.zipunzip MySQL-python-1.2.5.zipcd MySQL-python-1.2.5python setup.py installCentOS 安装 protobuf 3.5.1
xxxxxxxxxx# 墙内需要找其他下载源wget https://github.com/google/protobuf/releases/download/v3.5.1/protobuf-cpp-3.5.1.tar.gztar -xzvf protobuf-cpp-3.5.1.tar.gzcd protobuf-3.5.1/./configure --prefix=/usrmake -j4make installCentOS 配置静态 IP
xxxxxxxxxx[root@localhost ~]# cat /etc/sysconfig/network-scripts/ifcfg-eth0DEVICE="eth0"NAME="eth0"BOOTPROTO="static"HWADDR="00:50:56:23:48:ea"IPV6INIT="no"NM_CONTROLLED="yes"ONBOOT="yes"TYPE="Ethernet"UUID="646484f7-86d3-44f8-a679-e7c8da598401"IPADDR=192.168.2.99NETMASK=255.255.255.0GATEWAY=192.168.2.254DNS1=114.114.114.114DNS2=8.8.8.8
[root@localhost ~]# cat /etc/resolv.confnameserver 114.114.114.114nameserver 8.8.8.8
CentOS 安装 locust 0.8.1
locust 是基于 python 的性能测试工具,通过编写 python 代码来完成性能测试的。
xxxxxxxxxxsudo pip install locustio安装包含多个依赖库,大致信息如下所示
xxxxxxxxxxSuccessfully installed Jinja2-2.10 Werkzeug-0.14.1 click-6.7 flask-1.0.2 gevent-1.3.5 greenlet-0.4.14 itsdangerous-0.24 locustio-0.8.1 msgpack-python-0.5.6 pyzmq-17.1.0 six-1.11.0确认 locust 安装成功
xxxxxxxxxx[kevin@iZwz9cynwitmm46uagetmvZ ~]$ locust --version[2018-07-22 17:07:53,502] iZwz9cynwitmm46uagetmvZ/INFO/stdout: Locust 0.8.1[2018-07-22 17:07:53,502] iZwz9cynwitmm46uagetmvZ/INFO/stdout:CentOS 安装配置 zookeeper/kafka
xxxxxxxxxxzookeeper-3.4.6 安装配置0. 设置机器名    hostname XXX
1. 修改 /etc/hosts    192.168.2.2 master    192.168.2.3 node1    192.168.2.4 node2
2. 做 三台主机 master/node1/node2 之间的机器互信    2.1    每台机器执行 ssh-keygen -t rsa -P ''  #产生密钥对    2.2    将2.1中三个公钥写入authorized_keys #~/.ssh/id_rsa.pub >> authorized_keys    2.3    将2.2中authorized_keys拷贝到每台机器~/.ssh
3. 下载 zookeeper-3.4.6    wget http://mirrors.hust.edu.cn/apache/zookeeper/zookeeper-3.4.6/zookeeper-3.4.6.tar.gz
4. 解压,添加环境变量 /etc/profile    export ZOOKEEPER_HOME=/app/zookeeper-3.4.6    export PATH=$PATH:$ZOOKEEPER_HOME
5. 配置/app/zookeeper-3.4.6/zoo.cfg# The number of milliseconds of each ticktickTime=2000# The number of ticks that the initial# synchronization phase can takeinitLimit=10# The number of ticks that can pass between# sending a request and getting an acknowledgementsyncLimit=5# the directory where the snapshot is stored.# do not use /tmp for storage, /tmp here is just# example sakes.dataDir=/app/zookeeper-3.4.6/snapshotdataLogDir=/app/zookeeper-3.4.6/log# the port at which the clients will connectclientPort=2181# the maximum number of client connections.# increase this if you need to handle more clients#maxClientCnxns=60## Be sure to read the maintenance section of the# administrator guide before turning on autopurge.## http://zookeeper.apache.org/doc/current/zookeeperAdmin.html#sc_maintenance## The number of snapshots to retain in dataDir#autopurge.snapRetainCount=3# Purge task interval in hours# Set to "0" to disable auto purge feature#autopurge.purgeInterval=1server.1=master:2888:3888server.2=node1:2888:3888server.3=node2:2888:3888
6. 配置 /app/zookeeper-3.4.6/snapshot/myid(备注:创建myid:在zoo.cfg配置文件中的 dataDir 的目录下面创建 myid,每个节点myid要求不一样)master:echo 1 > /app/zookeeper-3.4.6/snapshot/myidnode1:  echo 2> /app/zookeeper-3.4.6/snapshot/myidnode2:  echo 3 > /app/zookeeper-3.4.6/snapshot/myid
7. 启动 ./bin/zkServer.sh startJMX enabled by defaultUsing config: /app/zookeeper-3.4.6/bin/../conf/zoo.cfgStarting zookeeper ... STARTED
8. 查看 zookeeper 节点状态[root@localhost bin]# ./zkServer.sh statusJMX enabled by defaultUsing config: /app/zookeeper-3.4.6/bin/../conf/zoo.cfgMode: leader
kafka 安装配置
1. 下载 wget http://mirrors.cnnic.cn/apache/kafka/0.10.0.0/kafka_2.11-0.10.0.0.tgz
2. 配置config/server.properties# Licensed to the Apache Software Foundation (ASF) under one or more# contributor license agreements.  See the NOTICE file distributed with# this work for additional information regarding copyright ownership.# The ASF licenses this file to You under the Apache License, Version 2.0# (the "License"); you may not use this file except in compliance with# the License.  You may obtain a copy of the License at##    http://www.apache.org/licenses/LICENSE-2.0## Unless required by applicable law or agreed to in writing, software# distributed under the License is distributed on an "AS IS" BASIS,# WITHOUT WARRANTIES OR CONDITIONS OF ANY KIND, either express or implied.# See the License for the specific language governing permissions and# limitations under the License.# see kafka.server.KafkaConfig for additional details and defaults
############################# Server Basics #############################
# The id of the broker. This must be set to a unique integer for each broker.broker.id=0
############################# Socket Server Settings #############################
# The address the socket server listens on. It will get the value returned from# java.net.InetAddress.getCanonicalHostName() if not configured.#   FORMAT:#     listeners = security_protocol://host_name:port#   EXAMPLE:#     listeners = PLAINTEXT://your.host.name:9092listeners=PLAINTEXT://master:9092
# Hostname and port the broker will advertise to producers and consumers. If not set,# it uses the value for "listeners" if configured.  Otherwise, it will use the value# returned from java.net.InetAddress.getCanonicalHostName().#advertised.listeners=PLAINTEXT://your.host.name:9092
# The number of threads handling network requestsnum.network.threads=3
# The number of threads doing disk I/Onum.io.threads=8
# The send buffer (SO_SNDBUF) used by the socket serversocket.send.buffer.bytes=102400
# The receive buffer (SO_RCVBUF) used by the socket serversocket.receive.buffer.bytes=102400
# The maximum size of a request that the socket server will accept (protection against OOM)socket.request.max.bytes=104857600

############################# Log Basics #############################
# A comma seperated list of directories under which to store log fileslog.dirs=/app/kafka_2.11-0.10.0.0/kafka-logs
# The default number of log partitions per topic. More partitions allow greater# parallelism for consumption, but this will also result in more files across# the brokers.num.partitions=1
# The number of threads per data directory to be used for log recovery at startup and flushing at shutdown.# This value is recommended to be increased for installations with data dirs located in RAID array.num.recovery.threads.per.data.dir=1
############################# Log Flush Policy #############################
# Messages are immediately written to the filesystem but by default we only fsync() to sync# the OS cache lazily. The following configurations control the flush of data to disk.# There are a few important trade-offs here:#    1. Durability: Unflushed data may be lost if you are not using replication.#    2. Latency: Very large flush intervals may lead to latency spikes when the flush does occur as there will be a lot of data to flush.#    3. Throughput: The flush is generally the most expensive operation, and a small flush interval may lead to exceessive seeks.# The settings below allow one to configure the flush policy to flush data after a period of time or# every N messages (or both). This can be done globally and overridden on a per-topic basis.
# The number of messages to accept before forcing a flush of data to disk#log.flush.interval.messages=10000
# The maximum amount of time a message can sit in a log before we force a flush#log.flush.interval.ms=1000
############################# Log Retention Policy #############################
# The following configurations control the disposal of log segments. The policy can# be set to delete segments after a period of time, or after a given size has accumulated.# A segment will be deleted whenever *either* of these criteria are met. Deletion always happens# from the end of the log.
# The minimum age of a log file to be eligible for deletionlog.retention.hours=168
# A size-based retention policy for logs. Segments are pruned from the log as long as the remaining# segments don't drop below log.retention.bytes.#log.retention.bytes=1073741824
# The maximum size of a log segment file. When this size is reached a new log segment will be created.log.segment.bytes=1073741824
# The interval at which log segments are checked to see if they can be deleted according# to the retention policieslog.retention.check.interval.ms=300000
############################# Zookeeper #############################
# Zookeeper connection string (see zookeeper docs for details).# This is a comma separated host:port pairs, each corresponding to a zk# server. e.g. "127.0.0.1:3000,127.0.0.1:3001,127.0.0.1:3002".# You can also append an optional chroot string to the urls to specify the# root directory for all kafka znodes.zookeeper.connect=master:2181,node1:2181,node2:2181
# Timeout in ms for connecting to zookeeperzookeeper.connection.timeout.ms=6000
delete.topic.enable=trueauto.leader.rebalance.enable=true
3. 启动 nohup ./kafka-server-start.sh ../config/server.properties &
Gerrit 使用者初始配置
Tips: 公司启用 Gerrit 代码审查,作为使用者,例如开发人员,须完成初始配置之后才能使用 Gerrit。
使用 CM 分配的 Gerrit 账号登陆 gerrit WEB 服务器
进入设置(Setting),填写个人邮箱,点击注册邮箱(Register New Mail)
登陆个人邮箱,找到 Gerrit 发送的验证邮件,点击邮件链接进行确认激活
安装 Git 客户端
生成 SSH 公钥(ssh-kengen -t rsa)
如果客户端使用的 openssl 库版本较高而服务器端版本较低,openssl 高版本禁用某些安全性较低的算法,这种情形下,需要在客户端的 .ssh 目录(即,id_rsa.pub所在目录)新建一个文件 config(Windows 下注意去掉后缀),内容如下
xxxxxxxxxxHost 172.13.31.14 KexAlgorithms +diffie-hellman-group1-sha1登陆 Gerrit,进入个人中心,将上一步产生的公钥 id_rsa.pub 添加到 SSH 公钥(SSH Public Keys)
CentOS 安装 gSOAP 2.8.18
安装 gSOAP 2.8.18
xxxxxxxxxxunzip gsoap_2.8.18.zipcd gsoap_2.8.18./configure --prefix=/usr/localmake -j4 && make install添加环境变量 /etc/profile
GSOAP=/usr/local/gsoap_2.8.18
PATH=$GSOAP/bin:$ATH
export PATH
source /etc/profile
CentOS 安装 flask
xxxxxxxxxxpip install flask flask-restfulCentOS 安装 telnet
xxxxxxxxxxyum install -y telnetCentOS 安装 fio
xxxxxxxxxxyum install libaio-develwget http://brick.kernel.dk/snaps/fio-2.0.7.tar.gzyum install libaio-develtar -zxvf fio-2.0.7.tar.gzcd fio-2.0.7makemake installCentOS 配置 NGINX 用户认证
利用 htpasswd 生成密码文件
xxxxxxxxxxhtpasswd -cb my.passwd myusername mypassword配置 Nginx
xxxxxxxxxxserver { listen 80; server_name mydomain.com; auth_basic "Restricted"; auth_basic_user_file /usr/local/nginx/conf/user.conf; root /opt/myserver; index index.html; location /server { proxy_set_header X-Real-IP $remote_addr; proxy_set_header X-Forwarded-For $proxy_add_x_forwarded_for; proxy_set_header Host $http_host; proxy_pass http://10.99.0.4:42290; }}reload nginx
xxxxxxxxxx/usr/local/nginx/sbin/nginx -t/usr/local/nginx/sbin/nginx -s reloadCentOS 安装 Tron
环境:CentOS 7.2/jdk 1.8.0
克隆仓库
xxxxxxxxxxgit clone https://github.com/tronprotocol/java-tronNile 测试网,切换到分支
new_hard_fork_nile,主网使用分支master编译
xxxxxxxxxxcd java-tron./gradlew build编译完成,全节点程序位于 build/libs/FullNode.jar
从
https://github.com/tronprotocol/TronDeployment下载测试网或者主网的配置文件,并且重命名为config.conf运行
xxxxxxxxxxjava -jar FullNode.jar -c config.conf最终的目录如下所示
xxxxxxxxxx[root@~]# tree -L 2.├── config.conf├── FullNode.jar├── logs│ ├── tron-2020-08-17.0.log.gz│ ├── tron-2020-08-17.1.log.gz│ └── tron.log└── output-directory └── databaseCentOS 升级内核
环境:CentOS 7.2
系统自带内核版本如下
xxxxxxxxxx# uname -srLinux 3.10.0-514.26.2.el7.x86_64添加内核源
xxxxxxxxxx# rpm --import https://www.elrepo.org/RPM-GPG-KEY-elrepo.org# rpm -Uvh http://www.elrepo.org/elrepo-release-7.0-2.el7.elrepo.noarch.rpm查看可用内核包
xxxxxxxxxx# yum --disablerepo="*" --enablerepo="elrepo-kernel" list availableLoaded plugins: fastestmirrorLoading mirror speeds from cached hostfile * elrepo-kernel: mirror-hk.koddos.netAvailable Packageselrepo-release.noarch 7.0-5.el7.elrepo elrepo-kernelkernel-lt.x86_64 5.4.117-1.el7.elrepo elrepo-kernelkernel-lt-devel.x86_64 5.4.117-1.el7.elrepo elrepo-kernelkernel-lt-doc.noarch 5.4.117-1.el7.elrepo elrepo-kernelkernel-lt-headers.x86_64 5.4.117-1.el7.elrepo elrepo-kernelkernel-lt-tools.x86_64 5.4.117-1.el7.elrepo elrepo-kernelkernel-lt-tools-libs.x86_64 5.4.117-1.el7.elrepo elrepo-kernelkernel-lt-tools-libs-devel.x86_64 5.4.117-1.el7.elrepo elrepo-kernelkernel-ml-devel.x86_64 5.12.2-1.el7.elrepo elrepo-kernelkernel-ml-doc.noarch 5.12.2-1.el7.elrepo elrepo-kernelkernel-ml-headers.x86_64 5.12.2-1.el7.elrepo elrepo-kernelkernel-ml-tools.x86_64 5.12.2-1.el7.elrepo elrepo-kernelkernel-ml-tools-libs.x86_64 5.12.2-1.el7.elrepo elrepo-kernelkernel-ml-tools-libs-devel.x86_64 5.12.2-1.el7.elrepo elrepo-kernelperf.x86_64 5.12.2-1.el7.elrepo elrepo-kernelpython-perf.x86_64 安装最新的主线稳定内核
xxxxxxxxxx# yum --enablerepo=elrepo-kernel install kernel-ml修改GRUB选项,使新安装的内核作为优先启动。修改前,先进行备份
xxxxxxxxxx# cp /etc/default/grub /etc/default/grub.bak修改vi /etc/default/grub中GRUB_DEFAULT=saved 为 GRUB_DEFAULT=0
xxxxxxxxxx# diff /etc/default/grub /etc/default/grub.bak 3c3< GRUB_DEFAULT=0---> GRUB_DEFAULT=saved重新创建内核配置
xxxxxxxxxx# grub2-mkconfig -o /boot/grub2/grub.cfg重启
xxxxxxxxxx# reboot验证
xxxxxxxxxx# uname -srLinux 5.12.2-1.el7.elrepo.x86_64CentOS 安装 envoy
xxxxxxxxxxsudo yum install -y yum-utilssudo yum-config-manager --add-repo https://getenvoy.io/linux/rpm/tetrate-getenvoy.repo# enable/disable# sudo yum-config-manager --enable tetrate-getenvoy-nightlysudo yum install -y getenvoy-envoy查看版本信息
xxxxxxxxxx[root@localhost ~]# envoy --versionenvoy version: d362e791eb9e4efa8d87f6d878740e72dc8330ac/1.18.2/clean-getenvoy-76c310e-envoy/RELEASE/BoringSSLCentOS 安装 nodejs/npm
获取 nodejs 的源
xxxxxxxxxxcurl --silent --location https://rpm.nodesource.com/setup_12.x | bash -安装 nodejs
xxxxxxxxxxyum install -y nodejs安装淘宝镜像 cnpm
如果是腾讯云服务器,使用腾讯源,否则卡顿到不可用。
npm config set registry http://mirrors.cloud.tencent.com/npm/
xxxxxxxxxxnpm install -g cnpm --registry=https://registry.npm.taobao.org查看安装版本
xxxxxxxxxxnode -vnpm -vcnpm -v卸载
xxxxxxxxxxyum remove nodejs npm -y手动删除可能的残留
xxxxxxxxxxrm -rf /usr/bin/node /usr/bin/npm /usr/local/bin/node /usr/local/bin/npm /usr/local/share/man/man1/node.1 /usr/local/lib/node_moudlesCentOS 安装 mono
环境:CentOS 7.2
安装基础库
xxxxxxxxxxyum -y install gcc gcc-c++ bison pkgconfig glib2-devel gettext make libpng-devel libjpeg-devel libtiff-devel libexif-devel giflib-devel libX11-devel freetype-devel fontconfig-devel cairo-devel python python3源码编译 mono
xxxxxxxxxxwget https://download.mono-project.com/sources/mono/mono-6.12.0.122.tar.xztar jxf mono-6.12.0.122.tar.xzcd mono-6.12.0.122./configure --prefix=/usr/monomake -j2make installecho PATH=/usr/mono/bin:$PATH >> ~/.bash_profilesource ~/.bash_profileldconfigCentOS 设置时区
以设置中国上海时区为例
备份
mv /ect/localtime /etc/localtime.bak设置目标时区
xxxxxxxxxxln -s /usr/share/zoneinfo/Asia/Shanghai /etc/localtime检查是否生效
xxxxxxxxxx[root@ip-172-31-28-38 ~]# dateTue Jun 28 22:16:31 CST 2022Amazon Linux 2023 安装 iftop
xxxxxxxxxxyum install -y ncurses-devel byacc flexmkdir iftop && cd iftopwget http://www.tcpdump.org/release/libpcap-1.9.1.tar.gztar -xzvf libpcap-1.9.1.tar.gz && cd libpcap-1.9.1 && ./configure && make -j10 && make install && cd ../wget http://www.ex-parrot.com/~pdw/iftop/download/iftop-0.17.tar.gztar -xzvf iftop-0.17.tar.gz && cd iftop-0.17 && ./configure && make -j10 && make install && cd ../cd ..rm -rf iftopAmazon Linux 2023 安装 ab
x
amazon-linux-extras enable epeldnf install httpd-tools -y示例命令
xxxxxxxxxxab -n 1000 -c 10 -p post_data.json -T "application/json" http://127.0.0.1:8888/api/new_addres-n 1000:总共发送 1000 个请求
-c 10:并发数为 10
-p post_data.json:指定包含请求数据的文件(如 POST 的 JSON 数据)
-T "application/json":设置 Content-Type 为 JSON
Ubuntu 替换源
环境:Ubuntu 14.04.5 LTS
备份
xxxxxxxxxxsudo cp /etc/apt/sources.list /etc/apt/sources.list.bak替换阿里云的源
通过
lsb_release -c查看系统版本,例如 14.04 对应trusty,而 18.04 对应bionic。因此,如果需要替换 18.04 为阿里云的源,替换trusty为bionic即可。
xxxxxxxxxxdeb http://mirrors.aliyun.com/ubuntu/ trusty main restricted universe multiversedeb http://mirrors.aliyun.com/ubuntu/ trusty-security main restricted universe multiversedeb http://mirrors.aliyun.com/ubuntu/ trusty-updates main restricted universe multiversedeb http://mirrors.aliyun.com/ubuntu/ trusty-proposed main restricted universe multiversedeb http://mirrors.aliyun.com/ubuntu/ trusty-backports main restricted universe multiversedeb-src http://mirrors.aliyun.com/ubuntu/ trusty main restricted universe multiversedeb-src http://mirrors.aliyun.com/ubuntu/ trusty-security main restricted universe multiversedeb-src http://mirrors.aliyun.com/ubuntu/ trusty-updates main restricted universe multiversedeb-src http://mirrors.aliyun.com/ubuntu/ trusty-proposed main restricted universe multiversedeb-src http://mirrors.aliyun.com/ubuntu/ trusty-backports main restricted universe multiverse18.04 替换为阿里云的源,配置文件如下
xxxxxxxxxxdeb http://mirrors.aliyun.com/ubuntu/ bionic main restricted universe multiversedeb-src http://mirrors.aliyun.com/ubuntu/ bionic main restricted universe multiversedeb http://mirrors.aliyun.com/ubuntu/ bionic-security main restricted universe multiversedeb-src http://mirrors.aliyun.com/ubuntu/ bionic-security main restricted universe multiversedeb http://mirrors.aliyun.com/ubuntu/ bionic-updates main restricted universe multiversedeb-src http://mirrors.aliyun.com/ubuntu/ bionic-updates main restricted universe multiversedeb http://mirrors.aliyun.com/ubuntu/ bionic-backports main restricted universe multiversedeb-src http://mirrors.aliyun.com/ubuntu/ bionic-backports main restricted universe multiversedeb http://mirrors.aliyun.com/ubuntu/ bionic-proposed main restricted universe multiversedeb-src http://mirrors.aliyun.com/ubuntu/ bionic-proposed main restricted universe multiverseUbuntu 安装 golang
下载安装(官方下载源)
xxxxxxxxxxwget https://dl.google.com/go/go1.13.4.linux-amd64.tar.gztar -xzvf go1.13.4.linux-amd64.tar.gzmv go /usr/local设置环境变量(/etc/profile 添加)
xxxxxxxxxxexport GOROOT=/usr/local/go# 设置 golang 工作空间,根据实际情况修改export GOPATH=/opt/goexport PATH=$GOROOT/bin:$GOPATH/bin:$PATH使环境变量生效
xxxxxxxxxxsource /etc/profileUbuntu 安装 bitcoin
环境:Ubuntu 14.04.5 LTS
安装依赖项
xxxxxxxxxxsudo apt-get install build-essential libtool autotools-dev automake pkg-config libssl-dev libevent-dev bsdmainutils python3 libboost-system-dev libboost-filesystem-dev libboost-chrono-dev libboost-program-options-dev libboost-test-dev libboost-thread-dev software-properties-common -ysudo add-apt-repository ppa:bitcoin/bitcoin -ysudo apt-get updatesudo apt-get install libdb4.8-dev libdb4.8++-dev -ysudo apt-get install libminiupnpc-dev libzmq3-dev libqt5gui5 libqt5core5a libqt5dbus5 qttools5-dev qttools5-dev-tools libprotobuf-dev protobuf-compiler libqrencode-dev -y克隆仓库
xxxxxxxxxxgit clone https://github.com/bitcoin/bitcoin.git配置
可以根据需要配置,通过
./configure --help查看全部支持配置选项,例如,不编译 qt 相关、测试用例,可以使用./configure --with-gui=no --disable-tests --disable-gui-tests
xxxxxxxxxx./autogen.sh./configure配置检查通过,输出的信息大致如下所示。可以看到如下同时编译了钱包、gui
xxxxxxxxxxOptions used to compile and link:  with wallet   = yes  with gui / qt = yes    qt version  = 5    with qr     = yes  with zmq      = yes  with test     = yes  with bench    = yes  with upnp     = yes  use asm       = yes  sanitizers    =  debug enabled = no  gprof enabled = no  werror        = no
  target os     = linux  build os      =
  CC            = gcc  CFLAGS        = -g -O2  CPPFLAGS      =   -U_FORTIFY_SOURCE -D_FORTIFY_SOURCE=2  -DHAVE_BUILD_INFO -D__STDC_FORMAT_MACROS  CXX           = g++ -std=c++11  CXXFLAGS      =   -Wstack-protector -fstack-protector-all  -Wall -Wextra -Wformat -Wvla -Wformat-security  -Wno-unused-parameter   -g -O2  LDFLAGS       = -pthread  -Wl,-z,relro -Wl,-z,now -pie  ARFLAGS       = cr
编译、安装
xxxxxxxxxxmakemake installUbuntu 安装 WaykiChain
环境:Ubuntu 14.04.5 LTS
初始化系统环境
xxxxxxxxxx
# Desc: init run evn
echo "backup sources.list"Date=`date +%Y%M%d`cp /etc/apt/sources.list /etc/apt/sources.list.\$Date.bak
echo "replace sources.list with aliyun"cat > /etc/apt/sources.list << EOFdeb http://mirrors.aliyun.com/ubuntu/ trusty main restricted universe multiversedeb http://mirrors.aliyun.com/ubuntu/ trusty-security main restricted universe multiversedeb http://mirrors.aliyun.com/ubuntu/ trusty-updates main restricted universe multiversedeb http://mirrors.aliyun.com/ubuntu/ trusty-proposed main restricted universe multiversedeb http://mirrors.aliyun.com/ubuntu/ trusty-backports main restricted universe multiversedeb-src http://mirrors.aliyun.com/ubuntu/ trusty main restricted universe multiversedeb-src http://mirrors.aliyun.com/ubuntu/ trusty-security main restricted universe multiversedeb-src http://mirrors.aliyun.com/ubuntu/ trusty-updates main restricted universe multiversedeb-src http://mirrors.aliyun.com/ubuntu/ trusty-proposed main restricted universe multiversedeb-src http://mirrors.aliyun.com/ubuntu/ trusty-backports main restricted universe multiverseEOF
echo "update sources"apt-get updateapt-get install vim curl wget autoconf software-properties-common -yapt-get update
echo "install essentials"apt-get install build-essential libtool autotools-dev automake pkg-config libssl-dev libevent-dev bsdmainutils python3 libboost-system-dev libboost-filesystem-dev libboost-chrono-dev libboost-program-options-dev libboost-test-dev libboost-thread-dev software-properties-common libdb4.8-dev libdb4.8++-dev libminiupnpc-dev libzmq3-dev libqt5gui5 libqt5core5a libqt5dbus5 qttools5-dev qttools5-dev-tools libprotobuf-dev protobuf-compiler libqrencode-dev -y将如下内容保存成
deploy.sh,将可执行程序 coind 与该脚本放在同一目录,运行./deploy.sh deploy即可完成regtest 网络节点部署
xxxxxxxxxx
function usage(){
echo "功能:部署 11 个节点,并导入私钥" echo "" echo "使用方式:" echo " 假设预期部署目录为 TargetDir" echo " 1. 将可执行文件 coind,脚本 deploy.sh 拷贝到 TargetDir" echo " 2. 通过 ./deploy.sh -h 查看帮助信息" echo " 部署 ./deploy.sh deploy" echo " 启动服务 ./deploy.sh start" echo " 停止服务 ./deploy.sh stop" echo " 更新程序 替换 coind 后执行 ./deploy.sh update" echo " 清理 ./deploy.sh cleanup" echo " 查看帮助 ./deploy.sh -h" echo "" echo "注意事项:防火墙关闭或开放对应端口" echo ""}
function stop(){ #echo "kill all nodes if exists" #ps afx|grep node|grep -v grep|awk '{print $1}'|xargs kill -9 for i in $(seq 1 11) do Node="node"$i if [ -d $Node ]; then cd $Node ./$Node -datadir=./ stop cd .. fi done}
function start(){ for i in $(seq 1 11) do Node="node"$i cd $Node ./$Node -datadir=./ & cd .. done}
function deploy(){ stop
echo "step 1: deploy all nodes" for i in $(seq 1 11) do Node="node"$i echo "begin to deploy $Node" rm -rf $Node mkdir -p $Node
Executive="node"$i cp coind $Executive/$Executive
if [ $i -lt 10 ]; then Uiport="450"$i Rpcport="690"$i Port="790"$i Connect="connect=127.0.0.1:790"$i else Uiport="45"$i Rpcport="69"$i Port="79"$i Connect="connect=127.0.0.1:79"$i fi
cat >> WaykiChain.conf << EOFrpcuser=chainrpcpassword=123regtest=1blockminsize=1000zapwallettxes=0debug=INFOdebug=MINERdebug=ERRORdebug=netdebug=vm#debug=shuffle#debug=profitslogprinttoconsole=0logtimestamps=1logprinttofile=1logprintfileline=1checkblocks=1server=1listen=1uiport=$Uiportrpcport=$Rpcportport=$Portrpcallowip=*.*.*.*connect=127.0.0.1:7901connect=127.0.0.1:7902connect=127.0.0.1:7903connect=127.0.0.1:7904connect=127.0.0.1:7905connect=127.0.0.1:7906connect=127.0.0.1:7907connect=127.0.0.1:7908connect=127.0.0.1:7909connect=127.0.0.1:7910connect=127.0.0.1:7911isdbtraversal=1disablesafemode=1gen=1genproclimit=1000000logsize=100EOF
sed -i "/$Connect/d" WaykiChain.conf mv WaykiChain.conf $Node
done
echo "step 2: start all nodes" start
sleep 5
echo "step 3: import private key for every node" cd node1 && ./node1 -datadir=./ importprivkey Y5F2GraTdQqMbYrV6MG78Kbg4QE8p4B2DyxMdLMH7HmDNtiNmcbM cd .. cd node2 && ./node2 -datadir=./ importprivkey Y7HWKeTHFnCxyTMtCEE6tVkqBzXoN1Yjxcx5Rs8j2dsSSvPxvF7p cd .. cd node3 && ./node3 -datadir=./ importprivkey Y871eB5Xiss2ugKWQRb4nmMhKTnmXAEyUqBimTCupogzoSTVCSU9 cd .. cd node4 && ./node4 -datadir=./ importprivkey Y9cAUsEhfsihbePnCYYCETpN1PVovqTMX4kauKRsZ9ERdz1uumeK cd .. cd node5 && ./node5 -datadir=./ importprivkey Y4unEjiFk1YJQi1jaT3deY4t9Hm1eSk9usCam35LcN85cUA2QmZ5 cd .. cd node6 && ./node6 -datadir=./ importprivkey Y5XKsR95ymf2pEyuhDPLtuvioHRo6ogDDNnaf4YU91ABvLb68QBU cd .. cd node7 && ./node7 -datadir=./ importprivkey Y7diE8BXuwTkjSzgdZMnKNhzYGrU8oSk31anJ1mwipSCcnPakzTA cd .. cd node8 && ./node8 -datadir=./ importprivkey YCjoCrtGEvMPZDLzBoY9GP3r7pqWa5mgzUxqAsVub6xnUVBwQHxE cd .. cd node9 && ./node9 -datadir=./ importprivkey Y6bKBN4ZKBNHJZpQpqE7y7TC1QpdT32YtAjw4Me9Bvgo47b5ivPY cd .. cd node10 && ./node10 -datadir=./ importprivkey Y8G5MwTFVsqj1FvkqFDEENzUBn4yu4Ds83HkeSYP9SkjLba7xQFX cd .. cd node11 && ./node11 -datadir=./ importprivkey YAq1NTUKiYPhV9wq3xBNCxYZfjGPMtZpEPA4sEoXPU1pppdjSAka cd ..
echo "step 4: set node1 to mine" cd node1 ./node1 -datadir=. importprivkey Y6J4aK6Wcs4A3Ex4HXdfjJ6ZsHpNZfjaS4B9w7xqEnmFEYMqQd13 ./node1 -datadir=. getbalance cd ..
echo "=================================" echo "congratulations, all is done" echo "================================="}
function update(){ stop
for i in $(seq 1 11) do Node="node"$i echo "begin to update $Node"
Executive="node"$i rm -rf $Executive/$Executive cp coind $Executive/$Executive done
start
echo "=================================" echo "congratulations, all is done" echo "================================="}
function cleanup(){ stop
for i in $(seq 1 11) do Node="node"$i rm -rf $Node done}
if [ $# -ne 1 ]; then usage exit 0fi
if [ $1"x" = "-h"x -o $1"x" = "--helpx" -o $1"x" = "helpx" ]; then usage exit 0fi
if [ $1"x" = deploy"x" ]; then deploy exit 0elif [ $1"x" = start"x" ]; then start exit 0elif [ $1"x" = stop"x" ]; then stop exit 0elif [ $1"x" = update"x" ]; then update exit 0elif [ $1"x" = cleanup"x" ]; then cleanup exit 0else echo "error: invalid argument" usage exit 0fiUbuntu 安装 ethereum
环境:Ubuntu 14.04.5 LTS
GCC:gcc (Ubuntu 4.8.4-2ubuntu1~14.04.4) 4.8.4
Golang:go version go1.10.3 linux/amd64 (注意:低版本 Golang 编译器存在 bug)
下载
xxxxxxxxxxmkdir -p $GOPATH/src/github.com/ethereumcd $GOPATH/src/github.com/ethereumgit clone https://github.com/ethereum/go-ethereum.git编译
xxxxxxxxxxcd go-ethereummake all查看编译文件
xxxxxxxxxxroot:go-ethereum# cd build/binroot:bin# lsabigen bootnode clef ethkey evm examples faucet geth p2psim puppeth rlpdump simulations swarm swarm-smoke wnode安装合约编译器 SolC
solc, the Solidity commandline compiler.
This program comes with ABSOLUTELY NO WARRANTY. This is free software, and you are welcome to redistribute it under certain conditions. See 'solc --license' for details.
Usage: solc [options] [input_file...] Compiles the given Solidity input files (or the standard input if none given or "-" is used as a file name) and outputs the components specified in the options at standard output or in files in the output directory, if specified. Imports are automatically read from the filesystem, but it is also possible to remap paths using the context:prefix=path syntax. Example: solc --bin -o /tmp/solcoutput dapp-bin=/usr/local/lib/dapp-bin contract.sol
xxxxxxxxxxsudo add-apt-repository ppa:ethereum/ethereumsudo apt-get updatesudo apt-get install solcwhich solc安装 nodejs
xxxxxxxxxxwget https://nodejs.org/dist/v8.11.3/node-v8.11.3-linux-x64.tar.xzxz -d node-v8.11.3-linux-x64.tar.xztar -xvf node-v8.11.3-linux-x64.tar.xz# 清理已安装的 node/nodejs/npmcd node-v8.11.3-linux-x64/cp -r bin/* /usr/local/bincp -r include/* /usr/loca/includecp -r lib/* /usr/local/libecho "/usr/local/bin >> ~/.bashrc"source ~/.bashrc替换 npm 淘宝源
xxxxxxxxxxecho "registry = https://registry.npm.taobao.org" >> ~/.npmrc安装 web3
备注:以太坊 官方 wiki 的 API,基于 web3 的版本是 0.2x.x。如果直接用
npm install web3,安装的版本为 1.0.0-beta.35,API 使用差异巨大,如果采用此方法安装,参考实际版本的 web3.js。
xxxxxxxxxx# npm initnpm install web3@0.20.1Ubuntu 安装 lua
运行环境:Ubuntu 14.04
xxxxxxxxxxcurl -R -O http://www.lua.org/ftp/lua-5.3.0.tar.gztar -zxf lua-5.3.0.tar.gzcd lua-5.3.0make linux testmake installUbuntu 安装搜狗拼音输入法
在 https://pinyin.sogou.com/linux/ 下载安装包
dpkg -i sogoupinyin_*.deb
配置输入法,系统设置 --> 语言支持 --> 把里面的 IBus 改为 fcitx --> 重启生效
Ubuntu svn 提交编辑器
xxxxxxxxxx修改 ~/.subversion/config 配置项,如下所示
xxxxxxxxxx### Set editor-cmd to the command used to invoke your text editor.### This will override the environment variables that Subversion### examines by default to find this information ($EDITOR,### et al).# editor-cmd = editor (vi, emacs, notepad, etc.)editor-cmd = viUbuntu 安装 vim 8.1
xxxxxxxxxx# 安装依赖库apt-get install libncurses5-dev libncursesw5-dev
# 下载解压curl -O http://ftp.vim.org/vim/unix/vim-8.1.tar.bz2bzip2 -d vim-8.1.tar.bz2tar -xvf vim-8.1.tar
# 编译、安装cd vim81./configuremake -j4make install
# 覆盖老版本cp /usr/local/bin/vim /usr/bin/vim
Ubuntu 禁用 ipv6
在 /etc/sysctl.conf 追加如下内容
xxxxxxxxxx#disable IPv6net.ipv6.conf.all.disable_ipv6 = 1net.ipv6.conf.default.disable_ipv6 = 1net.ipv6.conf.lo.disable_ipv6 = 1执行 sysctl -p 使之生效
Ubuntu 设置语言环境为中文
安装 zh_CN.UTF-8 语言
xxxxxxxxxxkevin@ubuntu:~$ sudo locale-gen zh_CN.UTF-8kevin@ubuntu:~$ localeLANG=en_US.UTF-8LANGUAGE=LC_CTYPE="en_US.UTF-8"LC_NUMERIC="en_US.UTF-8"LC_TIME="en_US.UTF-8"LC_COLLATE="en_US.UTF-8"LC_MONETARY="en_US.UTF-8"LC_MESSAGES="en_US.UTF-8"LC_PAPER="en_US.UTF-8"LC_NAME="en_US.UTF-8"LC_ADDRESS="en_US.UTF-8"LC_TELEPHONE="en_US.UTF-8"LC_MEASUREMENT="en_US.UTF-8"LC_IDENTIFICATION="en_US.UTF-8"LC_ALL=设置环境变量
xxxxxxxxxxkevin@ubuntu:~$ vim ~/.profile# 添加下面内容export LANG="zh_CN.UTF-8"export LC_ALL="zh_CN.UTF-8"Ubuntu 设置静态 IP
xxxxxxxxxxroot@ubuntu:~# cat /etc/network/interfaces# interfaces(5) file used by ifup(8) and ifdown(8)auto loiface lo inet loopback
auto eth0iface eth0 inet static
address 192.168.2.100netmask 255.255.255.0gateway 192.168.2.254
root@ubuntu:~# cat /etc/resolvconf/resolv.conf.d/basenameserver 114.114.114.114nameserver 8.8.8.8
Ubuntu 安装 eos
环境:Ubuntu Ubuntu 18.04 LTS
下载、编译
运行脚本之后,提示安装依赖包,输入
Yes即可
xxxxxxxxxxgit clone https://github.com/EOSIO/eos --recursiveroot@ubuntu:~/eos# ./eosio_build.sh默认最小硬盘限制为
20G,最小内存限制为7000M,如果编译机器物理硬件较差,可以适当修改
修改最小硬盘限制:修改文件
eosio_build.sh中DISK_MIN=20
修改最小内存限制:修改文件
scripts/eosio_build_ubuntu.sh中"${MEM_MEG}" -lt 7000
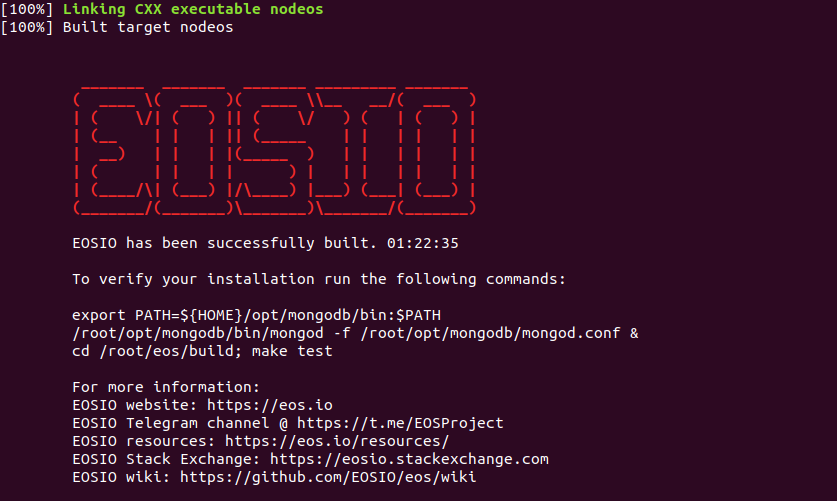
运行上述提示,测试正确性
xxxxxxxxxxexport PATH=${HOME}/opt/mongodb/bin:$PATH/root/opt/mongodb/bin/mongod -f /root/opt/mongodb/mongod.conf &cd /root/eos/build; make test
安装 eos
xxxxxxxxxxroot@ubuntu:~/eos# ./eosio_install.sh
Ubuntu 安装 fio
FIO 是测试 IOPS 的非常好的工具,用来对硬件进行压力测试和验证。
xxxxxxxxxxapt-get install libaio-devwget http://brick.kernel.dk/snaps/fio-2.0.7.tar.gzyum install libaio-develtar -zxvf fio-2.0.7.tar.gzcd fio-2.0.7makemake installUbuntu 安装 Nebulas
环境:Ubuntu 16.04,版本:master 分支,
215ea2c9a2c7305541902e7626034ab14f043c04
安装 golang
xxxxxxxxxxwget https://dl.google.com/go/go1.9.3.linux-amd64.tar.gztar -C /usr/local -xzf go1.9.3.linux-amd64.tar.gzxxxxxxxxxx# 环境变量写入 ~/.bashrcexport PATH=$PATH:/usr/local/go/binexport GOPATH=/opt/workspace
source ~/.bashrc编译 nebulas
xxxxxxxxxxmkdir -p $GOPATH/srccd $GOPATH/srcgo get -u -v github.com/nebulasio/go-nebulasxxxxxxxxxxcd github.com/nebulasio/go-nebulasgit checkout masterxxxxxxxxxxcd github.com/nebulasio/go-nebulassource install-native-libs.shsource install-rocksdb.shxxxxxxxxxxwget http://develop-center.oss-cn-zhangjiakou.aliyuncs.com/setup/vendor/vendor.tar.gztar -xvzf vendor.tar.gzxxxxxxxxxxmake buildUbuntu 安装 shadowsocks-libev
Ubuntu 18.04
安装 shadowsocks-libev
xxxxxxxxxxapt install shadowsocks-libev -y
# 内核版本 4.9 才支持开启 bbr(通过 uname -a 查看内核版本)echo "net.core.default_qdisc=fq" >> /etc/sysctl.confecho "net.ipv4.tcp_congestion_control=bbr" >> /etc/sysctl.confsysctl -p
添加配置文件
xxxxxxxxxx# cat /opt/config/manager.json{ "port_password": { "443": "12345" }, "fast_open":true, "reuse_port":true, "no_delay":true, "timeout": 300, "mode":"tcp_and_udp", "method": "aes-256-gcm"}启动服务
xxxxxxxxxxss-manager -c /opt/config/manager.json安装 simple-obfs
simple-obfs 是一个简单的混淆插件, 可以伪装成
http流量
xxxxxxxxxxcd /optapt-get install --no-install-recommends build-essential autoconf libtool libssl-dev libpcre3-dev libev-dev asciidoc xmlto automake -ygit clone https://github.com/shadowsocks/simple-obfs.gitcd simple-obfsgit submodule update --init --recursive./autogen.sh./configure && makesudo make install启用混淆
xxxxxxxxxx# cat /opt/config/manager.json{ "port_password": { "443" : "12345" }, "fast_open":true, "reuse_port":true, "no_delay":true, "timeout": 300, "mode":"tcp_and_udp", "method": "aes-256-gcm", "plugin":"obfs-server", "plugin_opts":"obfs=http;failover=apps.bdimg.com"}重启服务
xxxxxxxxxxsystemctl restart shadowsocks-libevss-manager -c /opt/config/manager.json客户端配置
安卓客户端:https://github.com/shadowsocks/simple-obfs-android/releases
下载 windows 客户端插件:https://github.com/shadowsocks/simple-obfs/releases,放在 ss 目录,如下
ss 配置如下
Ubuntu 安装 nc
安装
xxxxxxxxxxapt-get -y install netcat-traditional配置。Ubuntu 上默认安装的是 netcat-openbsd,而不是经典的 netcat-traditional,因此,需要配置一下。
xxxxxxxxxxroot@ubuntu:~# update-alternatives --config ncThere are 2 choices for the alternative nc (providing /bin/nc).
  Selection    Path                 Priority   Status------------------------------------------------------------* 0            /bin/nc.openbsd       50        auto mode  1            /bin/nc.openbsd       50        manual mode  2            /bin/nc.traditional   10        manual mode
Press <enter> to keep the current choice[*], or type selection number: 2
Windows 安装 remix-ide
安装 npm
参考安装 npm,可使用淘宝 cnpm 加速
安装依赖
xxxxxxxxxx# 编译C++原生模块npm install -g node-gyp# 下载 windows 系统的编译器npm install -g --production windows-build-tools安装 remix-ide(自动下载安装 remixd)
如果安装出错,请尝试升级 npm:
npm install npm@latest -gxxxxxxxxxxnpm install -g remix-ide在合约文件目录运行 remix-ide
redix-ide服务监听本地 8080 端口,同时调用remixd服务监听本地的 65520 端口,如下所示xxxxxxxxxx$ remix-idesetup notifications for E:\iblocktech\mf\contractcodeShared folder : E:\iblocktech\mf\contractcodeStarting Remix IDE at http://localhost:8080 and sharing E:\iblocktech\mf\contrac tcodeMon Aug 13 2018 14:57:01 GMT+0800 (中国标准时间) Remixd is listening on 127.0.0.1:65520origin http://localhost:8080Mon Aug 13 2018 14:57:23 GMT+0800 (中国标准时间) Connection accepted.setup notifications for E:\iblocktech\mf\contractcode打开浏览器,访问
http://localhost:8080,通过remixd服务配置remix-ide与本地合约文件,如下所示
Windows 安装 julia 1.0.0
官网下载 julia 安装包
添加环境变量
将 julia 安装路径添加到环境变量
Path即可
Windows 配置 GPG 签名 commit
安装 gpg4win
生成 GPG 密钥
xxxxxxxxxx$ gpg --list-secret-keys --keyid-format LONGgpg: /c/Users/kevin/.gnupg/trustdb.gpg: trustdb created
kevin@kevin-PC MINGW64 /d/Blog (master)$ gpg --gen-keygpg (GnuPG) 1.4.22; Copyright (C) 2015 Free Software Foundation, Inc.This is free software: you are free to change and redistribute it.There is NO WARRANTY, to the extent permitted by law.
Please select what kind of key you want:   (1) RSA and RSA (default)   (2) DSA and Elgamal   (3) DSA (sign only)   (4) RSA (sign only)Your selection? 1RSA keys may be between 1024 and 4096 bits long.What keysize do you want? (2048)Requested keysize is 2048 bitsPlease specify how long the key should be valid.         0 = key does not expire      <n>  = key expires in n days      <n>w = key expires in n weeks      <n>m = key expires in n months      <n>y = key expires in n yearsKey is valid for? (0)Key does not expire at allIs this correct? (y/N) y
You need a user ID to identify your key; the software constructs the user IDfrom the Real Name, Comment and Email Address in this form:    "Heinrich Heine (Der Dichter) <heinrichh@duesseldorf.de>"
Real name: KevinEmail address: c.r2009@163.comComment: wupolifa1You selected this USER-ID:    "Kevin (wupolifa1) <c.r2009@163.com>"
Change (N)ame, (C)omment, (E)mail or (O)kay/(Q)uit? OYou need a Passphrase to protect your secret key.
We need to generate a lot of random bytes. It is a good idea to performsome other action (type on the keyboard, move the mouse, utilize thedisks) during the prime generation; this gives the random numbergenerator a better chance to gain enough entropy.....++++++++++We need to generate a lot of random bytes. It is a good idea to performsome other action (type on the keyboard, move the mouse, utilize thedisks) during the prime generation; this gives the random numbergenerator a better chance to gain enough entropy..........+++++.+++++gpg: key FF939C7E marked as ultimately trustedpublic and secret key created and signed.
gpg: checking the trustdbgpg: 3 marginal(s) needed, 1 complete(s) needed, PGP trust modelgpg: depth: 0  valid:   1  signed:   0  trust: 0-, 0q, 0n, 0m, 0f, 1upub   2048R/FF939C7E 2018-11-01      Key fingerprint = 7032 C3B1 BC33 6747 3FD9  04C7 4A96 54CE FF93 9C7Euid                  Kevin (wupolifa1) <c.r2009@163.com>sub   2048R/3B2770AE 2018-11-01
其中,
pub为公钥,sub为私钥
获取公钥
通过
gpg --list-keys查看Pub GPG key ID
xxxxxxxxxx$ gpg --armor --export FF939C7E拷贝上面得到的公钥到 github 账号设置
SSH and GPG keys
设置 git 签名时使用的
key
xxxxxxxxxx$ git config --global user.signingkey FF939C7E设置使用 GPG 签名
commit
xxxxxxxxxx$ git config commit.gpgsign true设置全局生效,使用
git config --global commit.gpgsign true
关闭,使用
git config commit.gpgsign false
也可以每次提交时,指定使用 GPG 签名
git commit -S -m "your commit message"
xxxxxxxxxxkevin@kevin-PC MINGW64 /d/Blog (master)$ git commit -m "config: Windows 配置 GPG 签名 commit" -S
You need a passphrase to unlock the secret key foruser: "Kevin (wupolifa1) <c.r2009@163.com>"2048-bit RSA key, ID FF939C7E, created 2018-11-01
[master 9059a7a] config: Windows 配置 GPG 签名 commit 4 files changed, 152 insertions(+), 4 deletions(-) create mode 100644 pic/config/gpg1.png create mode 100644 pic/config/gpg2.png
Windows 安装 bitcoin
环境:Windows 7 Ultimate x64
准备编译环境
安装 msys shell(Windows 平台模式 shell 的程序)
从 http://sourceforge.net/projects/mingw/files/Installer/mingw-get-setup.exe/download 下载安装包,安装如下四项:
msys-base-bin
msys-autoconf-bin
msys-automake-bin
msys-libtool-bin
安装 MinGW-builds 工具链
添加环境变量
将 2 中工具链的目录添加到环境变量 Path,即,追加 C:\mingw32\bin;
验证工具链安装配置正确
xxxxxxxxxx$ gcc -vUsing built-in specs.COLLECT_GCC=C:\mingw32\bin\gcc.exeCOLLECT_LTO_WRAPPER=C:/mingw32/bin/../libexec/gcc/i686-w64-mingw32/4.9.2/lto-wrapper.exeTarget: i686-w64-mingw32Configured with: ../../../src/gcc-4.9.2/configure --host=i686-w64-mingw32 --build=i686-w64-mingw32 --target=i686-w64-mingw32 --prefix=/mingw32 --with-sysroot=/c/mingw492/i686-492-posix-dwarf-rt_v3-rev1/mingw32 --with-gxx-include-dir=/mingw32/i686-w64-mingw32/include/c++ --enable-shared --enable-static --disable-multilib --enable-languages=ada,c,c++,fortran,objc,obj-c++,lto --enable-libstdcxx-time=yes --enable-threads=posix --enable-libgomp --enable-libatomic --enable-lto --enable-graphite --enable-checking=release --enable-fully-dynamic-string --enable-version-specific-runtime-libs --disable-sjlj-exceptions --with-dwarf2 --disable-isl-version-check --disable-cloog-version-check --disable-libstdcxx-pch --disable-libstdcxx-debug --enable-bootstrap --disable-rpath --disable-win32-registry --disable-nls --disable-werror --disable-symvers --with-gnu-as --with-gnu-ld --with-arch=i686 --with-tune=generic --with-libiconv --with-system-zlib --with-gmp=/c/mingw492/prerequisites/i686-w64-mingw32-static --with-mpfr=/c/mingw492/prerequisites/i686-w64-mingw32-static --with-mpc=/c/mingw492/prerequisites/i686-w64-mingw32-static --with-isl=/c/mingw492/prerequisites/i686-w64-mingw32-static --with-cloog=/c/mingw492/prerequisites/i686-w64-mingw32-static --enable-cloog-backend=isl --with-pkgversion='i686-posix-dwarf-rev1, Built by MinGW-W64 project' --with-bugurl=http://sourceforge.net/projects/mingw-w64 CFLAGS='-O2 -pipe -I/c/mingw492/i686-492-posix-dwarf-rt_v3-rev1/mingw32/opt/include -I/c/mingw492/prerequisites/i686-zlib-static/include -I/c/mingw492/prerequisites/i686-w64-mingw32-static/include' CXXFLAGS='-O2 -pipe -I/c/mingw492/i686-492-posix-dwarf-rt_v3-rev1/mingw32/opt/include -I/c/mingw492/prerequisites/i686-zlib-static/include -I/c/mingw492/prerequisites/i686-w64-mingw32-static/include' CPPFLAGS= LDFLAGS='-pipe -L/c/mingw492/i686-492-posix-dwarf-rt_v3-rev1/mingw32/opt/lib -L/c/mingw492/prerequisites/i686-zlib-static/lib -L/c/mingw492/prerequisites/i686-w64-mingw32-static/lib -Wl,--large-address-aware'Thread model: posixgcc version 4.9.2 (i686-posix-dwarf-rev1, Built by MinGW-W64 project)
安装依赖库
依赖库统一安装到目录 C:\deps
安装 openssl
从 http://www.openssl.org/source/openssl-1.0.1g.tar.gz 下载安装包拷贝到 C:\deps
启动 msys,即,C:\MinGW\msys\1.0\msys.bat)运行这个msys.bat,就会启动一个shell环境,提示符 $
执行如下命令
xxxxxxxxxxcd /c/deps/tar -xvfz openssl-1.0.1l.tar.gzcd openssl-1.0.1l./configure no-zlib no-shared no-dso no-krb5 no-camellia no-capieng no-cast no-cms no-dtls1 no-gost no-gmp no-heartbeats no-idea no-jpake no-md2 no-mdc2 no-rc5 no-rdrand no-rfc3779 no-rsax no-sctp no-seed no-sha0 no-static_engine no-whirlpool no-rc2 no-rc4 no-ssl2 no-ssl3 mingwmake dependmake
安装 Berkeley DB
从 http://download.oracle.com/berkeley-db/db-4.8.30.NC.tar.gz 下载安装包并拷贝到 C:\deps
执行如下命令
xxxxxxxxxxcd /c/deps/tar -xvfz db-4.8.30.NC.tar.gzcd db-4.8.30.NC/build_unix../dist/configure --enable-mingw --enable-cxx --disable-shared --disable-replicationmake
安装 boost
从 http://sourceforge.net/projects/boost/files/boost/1.57.0/ 下载安装包并解压到 C:\deps
执行如下命令
xxxxxxxxxxcd C/deps/boost_1_57_0./bootstrap.bat mingw./b2 --build-type=complete --with-chrono --with-filesystem --with-program_options --with-system --with-thread toolset=gcc variant=release link=static threading=multi runtime-link=static stage
安装 Miniupnpc
从 http://miniupnp.free.fr/files/download.php?file=miniupnpc-1.9.20150206.tar.gz 下载安装包并拷贝到 C:\deps
执行如下命令
xxxxxxxxxxcd C/depstar -xzvf miniupnpc-1.9.20150206.tar.gzcd miniupnpc-1.9.20150206mingw32-make -f Makefile.mingw init upnpc-static
安装 protobuf
从 https://github.com/google/protobuf/releases/download/v2.6.1/protobuf-2.6.1.tar.gz 下载安装包并拷贝到 C:\deps
执行如下命令
xxxxxxxxxxtar -xzvf protobuf-2.6.1.tar.gzcd protobuf-2.6.1./configure --disable-sharedmake
安装 qrencode
从 http://download.sourceforge.net/libpng/libpng-1.6.16.tar.gz 下载安装包并拷贝到 C:\deps
执行如下命令
xxxxxxxxxxtar -xzvf libpng-1.6.16.tar.gzcd libpng-1.6.16./configure --disable-sharedmakecp .libs/libpng16.a .libs/libpng.a从 http://fukuchi.org/works/qrencode/qrencode-3.4.4.tar.gz 下载安装包并拷贝到 C:\deps
执行如下命令
xxxxxxxxxxtar -xzvf qrencode-3.4.4.tar.gzcd qrencode-3.4.4LIBS="../libpng-1.6.16/.libs/libpng.a ../../mingw32/i686-w64-mingw32/lib/libz.a" \png_CFLAGS="-I../libpng-1.6.16" \png_LIBS="-L../libpng-1.6.16/.libs" \./configure --enable-static --disable-shared --without-tools
安装 QT 5
从 http://mirrors.tuna.tsinghua.edu.cn/qt/archive/qt/5.3/5.3.2/submodules/qtbase-opensource-src-5.3.2.7z 下载安装包、解压并拷贝到 C:\Qt\5.3.2
从 http://mirrors.tuna.tsinghua.edu.cn/qt/archive/qt/5.3/5.3.2/submodules/qttools-opensource-src-5.3.2.7z 下载安装包、解压并拷贝到 C:\Qt\qttools-opensource-src-5.3.2
Windows 命令行(CMD)执行如下命令
编译加速:如下编译耗时较长,可通过 mingw32-make -j4 加快编译速度(根据机器实际情况调整参数)
错误处理:出现 'fputs' is not a member of 'std' 编译错误时,在出错的文件所在目录 Makefile.Debug/Makefile.Release 文件,CXXFLAGS 添加编译选项 -std=c++11
xxxxxxxxxxset INCLUDE=C:\deps\libpng-1.6.16;C:\deps\openssl-1.0.1l\includeset LIB=C:\deps\libpng-1.6.16\.libs;C:\deps\openssl-1.0.1lcd C:\Qt\5.3.2configure.bat -release -opensource -confirm-license -static -make libs -no-sql-sqlite -no-opengl -system-zlib -qt-pcre -no-icu -no-gif -system-libpng -no-libjpeg -no-freetype -no-angle -no-vcproj -openssl -no-dbus -no-audio-backend -no-wmf-backend -no-qml-debugmingw32-make -j4set PATH=%PATH%;C:\Qt\5.3.2\bincd C:\Qt\qttools-opensource-src-5.3.2qmake qttools.promingw32-make -j4
安装 bitcoin
解压到 C:\
执行如下命令
xxxxxxxxxxcd /c/bitcoin-0.9.4./autogen.shCPPFLAGS="-I/c/deps/db-4.8.30.NC/build_unix \-I/c/deps/openssl-1.0.1l/include \-I/c/deps \-I/c/deps/protobuf-2.6.1/src \-I/c/deps/libpng-1.6.16 \-I/c/deps/qrencode-3.4.4" \LDFLAGS="-L/c/deps/db-4.8.30.NC/build_unix \-L/c/deps/openssl-1.0.1l \-L/c/deps/miniupnpc \-L/c/deps/protobuf-2.6.1/src/.libs \-L/c/deps/libpng-1.6.16/.libs \-L/c/deps/qrencode-3.4.4/.libs" \BOOST_ROOT=/c/deps/boost_1_57_0 \./configure \--disable-upnp-default \--disable-tests \--with-qt-incdir=/c/Qt/5.3.2/include \--with-qt-libdir=/c/Qt/5.3.2/lib \--with-qt-plugindir=/c/Qt/5.3.2/plugins \--with-qt-bindir=/c/Qt/5.3.2/bin \--with-protoc-bindir=/c/deps/protobuf-2.6.1/srcmakestrip src/bitcoin-cli.exestrip src/bitcoind.exestrip src/qt/bitcoin-qt.exe
Windows 安装 ethereum
环境:Windows 7 Ultimate x64
从 官方下载源 下载 golang 1.10.3,并配置环境变量
xxxxxxxxxxGOPATH=D:\goGOROOT=C:\Go\PATH 添加 %GOROOT%\bin;%GOPATH%\binxxxxxxxxxxcd /d/go/src/github.com/ethereum/go-ethereumgo install ./cmd/geth在目录 D:\go\bin 生成 geth.exe
Windows 安装配置 nodejs/npm
说明:使用 Node.js 的 npm 命令需要访问国外的站点,但由于国内网络的问题,安装速度会比较慢,甚至完全无法安装,淘宝为国内开发者提供了 npm 镜像服务。
下载 nodejs(已包含 npm),官网 https://nodejs.org/en/
使用淘宝 npm 镜像
xxxxxxxxxxnpm config set registry=https://registry.npm.taobao.orgWindows 安装 Git Bash 支持 wget/make/protoc
wget
下载 wget.exe
拷贝 wget.exe 到 Git 安装目录,默认路径 C:\Program Files\Git\mingw64\bin\(需根据 Git 实际安装路径调整)
make
下载 make-4.2.1-without-guile-w32-bin.zip(适用于 Windows 64 位系统)
解压
将解压后的所有文件拷贝到 Git 安装目录,默认路径 C:\Program Files\Git\mingw64\(需根据 Git 实际安装路径调整,另外,如果某些文件原来此目录已存在,切记不要覆盖,选择跳过即可)
protoc
下载 exe
解压
将解压后的所有文件拷贝到 Git 安装目录,默认路径 C:\Program Files\Git\mingw64\(需根据 Git 实际安装路径调整,另外,如果某些文件原来此目录已存在,切记不要覆盖,选择跳过即可)
确认配置成功
打开 Git Bash,输入 protoc --version
xxxxxxxxxx$ protoc --versionlibprotoc 3.5.1Mac 安装 libra
下载源码
xxxxxxxxxxgit clone https://github.com/libra/libra.git检出测试网分支代码
xxxxxxxxxxgit checkout testnet安装依赖项,主要包含 Rust、CMake、Golang、Protobuf 的依赖环境的安装
xxxxxxxxxxcd libra./scripts/dev_setup.sh顺利完成安装,有如下提示
xxxxxxxxxx➜  libra git:(testnet) ./scripts/dev_setup.shWelcome to Libra!
This script will download and install the necessary dependencies needed tobuild Libra Core. This includes:  * Rust (and the necessary components, e.g. rust-fmt, clippy)  * CMake
If you'd prefer to install these dependencies yourself, please exit this scriptnow with Ctrl-C.
Proceed with installing necessary dependencies? (y/N) > yInstalling Rust......Rust is already installedinfo: syncing channel updates for 'stable-x86_64-apple-darwin'info: checking for self-updates
  stable-x86_64-apple-darwin unchanged - rustc 1.41.0 (5e1a79984 2020-01-27)
info: cleaning up downloads & tmp directoriesinfo: component 'rustfmt' for target 'x86_64-apple-darwin' is up to dateinfo: component 'clippy' for target 'x86_64-apple-darwin' is up to dateInstalling CMake......CMake is already installed
Finished installing all dependencies.
You should now be able to build the project by running:  source /Users/kevin/.cargo/env  cargo build
编译客户端并连接到测试网
xxxxxxxxxx./scripts/cli/start_cli_testnet.sh正确运行客户端并连接到测试网,信息如下:
xxxxxxxxxx   Compiling cli v0.1.0 (/Users/kevin/libra/client/cli)    Finished dev [unoptimized + debuginfo] target(s) in 5m 17s     Running `target/debug/cli --host ac.testnet.libra.org --port 8000`I0215 11:19:24.212584 4626128320 client/cli/src/grpc_client.rs:135] Trusted epoch change to :EpochInfo [epoch: 1, validator: ValidatorSet: [02b9e566: 1, 076f0329: 1, 77e3cd65: 1, 79fba303: 1, d208c6f0: 1, e0e838c4: 1, ]]Connected to validator at: ac.testnet.libra.org:8000, latest version = 24614297, timestamp = 2020-02-15 03:19:21.733802 UTCusage: <command> <args>
Use the following commands:
account | a  Account operationsquery | q  Query operationstransfer | transferb | t | tb  <sender_account_address>|<sender_account_ref_id> <receiver_account_address>|<receiver_account_ref_id> <number_of_coins> [gas_unit_price_in_micro_libras (default=0)] [max_gas_amount_in_micro_libras (default 140000)] Suffix 'b' is for blocking.  Transfer coins (in libra) from account to another.help | h  Prints this helpquit | q!  Exit this client

Please, input commands:
iOS APP 使用企业证书签名后分发
将签名后的 ipa 和 plist 文件上传到 OSS/OBS 等
plist 文件内容如下
替换
<your ipa url>为 ipa 实际路径
确保
dict配置跟安装包原始配置信息保持一致,特别是<bundle-identifier>
xxxxxxxxxx<dict> <key>items</key> <array> <dict> <key>assets</key> <array> <dict> <key>kind</key> <string>software-package</string> <key>url</key> <string>https://<your ipa url></string> </dict> </array> <key>metadata</key> <dict> <key>bundle-identifier</key> <string>center.vic.flutter</string> <key>bundle-version</key> <string>1.0.0</string> <key>kind</key> <string>software</string> <key>title</key> <string>VIC</string> </dict> </dict> </array></dict></plist>添加 App 下载页面,iOS 安装包路径配置
可复制
itms-services://?action=download-manifest&url=https://<your plist url>到苹果手机浏览器打开,预期结果:可正常下载安装
xxxxxxxxxxfunction downloadIOS() {    url = "itms-services://?action=download-manifest&url=https://<your plist url>";
    var isWeixin = is_weixin();    var winHeight = typeof window.innerHeight != 'undefined' ? window.innerHeight : document.documentElement.clientHeight;    var weixinTip = $('<div id="weixinTip"><p><img src="img/live_weixin.png" alt="微信打开"/ style="width: 100%;"></p></div>');
    if (isWeixin) {      $("body").append(weixinTip);      $("#weixinTip").css({        "position": "fixed",        "left": "0",        "top": "0",        "height": winHeight,        "width": "100%",        "z-index": "1000",        "background-color": "rgba(0,0,0,0.8)",        "filter": "alpha(opacity=80)",      });      $("#weixinTip p").css({        "text-align": "center",        "margin-top": "10%",        "padding-left": "5%",        "padding-right": "5%"      });
      try {        var elemIF = document.createElement("iframe");        elemIF.src = url;        elemIF.style.display = "none";        document.body.appendChild(elemIF);      } catch (e) {      }    } else {      window.location.href = url;    }  }
gitlab 极狐私有部署
gitlab 极狐安装、配置
安装基础依赖
xxxxxxxxxxyum install -y curl openssh-server openssh-clients postfix cronie policycoreutils-python通过如下命令来配置GitLab软件镜像
xxxxxxxxxxcurl -fsSL https://packages.gitlab.cn/repository/raw/scripts/setup.sh | /bin/bash安装
xxxxxxxxxxapt-get install gitlab-jh
# 查看版本信息cat /opt/gitlab/embedded/service/gitlab-rails/VERSION
配置
首次安装之后进行初始化默认配置,配置时间较长
初始化配置生成
root密码,以文件形式存放/etc/gitlab/initial_root_password
xxxxxxxxxxgitlab-ctl reconfigure启动服务
如下命令包含先停止老进程再启动,具体可查看
help说明
xxxxxxxxxxgitlab-ctl start查看状态
xxxxxxxxxxgitlab-ctl status设置开机自启动
xxxxxxxxxxsystemctl enable gitlab-runsvdir.servicegitlab 邮件配置
以配置 163 免费邮箱为例
注册 163 免费邮箱,设置启用
smtp服务在配置文件
/etc/gitlab/gitlab.rb添加如下核心配置
xxxxxxxxxxgitlab_rails['smtp_enable'] = truegitlab_rails['smtp_address'] = "smtp.163.com"gitlab_rails['smtp_port'] = 465gitlab_rails['smtp_user_name'] = "<user@163.com>"gitlab_rails['smtp_password'] = "<password>"gitlab_rails['smtp_authentication'] = "login"gitlab_rails['smtp_enable_starttls_auto'] = falsegitlab_rails['smtp_tls'] = truegitlab_rails['gitlab_email_from'] = "<user@163.com>"gitlab_rails['smtp_domain'] = "smtp.163.com"重新配置并启动
xxxxxxxxxxgitlab-ctl reconfiguregitlab-ctl start后续在 gitlab 的各项活动都能收到邮件
<可选>配置外部访问域名、启用 https
编辑 /etc/gitlab/gitlab.rb 并将 external_url 更改为您的首选 URL
xxxxxxxxxxexternal_url "http://gitlab.example.com"或者 IP 地址
xxxxxxxxxxexternal_url "http://10.0.0.1"或者安装时指定
xxxxxxxxxxEXTERNAL_URL="https://gitlab.example.com" apt-get install gitlab-jh配置 ci/cd
runner 可以设置为组内共享,多个项目可以复用
安装 gitlab-runner
xxxxxxxxxx# 安装程序wget -O /usr/local/bin/gitlab-runner https://gitlab-runner-downloads.s3.amazonaws.com/latest/binaries/gitlab-runner-linux-amd64
# 等待下载完成后分配权限chmod +x /usr/local/bin/gitlab-runner
# 创建 runner 用户useradd --comment 'gitlab-runner' --create-home gitlab-runner --shell /bin/bash
# 安装程序gitlab-runner install --user=gitlab-runner --working-directory=/home/gitlab-runner
# 启动程序gitlab-runner start
假设要给某个项目配置 ci/cd,从项目设置中获取 gitlab-runner 所需的授权信息
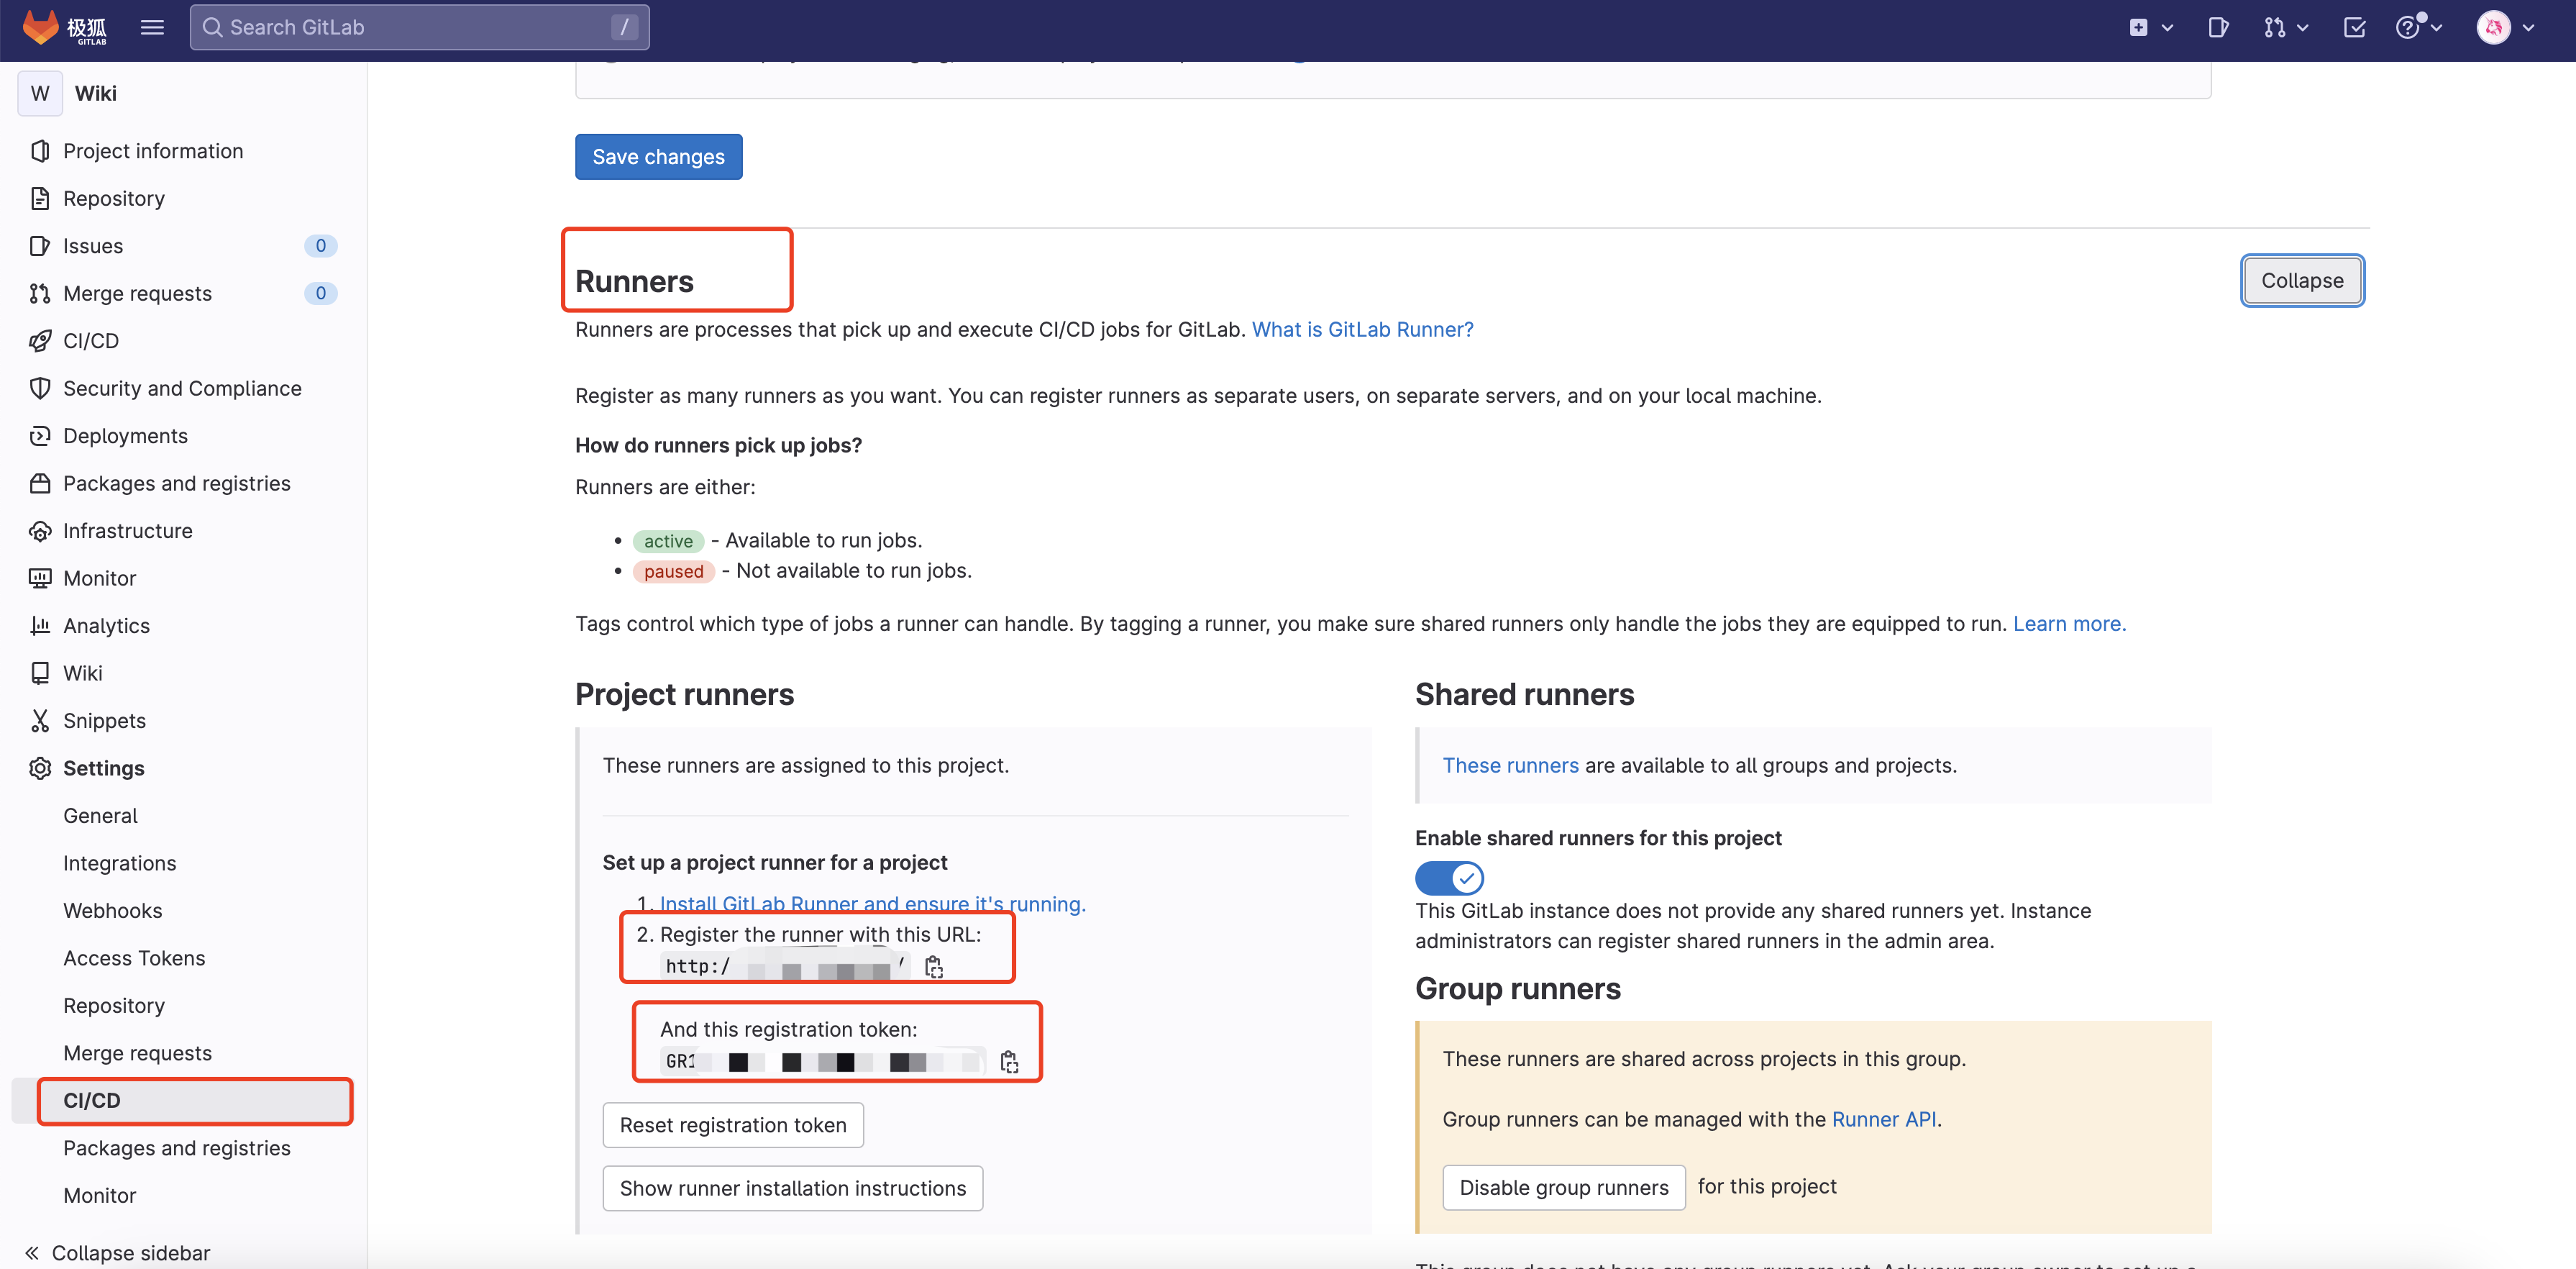
配置 gitlab-runner
特别注意标签名字,后续 gitlab 项目中 ci/cd 配置需要指定此 runner 的标签,假设标签为
jupiter
如果 runner 跟 gitlab 实例在同一台服务器或者同一个内网,使用
localhost或者内网 IP,否则在编译完成上传文件(uploading artifacts)特别慢
xxxxxxxxxxgitlab-runner register
>> Enter the GitLab instance URL (for example, https://gitlab.com/):# 输入刚才获取到的gitlab仓库地址>> Enter the registration token:# 输入刚才获取到的token>> Enter a description for the runner:# 自定义runner描述>> Enter tags for the runner (comma-separated):# 自定义runner标签>> Enter an executor: docker-ssh, docker+machine, docker-ssh+machine, docker, parallels, shell, ssh, virtualbox, kubernetes, custom:# 选择执行器,此处我们输入 shell
配置 gitlab 项目中的 ci/cd 配置,对应文件
.gitlab-ci.yml
tags对应gitlab-runner注册所填写的tag
配置文件也可以通过在 gitlab 项目前端
CI/CD子菜单Editor生成更改
.gitlab-ci.yml 文件是流水线执行的流程文件,Runner 会据此完成规定的一系列流程。我们在项目根目录中创建.gitlab-ci.yml 文件,然后在其中编写内容
xxxxxxxxxx# 阶段stages:  - install  - build  - deploy
cache:  paths:    - node_modules/
# 安装依赖install:  stage: install  # 此处的tags必须填入之前注册时自定的tag  tags:     - jupiter  # 规定仅在package.json提交时才触发此阶段  only:    changes:      - package.json  # 执行脚本  script:    yarn
# 打包项目build:  stage: build   tags:     - jupiter  script:     - yarn build  # 将此阶段产物传递至下一阶段   artifacts:     paths:        - dist/
# 部署项目deploy:  stage: deploy  tags:     - jupiter  script:     # 自定义命令    - <command line>    # ...    - <command line ...>
执行、查看结果
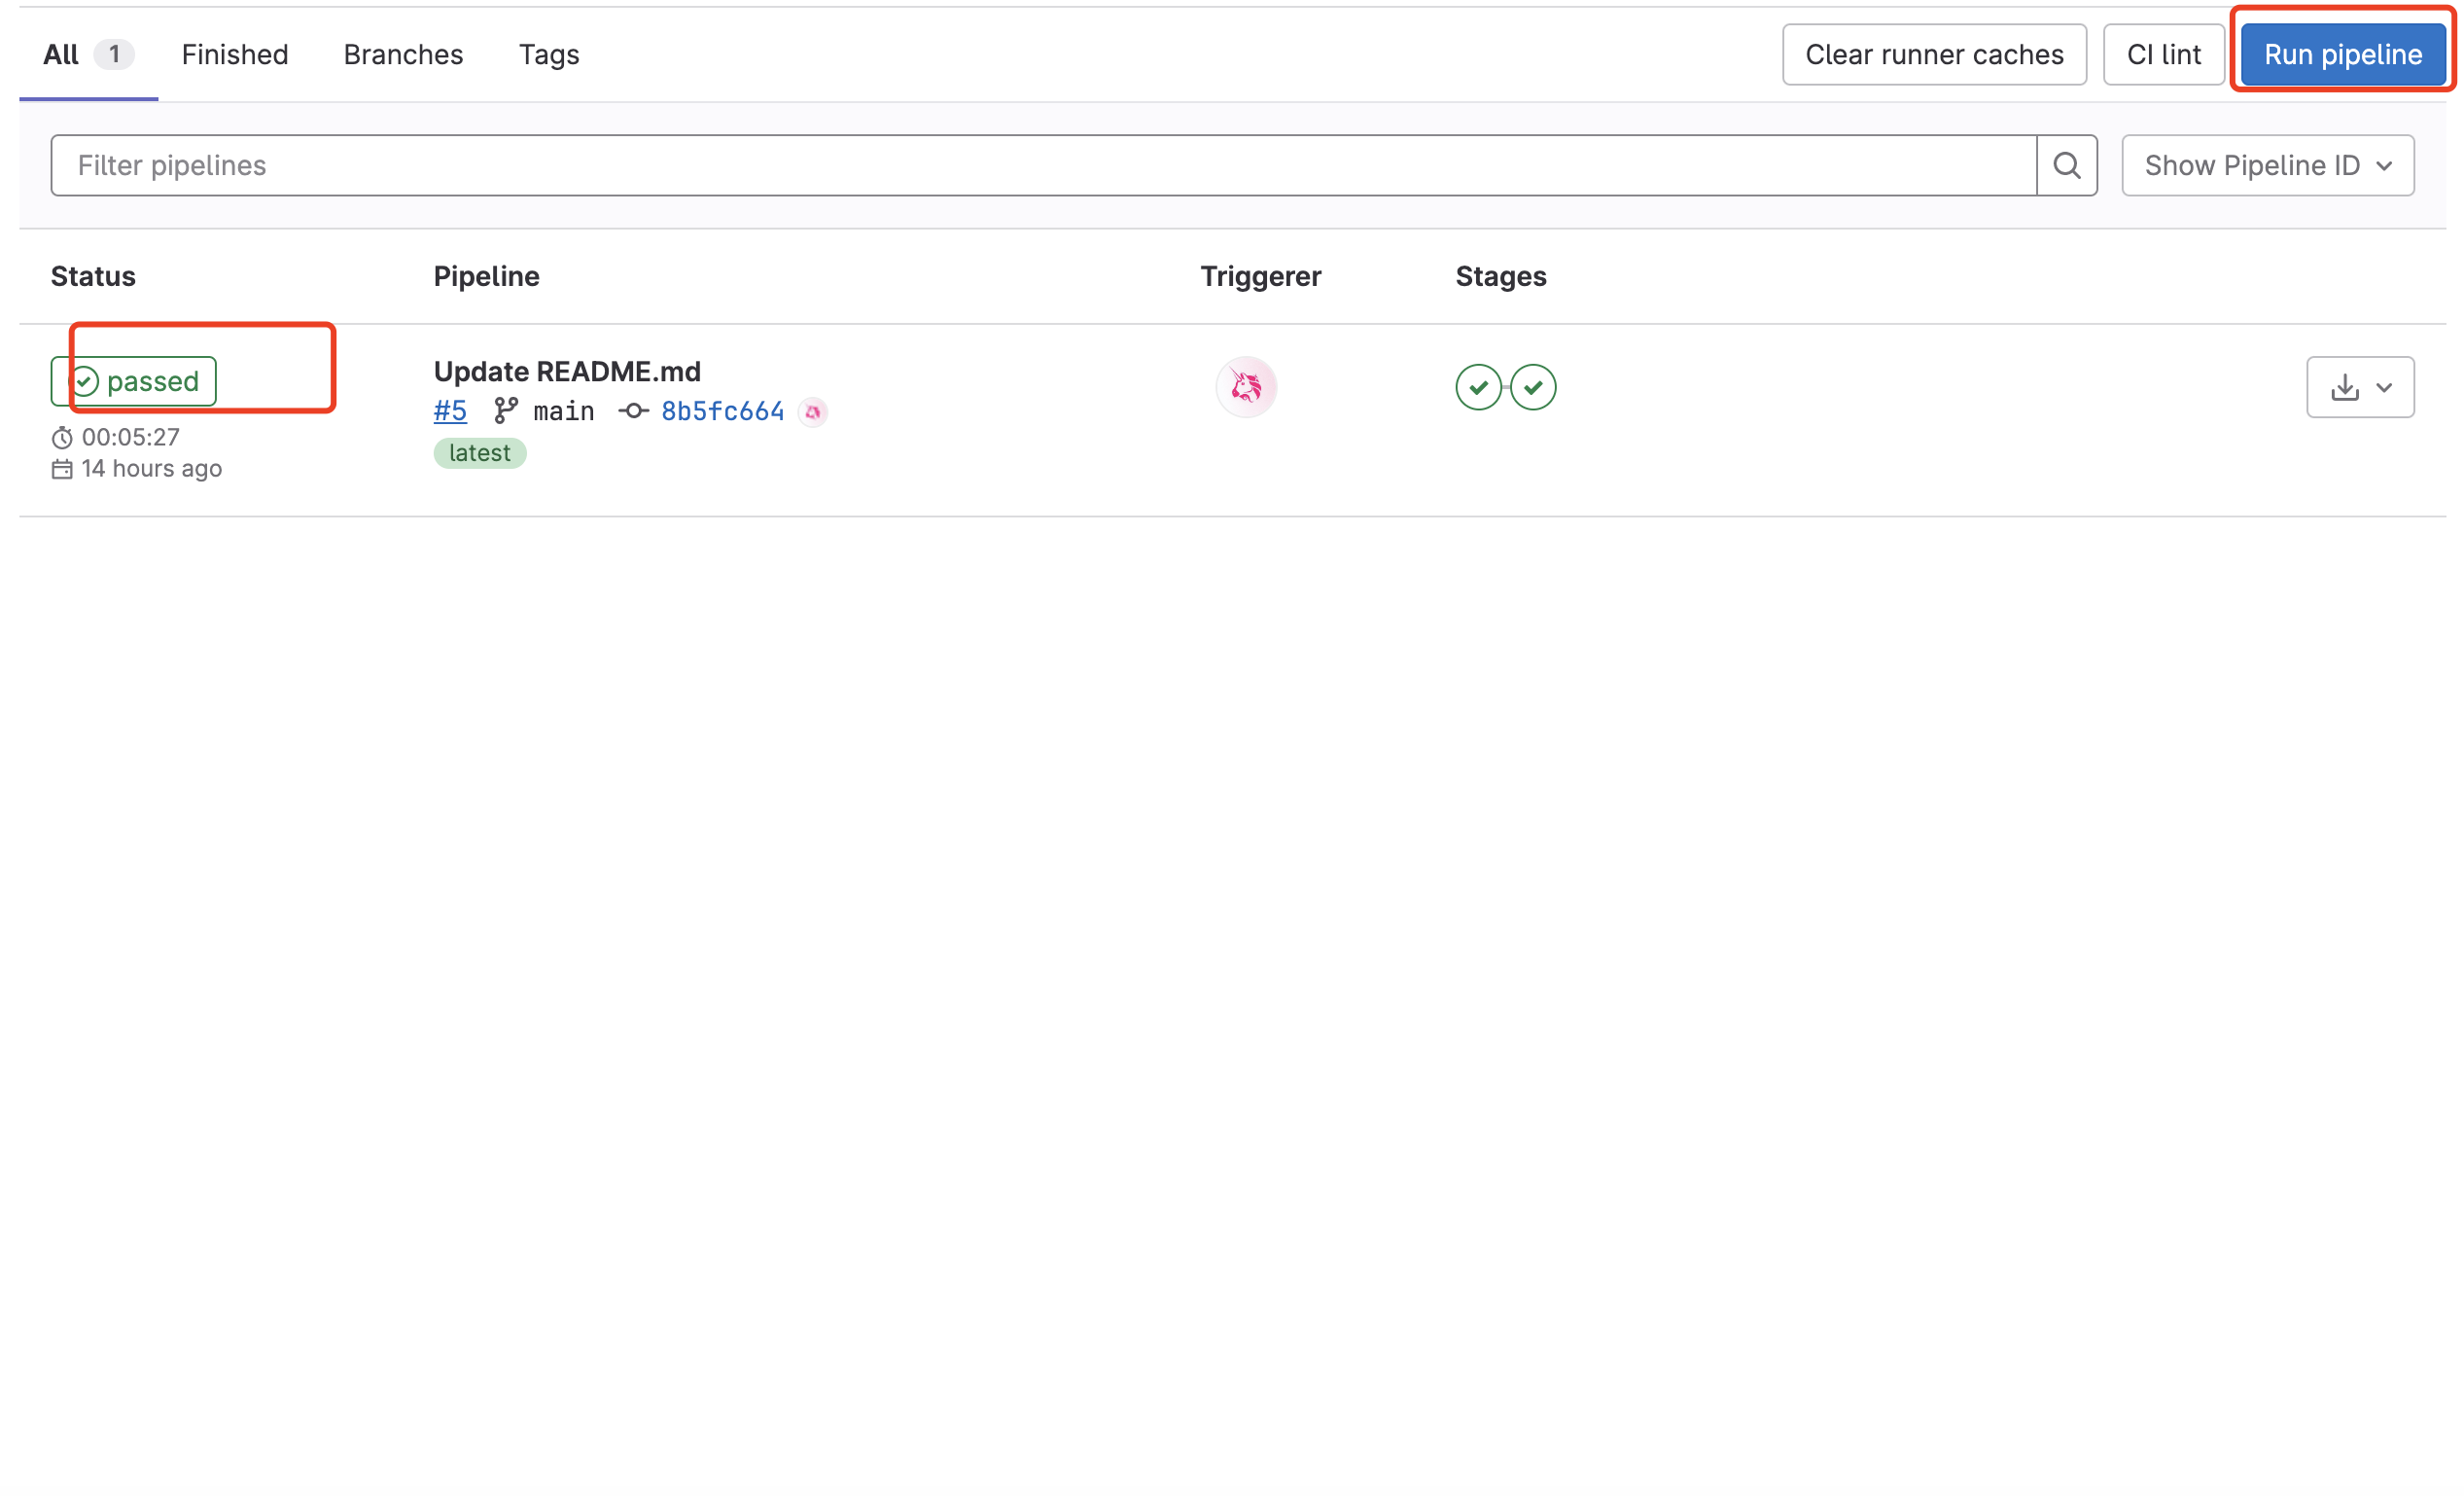
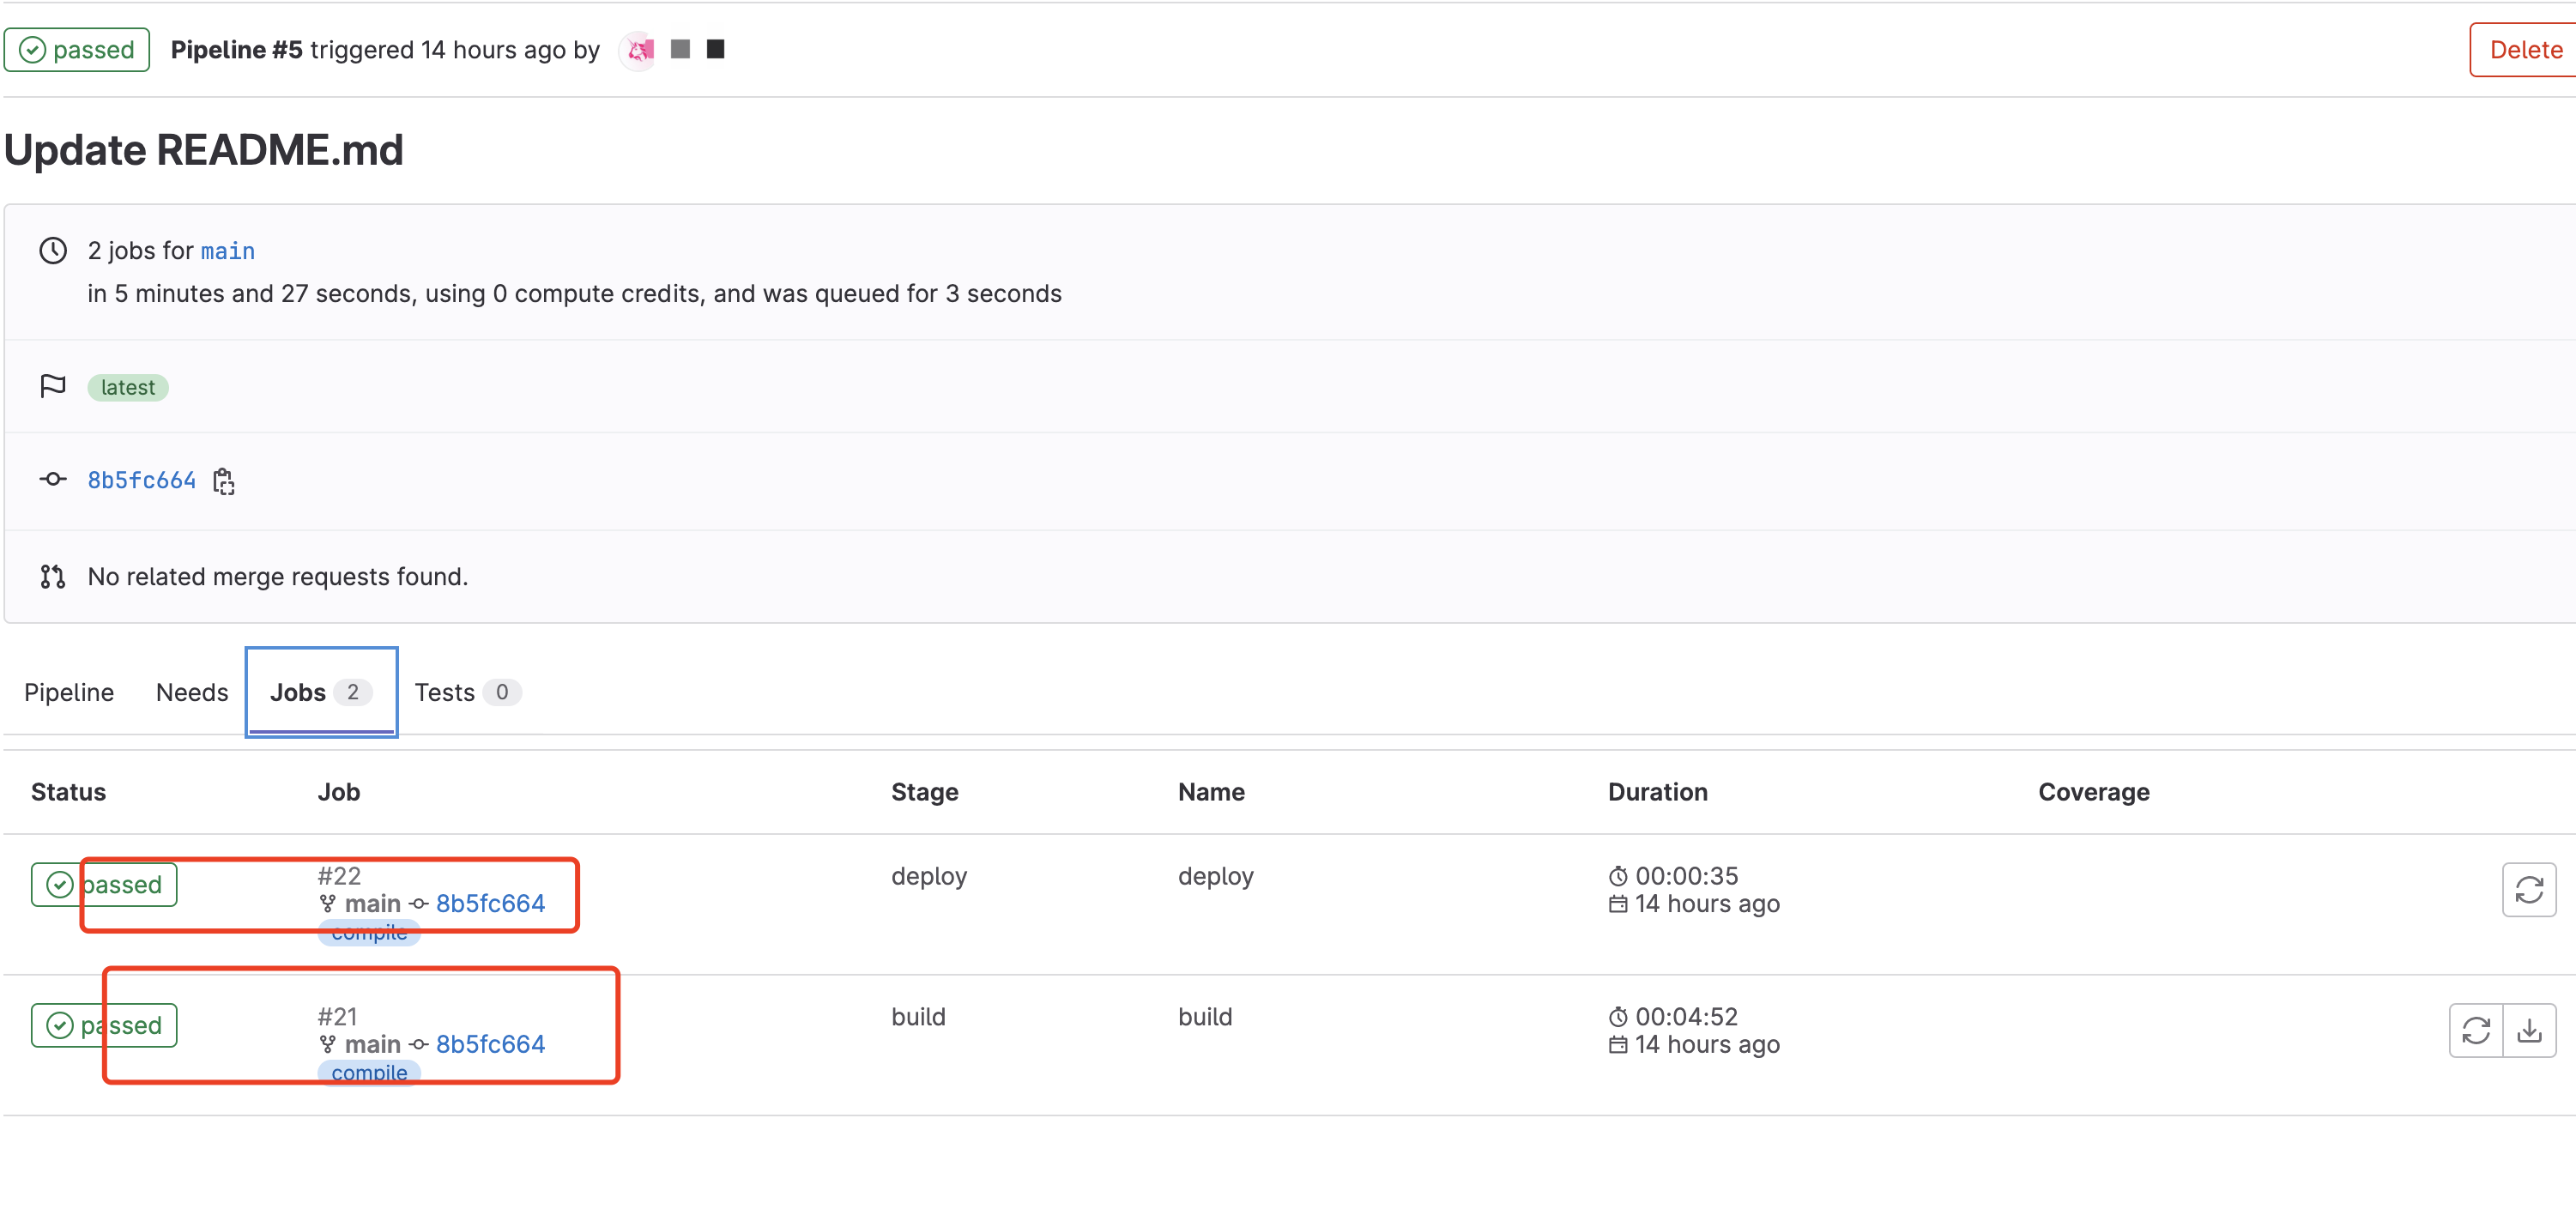
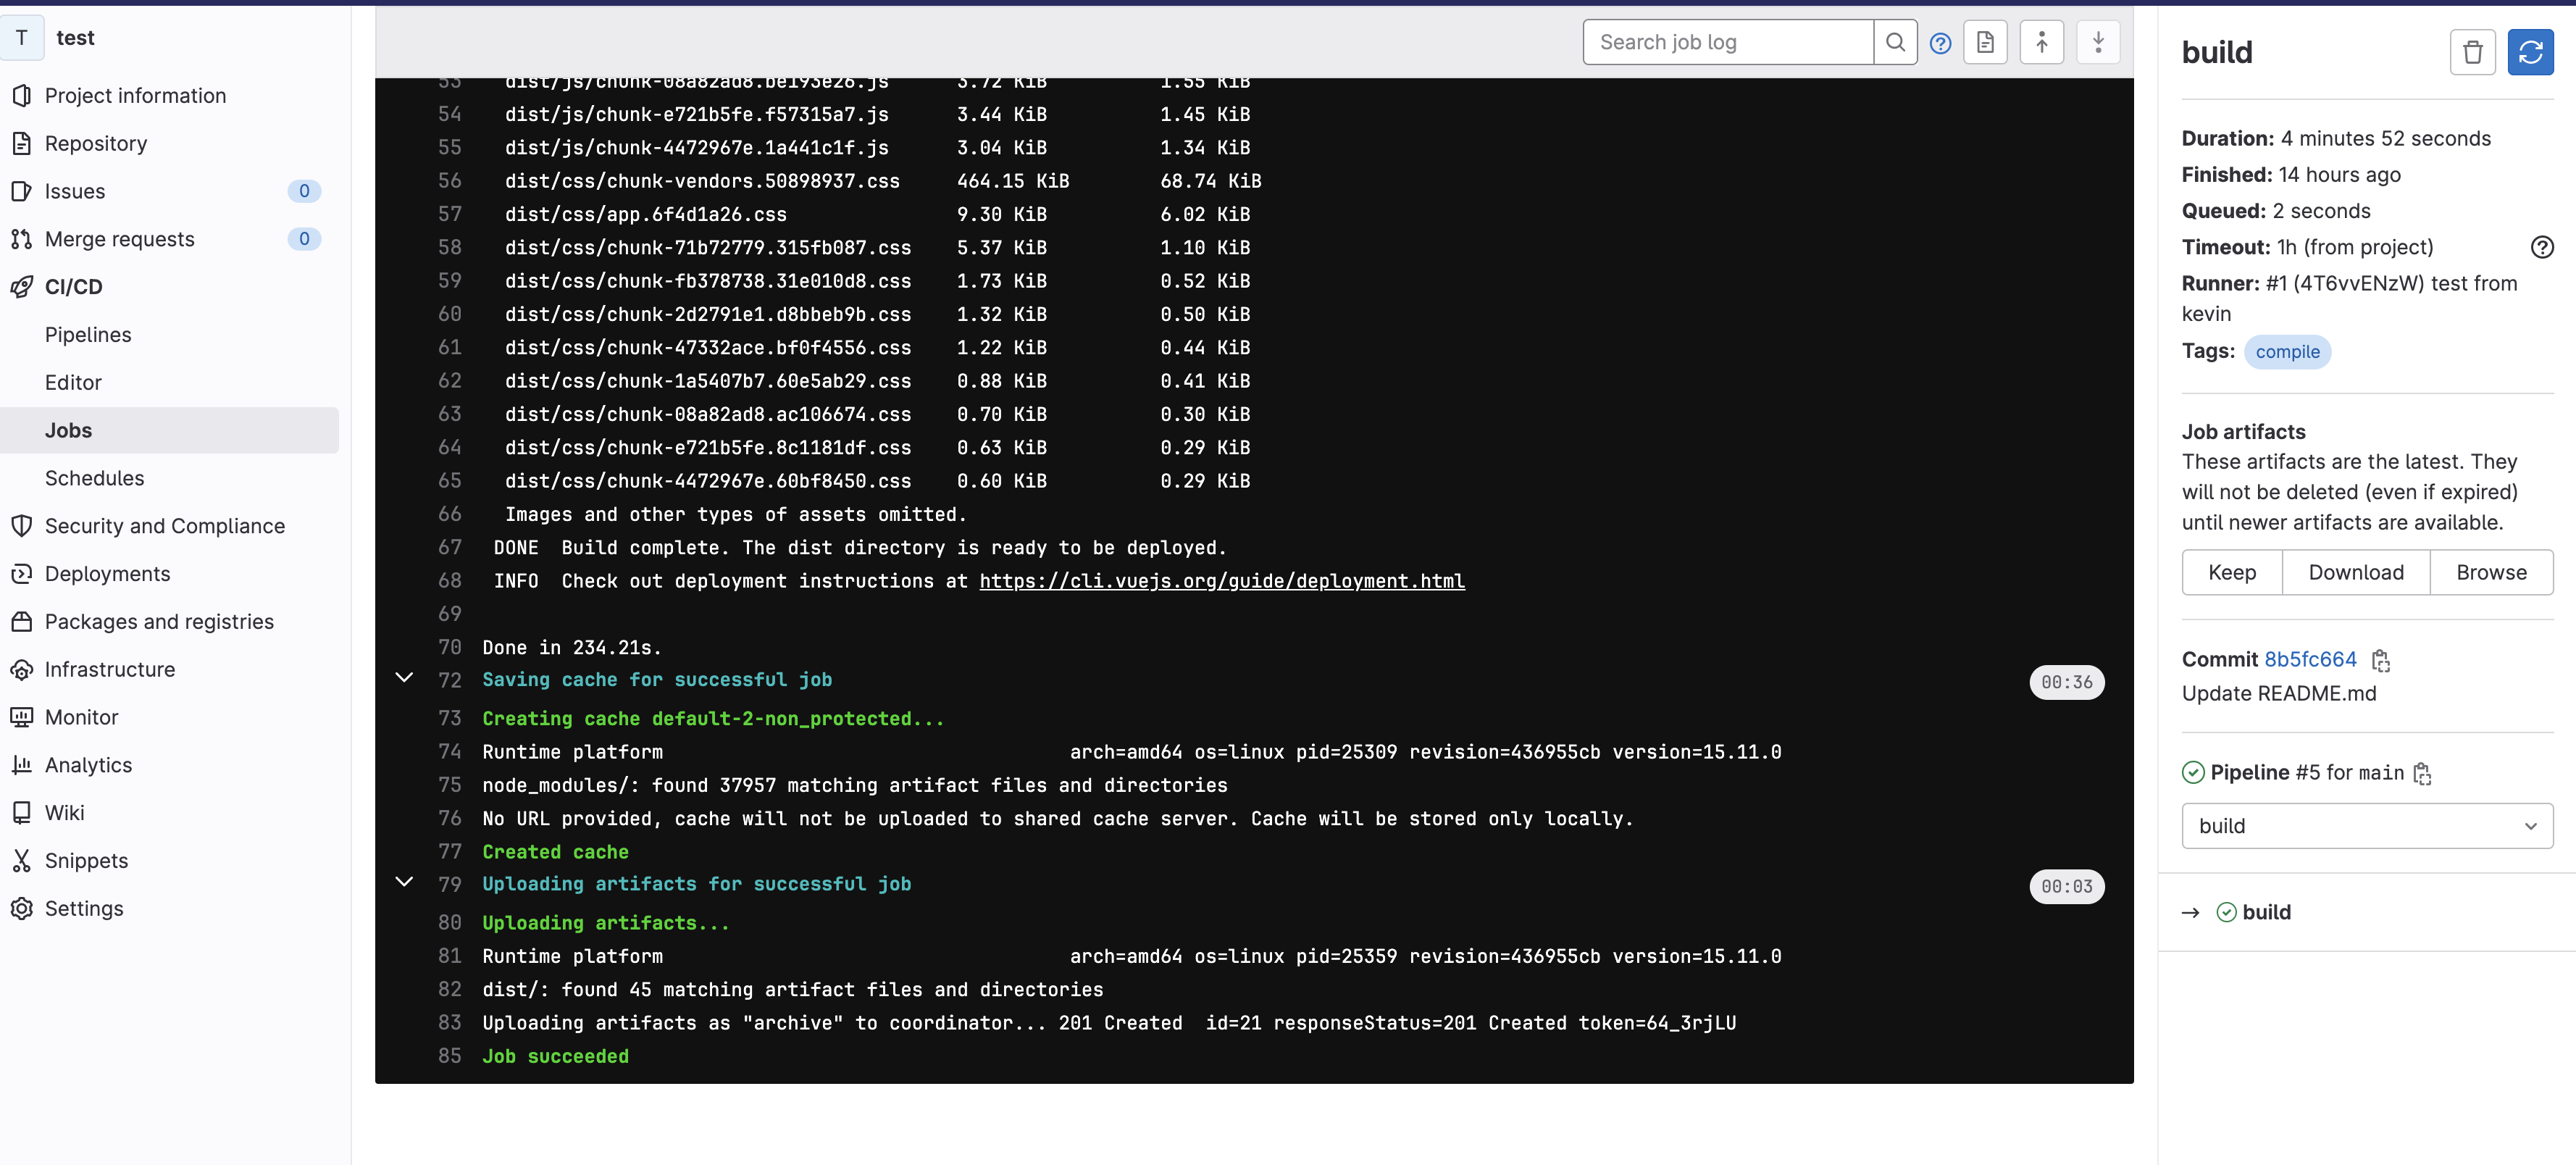
aws ec2 ami 制作
控制台可以制作 ami 但无法下载到本地
aws 账户个人中心 -> 安全凭证,创建
Access keys使用 aws 客户端制作镜像
初始化 aws
xxxxxxxxxxaws ec2 create-image --instance-id i-02c15e7f30162d565 --name "centos_ami_20230601" --description "centos ami 20230601"{ "ImageId": "ami-06e8ec0e3bd53ce40"}创建 s3 存储桶
xxxxxxxxxxaws s3api create-bucket --bucket centosami --region ap-southeast-1 --create-bucket-configuration LocationConstraint=ap-southeast-1{ "Location": "http://centosami.s3.amazonaws.com/"}上传镜像到存储桶
xxxxxxxxxx
[root@ip-172-31-46-112 ~]# aws ec2 create-store-image-task --image-id ami-06e8ec0e3bd53ce40 --bucket centosami{    "ObjectKey": "ami-06e8ec0e3bd53ce40.bin"}
从 s3 下载镜像
xxxxxxxxxxaws s3 cp s3://centosami/ami-06e8ec0e3bd53ce40.bin ./如果要将此镜像再次还原成 ami
xxxxxxxxxxaws ec2 create-restore-image-task --object-key ami-06e8ec0e3bd53ce40.bin --bucket centosami --name "migration-centos-ami"